Advertisement
If you have a new account but are having problems posting or verifying your account, please email us on hello@boards.ie for help. Thanks :)
Hello all! Please ensure that you are posting a new thread or question in the appropriate forum. The Feedback forum is overwhelmed with questions that are having to be moved elsewhere. If you need help to verify your account contact hello@boards.ie
Hi there,
There is an issue with role permissions that is being worked on at the moment.
If you are having trouble with access or permissions on regional forums please post here to get access: https://www.boards.ie/discussion/2058365403/you-do-not-have-permission-for-that#latest

A "before & after" thread?

  • 17-06-2009 8:06pm
    #1
    Registered Users, Registered Users 2 Posts: 2,967 ✭✭✭


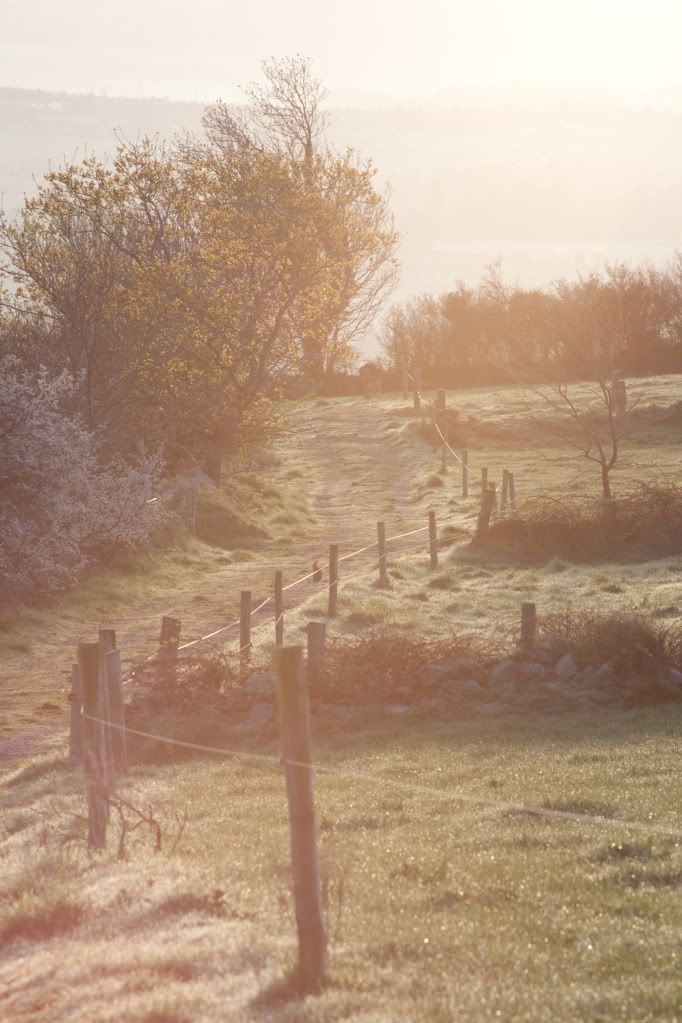
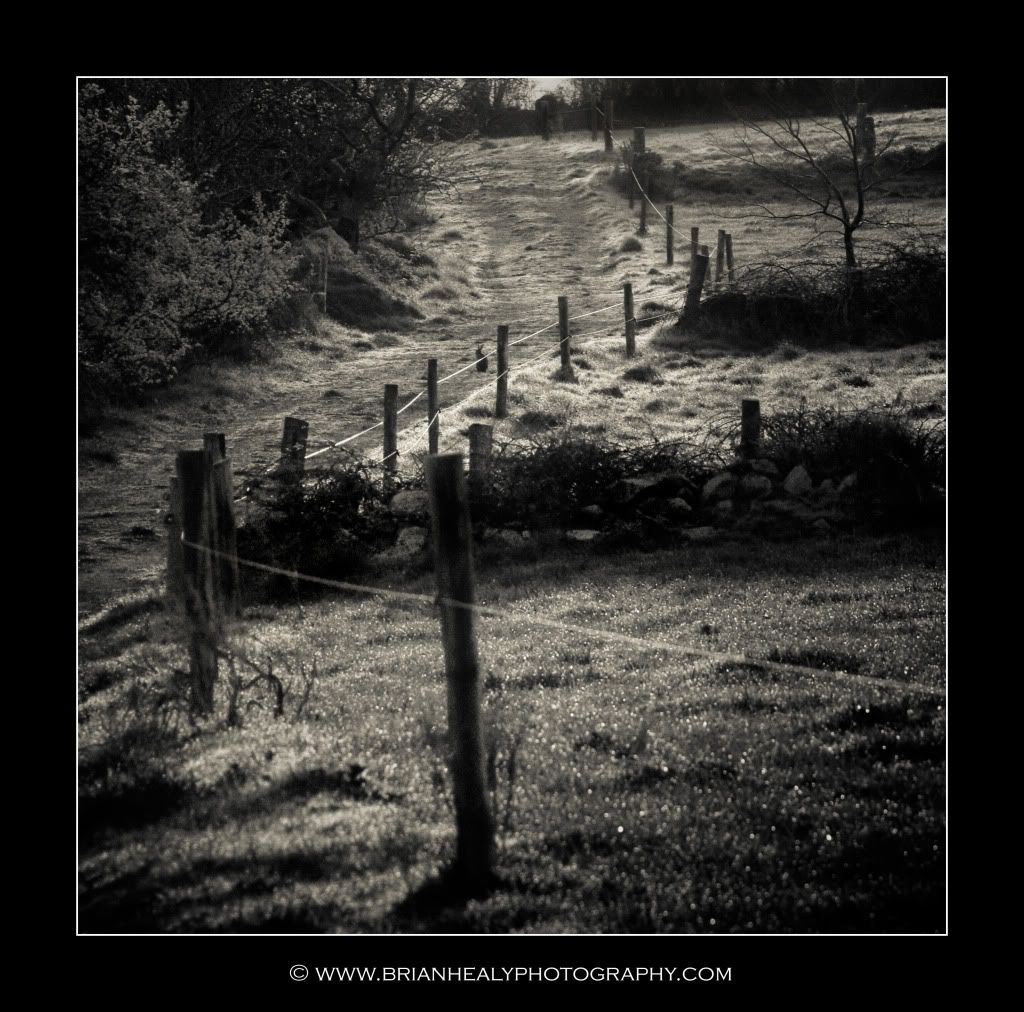
    I'd like to see what people have done to their shots to reach the "finished" image.

    Here's a recent example of mine, to show what I mean:

    Before:

    3635790849_e2859d1834_o.jpg

    After:

    3636162718_cb8d800c5c_o.jpg

    Detail: just cropped & added a frame, nothing else done.


    I'm hoping for some adjustment ideas, as I'm SOOOO green at PP :D

    (Oh, I think it should be fair to make suggestions if you feel it would help?)


«13456

Comments

  • Registered Users, Registered Users 2 Posts: 1,220 ✭✭✭Slidinginfinity


    This

    BE07FB98720443DF908E7C1536732A0C-800.jpg

    & This

    248403D16BD046A09406CFE3AB8D4872-800.jpg

    =

    64A1BA7F440B4916B5DD9A0122DA7572-800.jpg

    With a blending gradient filter & some cropping.


  • Registered Users, Registered Users 2 Posts: 5,718 ✭✭✭.Longshanks.


    From this img1983.jpg to this 3356211757_d80c235ec6.jpg


  • Moderators, Technology & Internet Moderators, Regional South East Moderators Posts: 28,517 Mod ✭✭✭✭Cabaal


    Longshanks100, thats some difference

    How did you take the shot itself?


  • Moderators, Education Moderators, Music Moderators Posts: 10,686 Mod ✭✭✭✭melekalikimaka


    the subject, with a pane of glass over it, amd focus on the drops of water


  • Registered Users, Registered Users 2 Posts: 5,718 ✭✭✭.Longshanks.


    the subject, with a pane of glass over it, amd focus on the drops of water

    Bingo!


  • Advertisement
  • Registered Users, Registered Users 2 Posts: 16,930 ✭✭✭✭challengemaster


    Wasn't my photo to begin with, but probably one of my better edits to date :D

    before
    7CDB8C36493840D8A8322F6FBDCDE176-800.jpg


    after
    D15902D13DAF499CB41D550A027A0574-800.jpg


  • Closed Accounts Posts: 2,131 ✭✭✭oshead


    I don't usually alter an image this much, but just couldn't help it on this occasion.. :pac:

    82984.jpg598C512461294BB2A1782651F8C52202-800.jpg


  • Registered Users, Registered Users 2 Posts: 2,967 ✭✭✭mrmac


    oshead wrote: »
    I don't usually alter an image this much, but just couldn't help it on this occasion.. :pac:

    WOW - that's some difference!
    Really makes the shot though, it's great.


  • Closed Accounts Posts: 4,763 ✭✭✭Fenster


    Some of my own:

    comp1_s.jpg

    comp2_s.jpg

    comp3_s.jpg

    comp4_s.jpg


  • Registered Users, Registered Users 2 Posts: 15,018 ✭✭✭✭Kintarō Hattori


    One of my favourites:


    imgp5656.th.jpg

    3457510260_9996b30b19.jpg


  • Advertisement
  • Registered Users, Registered Users 2 Posts: 889 ✭✭✭hi_im_fil


    This
    DSC_1143.jpg

    to this....
    fakerigcopycopy.jpg

    More for fun than anything else


  • Registered Users, Registered Users 2 Posts: 5,146 ✭✭✭Morrisseeee


    Oh, I've loads of these !!

    FA4B3B9D1B944B5C8637E0128F27F279-500.jpg

    28522222C4BD44EDAAB3933D12BE8ABA-500.jpg


  • Registered Users Posts: 1,826 ✭✭✭Anouilh


    Original, Straight Out of Camera

    attachment.php?attachmentid=83023&stc=1&d=1245318528


    Cropped and subjected to Harry's Filter in Irfanview

    attachment.php?attachmentid=83025&stc=1&d=1245318636


  • Banned (with Prison Access) Posts: 1,822 ✭✭✭Ballyman


    EF51C213C8DF469DA14BCB3541D6090C.jpg

    The first one has a contrast/vibrance increase and a little bit of luminance adjustment. I also cloned out stones and rocks on the beach and that was it.

    The second one has had it's background removed and another put in place. The horse is Brave Inca and I wanted a shot of him on his own without any other horses in the frame. He's old now and I knew he wasn't going to win so as soon as he passed this hurdle I took another shot of the hurdle on it's own so I could change it afterwards. He will probably never again be seen on a racecourse after this shot was taken.
    I won my largest amount of money ever on him the year he won the Champion Hurdle at Cheltenham! :)


  • Registered Users, Registered Users 2 Posts: 1,012 ✭✭✭njburke


    I'm beginning to see the benefits of PP from the above examples, Oshead how much time went into that shot of you daughter and the puddle?

    Heres one I'm pleased with, its a colour film scan from foleys chemist on meath street, cheap but the resolution and range is poor.
    (I can get exactly the same fuji service in naas, but foleys is 1/5th the price plus they posted it back to me, thanks again to Humberklog for the tip).

    I plan to put the neg into a better scanner.
    There wasn't much light and what light there was nowhere near daylight balance, so greyscale conversion followed by a crop, her indoors wants it on a canvas.

    Before>

    4EC42CD91FEF49259936D1780E30E855-500.jpg

    And after.
    A54A7BEFE7FC463F8C5288A444C1AFE8-500.jpg


  • Registered Users, Registered Users 2 Posts: 20,121 ✭✭✭✭cnocbui


    SGMstart.jpg

    Swirlygreenmoss.jpg


  • Registered Users, Registered Users 2 Posts: 2,967 ✭✭✭mrmac


    cnocbui - that's mad!

    It's giving me motion sickness, and hurting my eyes!

    I like it :D


  • Registered Users, Registered Users 2 Posts: 716 ✭✭✭squareballoon


    3482984934_1ba0ee5404.jpg?v=0
    A bit heavy handed on the sharpening though


  • Closed Accounts Posts: 22,565 ✭✭✭✭Tallon


    This is one of my Fav sites, it shows you the pic before and after

    MrMac, maybe you could stick it in the OP


    http://www.batailley.net/index.php


  • Registered Users, Registered Users 2 Posts: 1,009 ✭✭✭KarmaGarda


    I use gimp to post process, just because it's free. But I'm finding for my purposes it pretty much has everything I need.

    Image below is just cropped, applied 3 different blends of the same photo on top of itself to bring out the colours (think it's called a fake HDR), and added a border.

    Original:
    DSC_0696.jpg


    "Gimped"
    3633278619_ddb2525999.jpg


  • Advertisement
  • Registered Users, Registered Users 2 Posts: 10,263 ✭✭✭✭Borderfox


    Before
    ACC_0316.jpg

    After
    Finished.jpg


  • Registered Users, Registered Users 2 Posts: 2,967 ✭✭✭mrmac


    Borderfox - could you share what you did with your shot?
    Lovely result btw.


  • Registered Users, Registered Users 2 Posts: 10,263 ✭✭✭✭Borderfox


    5 shots 1ev apart and converted to HDR in photomatix, topaz dramatic preset and Nik Software Silvr EFx pro conversion to black and white. Curves medium contrast to finish off.


  • Registered Users, Registered Users 2 Posts: 211 ✭✭ronanphilip


    after
    4AAF1413E338459CBC1DEDF079554EC4-800.jpg

    before


  • Registered Users, Registered Users 2 Posts: 2,967 ✭✭✭mrmac


    Borderfox wrote: »
    5 shots 1ev apart and converted to HDR in photomatix, topaz dramatic preset and Nik Software Silvr EFx pro conversion to black and white. Curves medium contrast to finish off.

    Thanks - appreciate the inside info - very dramatic result.


  • Closed Accounts Posts: 2,131 ✭✭✭oshead


    njburke wrote: »
    I'm beginning to see the benefits of PP from the above examples, Oshead how much time went into that shot of you daughter and the puddle?

    Don't know really. I was just practing with my new wacom tablet and eventually went overboard in the end. I guess "Time" didn't come into it. Probably took ages though. ;)

    Dave OS


  • Registered Users, Registered Users 2 Posts: 5,966 ✭✭✭GhostInTheRuins


    My most recent 'fix'. I probably should have put a tiny bit of effort into getting the exposure and angle right to begin with :pac:

    83213.jpg83214.jpg


  • Registered Users Posts: 353 ✭✭simonp1


    Here is my best and all thanks to the folks on here :)

    Before
    3386239982_7e3383898a_b.jpg

    After
    3387335016_41e78aae9e_b.jpg


  • Registered Users, Registered Users 2 Posts: 2,967 ✭✭✭mrmac


    Very interesting posts here, with fantastic end results. It shows how well images can be "saved".

    If I could ask folks to give a brief summary of what they did to their images - I'd really appreciate the pointers.


  • Advertisement
  • Registered Users, Registered Users 2 Posts: 6,393 ✭✭✭AnCatDubh


    83232.jpg

    Shot indoors with a 50mm at f1.7, handheld and at ISO 3200 which meant the noise was high to begin with. Lighting was obviously brutal (Infact why I took it I don't know - how and ever). Manual adjustment of the white balance (big adjustment to the left). Went for some noise reduction whilst pushing the exposure bias by +3 - this softened somewhat from what was harsh noise but left it with ample grit to be reasonably aesthetic. Went for the monochrome conversion that Silkypix (pp software) gives me and finally a little unsharp which given the overall poor sharpness actually increased the 'gritty' nature of it.

    That's the gist of it.


  • Closed Accounts Posts: 2,194 ✭✭✭Trojan911


    A couple more.

    Original:

    2944821848_bf52f5577d.jpg

    Finished:

    3646496793_08857a281d.jpg

    Original:

    3418960945_008cf62bca.jpg

    Finished:

    3419756724_3b055a3388.jpg


  • Registered Users, Registered Users 2 Posts: 1,228 ✭✭✭honerbright


    Some gorgeous photos in this thread!!

    One of the boats that was down at the docks during the Volvo race;

    Before:
    27927037.jpg

    After:
    45776553.jpg

    Just cloned the sky to get rid of the buildings and fiddled with the levels and contrast.


  • Registered Users, Registered Users 2 Posts: 1,009 ✭✭✭KarmaGarda


    Just to reply to Mrmac:

    If you use gimp what I did to bring out the colours, i.e. what I call a fake HDR, is just:
    • Auto white balanced the image. Sometimes auto white balance doesn't work so you'll have to manually correct the levels youself to get the image at the correct "brightness".
    • Make 2 layers that are a copy of the original.
    • On first layer I
      • desaturated
      • inverted
      • added a glow
      • Set layer blend to "soft light"
      • opacity to 50%
    • On second layer I
      • increased the input dark levels to 100 (basically concentrates the darks/shadows)
      • Then set layer opacity to 30/40%
    • Flattened the image
    • Did some final levels adjustments.

    It's quite handy if you can't do a real HDR on it.


  • Registered Users, Registered Users 2 Posts: 762 ✭✭✭Buzz Lightyear


    5FE252327BC84B318B6749966AE3A002-800.jpg


    This was one taken for the Kilmainham Gaol project for the Dublin Camera Club. Its the 1916 wing of the jail.

    I've obviously croped the image, however five images were taken with the difference in between each shot of about 1ev. The images were then tone maped in Photomatix, before being brought back into light room and converted to monochrome. Some dodging and burning was done to clean up the image.


  • Registered Users, Registered Users 2 Posts: 8,161 ✭✭✭dinneenp


    This photoblog is a very good example of before and after. Hover over the bar above the image to see the before shot. It's Alan Rossiter Photography (not mine)


  • Advertisement
  • Closed Accounts Posts: 28 Silently loud


    4673_89356844471_758669471_1900464_5001386_n.jpg


    After:

    4673_89684784471_758669471_1904795_6117334_n.jpg

    Not the best but thought i'd put it up. Selt thought and just getting in to the whole photography thing would like to get some feed back. :)


  • Registered Users, Registered Users 2 Posts: 1,228 ✭✭✭honerbright


    Never really edited my photos after taking them before (other that a quick sharpen or contrast adjustment) but this thread and the sites linking off them are fantastic and really inspiring, so i've been messing around a lot more in photoshop :P

    Anyhow, this is an old shot back from when I lived in New Zealand.
    Photo was cropped, cloned out the birds and ducks and played with the levels and colours a bit.

    Before:
    3651816361_e63d36dd1b.jpg

    After:
    3652608956_a9f288e244_o.jpg


  • Registered Users, Registered Users 2 Posts: 842 ✭✭✭daycent


    Before
    IMG_6740.jpg

    After
    20090420-IMG_6740-updated.jpg

    I thought this shot was ruined because of the lens flare but I like how it turned out. I converted to B&W in Lightroom and did some more dodging/burning in PS and some other adjustments.


  • Registered Users, Registered Users 2 Posts: 8,161 ✭✭✭dinneenp


    Not so much a before and after, rather combining two together to make a poster:
    3403568083_8c4b73bf18.jpg


  • Registered Users, Registered Users 2 Posts: 3,057 ✭✭✭kjt


    Brilliant thread guys. I love seeing what people can do to images and how they achieve their end result! Great shot above Phil, really like it!!

    b_a_2.jpg
    HDR of 4 different exposures
    + Increased contrast in photoshop


    8.jpg
    I've done a whole tutorial for this image.


    b_a_1.jpg
    -Sharpening of the eyes
    -Curves to brighten the image
    -Cross process
    -Another brighten curves layer, selecting only the eyes

    b_a_3.jpg
    6 different exposures taken
    3 different hdr images where then made from those 6
    In Photoshop:
    Adjustment layer: Increased contrast 70% opacity + layermask for sky
    Adjustment layer: Brighten 49% opacity + layermask for road
    ->Adjustment layer for the above layer: Lighten @ 40% opacity
    Adjustment layer: Linear Contrast 20% opacity + layermask for sun
    Adjustment layer: Darken 40% opacity + layermask for the sides
    Adjustment layer: Lighen 50% opacity + layermask selective areas


  • Advertisement
  • Closed Accounts Posts: 279 ✭✭TheNorthBank


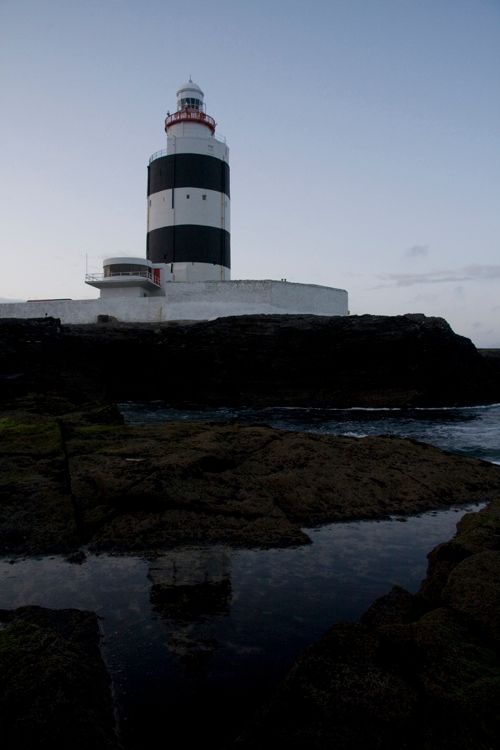
    Straight From Camera:

    Hook-straightfromthecamera.jpg

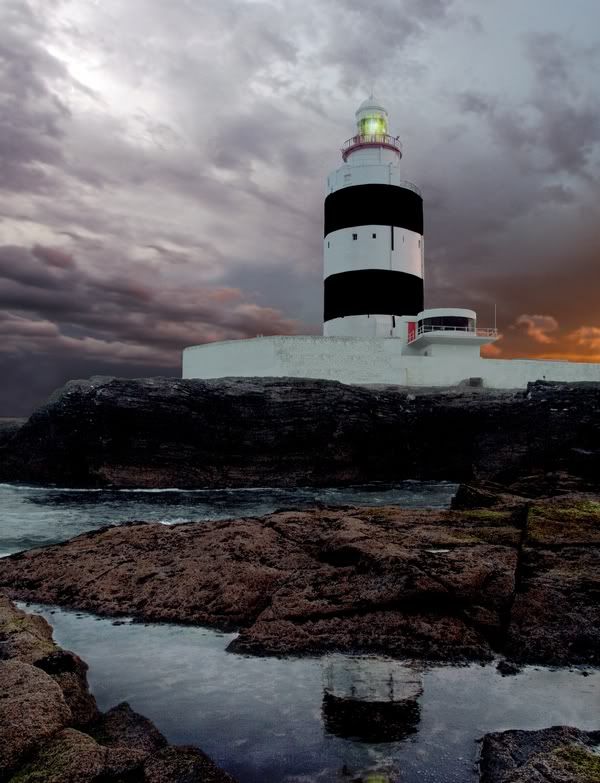
    After Photoshop:

    LighthouseReflection.jpg

    Added a new sky, turned the light in the Lighthouse on, flipped the image so Lighthouse is now on the right as you look at it, cloned out some pipes that were running downthe side of the lighthouse and some various contrast adjustments. Thats all I think!


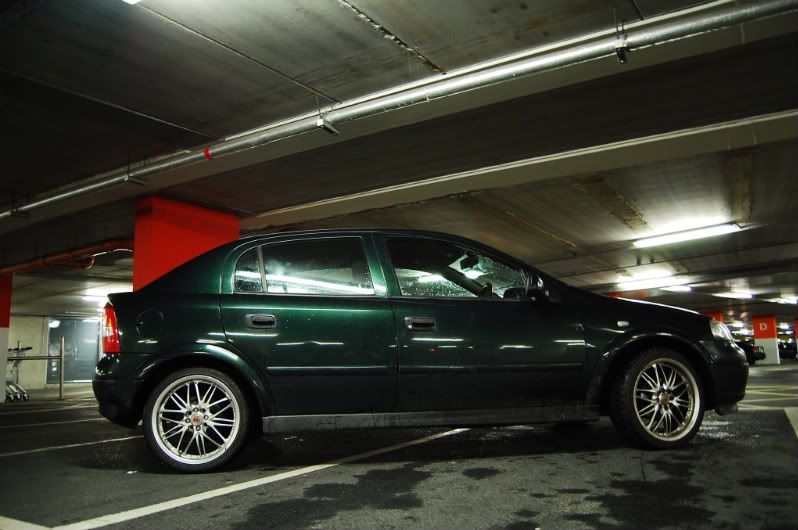
  • Registered Users, Registered Users 2 Posts: 5,718 ✭✭✭.Longshanks.


    From the motors assignment thread;

    3504873265_748054302d.jpg

    I used a Canon 1000D with the kit lens set at 18mm (as wide as it will go) and in Aperture mode at f9.0. Took three pics using a different exposure in each; -1, 0 & +1. This is the second exposure (i.e. at 0)
    83509378.jpg

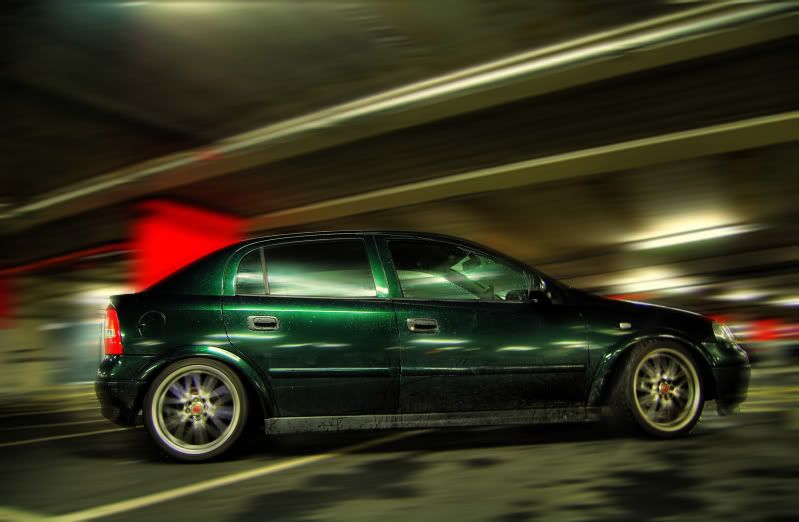
    I then created a HDR jpeg using photomatrix software. Just played around with sliders until i was happy with it. As the car wasn't clean i was hoping for a dark / moody kinda look.

    After that i copied the outline of the car into a new layer and blurred the background (done ground and sky separately) to try and give effect car was moving. After that I then played around with the wheels using radial blur to make them look like they were moving also.

    Then I gave the windows a light darkening tint (to hide fact that nobody was driving :)) but didn't wanna go dark as looked sh1te. Lastly done a high pass filter to sharpen the pic. Imaged flattened, cropped, framed and posted on flickr!


  • Registered Users, Registered Users 2 Posts: 5,718 ✭✭✭.Longshanks.


    One more from me, but this time no write up (yet anyways) as its almost bedtime :o

    Before
    img3324w.jpg

    After
    3543199215_484b231805.jpg


  • Closed Accounts Posts: 279 ✭✭TheNorthBank


    Brilliant processing Longshanks, very impressive. The first one particularly, making a still object look like its tearing up the road. 10 out of 10 dude!!!


  • Registered Users, Registered Users 2 Posts: 1,228 ✭✭✭honerbright


    Finally decided to explore the scary world of HDR :D
    Only had two RAW files of my computer and one of which is mad noisy so I only had this one to mess with, but I think it turned out OK.

    Before:
    3672530385_f72ab6f029.jpg


    After:
    3672094159_94958ded91.jpg


  • Registered Users, Registered Users 2 Posts: 5,966 ✭✭✭GhostInTheRuins


    From the motors assignment thread;

    I used a Canon 1000D with the kit lens set at 18mm (as wide as it will go) and in Aperture mode at f9.0. Took three pics using a different exposure in each; -1, 0 & +1. This is the second exposure (i.e. at 0)

    I then created a HDR jpeg using photomatrix software. Just played around with sliders until i was happy with it. As the car wasn't clean i was hoping for a dark / moody kinda look.

    After that i copied the outline of the car into a new layer and blurred the background (done ground and sky separately) to try and give effect car was moving. After that I then played around with the wheels using radial blur to make them look like they were moving also.

    Then I gave the windows a light darkening tint (to hide fact that nobody was driving :)) but didn't wanna go dark as looked sh1te. Lastly done a high pass filter to sharpen the pic. Imaged flattened, cropped, framed and posted on flickr!

    Yep nice job, but were the three exposures really necessary there? To me it looks like the '0' exposure has enough range to get the same effect.


  • Registered Users, Registered Users 2 Posts: 5,718 ✭✭✭.Longshanks.


    Yep nice job, but were the three exposures really necessary there? To me it looks like the '0' exposure has enough range to get the same effect.

    Perhaps, but that picture was shot on jpeg and was before I discovered the joys of raw. I also didn't want to over cook the tone mapping....
    Works for me!


  • Registered Users Posts: 1,826 ✭✭✭Anouilh


    Guided by some comments from members here on this photo

    [IMG][/img]http://farm4.static.flickr.com/3555/3370557679_c7cf4ef3e0.jpg3370557679_c7cf4ef3e0.jpg

    I tried a colour change


    [IMG][/img]http://farm3.static.flickr.com/2439/3676096000_8c90f7aa72.jpg3676096000_8c90f7aa72.jpg


    It would be interesting to know if the posters find it an improvement.


  • Closed Accounts Posts: 279 ✭✭TheNorthBank


    I love the red one, it looks like your standing right in the middle of an erupting volcano!


  • Registered Users, Registered Users 2 Posts: 5,718 ✭✭✭.Longshanks.


    Before
    originalwfd.jpg

    After
    3675930849_98b5334b8d.jpg

    From the random photo thread;
    Ricky91t wrote: »
    Was this a stationary shot,The photoshopped?

    Sorry for asking i'd just like to know,Either way it's great,If it is what i say,It's some excellent work!
    keps wrote: »
    That car pic is a truly incredible shot- you can sense the speed as if you were in the car (especially in the larger shot).
    Top class indeed and well done on a really great image! ( I've sent a PM to you to ask a question)

    Twice I have tried to quote Longshanks post - but it did not work for me.
    Thanks people! I love to say i have access to a rig, but its all photoshop using the radial blur tool


  • Advertisement
Advertisement