Advertisement
If you have a new account but are having problems posting or verifying your account, please email us on hello@boards.ie for help. Thanks :)
Hello all! Please ensure that you are posting a new thread or question in the appropriate forum. The Feedback forum is overwhelmed with questions that are having to be moved elsewhere. If you need help to verify your account contact hello@boards.ie
Please note that it is not permitted to have referral links posted in your signature. Keep these links contained in the appropriate forum. Thank you.

https://www.boards.ie/discussion/2055940817/signature-rules
Hi all! We have been experiencing an issue on site where threads have been missing the latest postings. The platform host Vanilla are working on this issue. A workaround that has been used by some is to navigate back from 1 to 10+ pages to re-sync the thread and this will then show the latest posts. Thanks, Mike.
Hi there,
There is an issue with role permissions that is being worked on at the moment.
If you are having trouble with access or permissions on regional forums please post here to get access: https://www.boards.ie/discussion/2058365403/you-do-not-have-permission-for-that#latest

Preparation before painting over scratches

  • 01-01-2010 1:05pm
    #1
    Registered Users, Registered Users 2 Posts: 9,969 ✭✭✭


    I have a few scratches on my bumper and one big one on the drivers door casued by some ejit who did a hit and run. I would rather paint over the scratch then get them repaired due to tight funds, thus I got a small bottle of colour coded paint in the auto shop yesterday. What preparation should I carry out before painting over the scratches. Obviously the surface would need to be dry first. I presume I don't sand over the scratches first becasue it will ruin the door paint. Any advice would be appreciated


Comments

  • Registered Users, Registered Users 2 Posts: 10,992 ✭✭✭✭partyatmygaff


    I've done this before, its not too difficult but you need a lot of patience if you want a good finish that will last. Spray painting it straight away is not a good idea.

    From what you just said, I think the scratches are fairly deep. In that case you need to buy some filler from any shop that sells things for cars like halfords. You also need to buy some sandpaper, some medium grade and some fine grade for finishing. If you have a lot of scratches you could get some grey coloured spray primer but thats optional, I didn't use it and it turned out alright.

    Basically what you need is
    • Can of Body colour paint
    • Filler (You only need a tiny bit so get a small amount)
    • Can of primer (Optional)
    • Can of Clear coat
    • Medium Sandpaper and Fine Sandpaper
    • A lot of patience and some masking tape

    Ok Now here is what you do

    1. Find the scratches and wash the area thoroughly with soap and water and dry.

    2. Put masking tape and some newspaper around the scratch. Unless your very good with spray paint, you should put some newspaper all around the area thats going to be painted or your door will look like a mess.

    3. Now that its masked off you should only be able to see the scratch on the door and maybe about 1cm in any direction from the scratch.

    4. Take your medium sandpaper and start slowly sanding the area making sure not to damage the masking tape. Keep sanding until the paint in the area is roughed up or almost gone. DO NOT GO DOWN TO THE BARE METAL!!! If you do then you will HAVE to use primer or your door will rust.
    Wetting the sandpaper makes it much easier to sand but make sure to dry the area afterwards and remove any dust etc.

    5. With the area now sanded take the filler and using a spatula (It should come with the filler) put a small bit of filler all along the scratch and begin to smoothen it out with the spatula. Don't use a lot of filler or you will be sanding it down for hours. When you have the scratch completely filled, wait at LEAST 30 mins for it to completely dry if not 1 - 2 hours. It has to be completely dry before going on to the next step.

    6. With your medium sandpaper start filing the filler down (If its flaking or feels slightly soft then it is still not dry). Continue filing the filler down until it feels level with the rest of the area. When it feels level, wet a piece of fine sandpaper and start sanding. This is single handedly the most important step to a good finish. It took me 1 hour to get the filler looking perfectly smooth. The filler shouldn't have any little lines running through it or craters in it. It should look completely smooth like the rest of the door and when you run a finger over it you should not feel anything on the line between the filler and the rest of the door.

    7. Now its time to paint. Make sure the masking tape and newspapers are intact and get your can of body paint. If you have a piece of wood or even paper nearby try practicing with the can for a second to see how the paint spreads. Stay atleast 15cm away from the car and make a SINGLE pass from left to right over the area being painted making to sure to move your hand at a steady speed. Don't be afraid to paint the newspaper :D
    Now wait for that to be touch dry. Repeat this about 3 - 4 times. Now that you're nearly done don't rush the last two steps.


    After the last coat of paint is completely dry which takes about 2-4 hours depending on the type of paint...

    8. With a bit of wet fine sandpaper gently sand the area until its matte and not glossy. Don't overdo the sanding, stop when it when stops looking glossy. Then wipe the area to get rid of any dust.

    9. Take off all the masking tape and newspaper and get your can of clear coat and spray over the area that you just painted. Do a few light coats. Maybe 3 at the very most. Don't worry if you get the clear coat on the rest of the door.

    10. Take photos and admire your work :pac:

    Its not difficult at all, its just very time consuming. Don't forget to take before and after pics :D


  • Registered Users, Registered Users 2 Posts: 659 ✭✭✭The-Game


    I've done this before, its not too difficult but you need a lot of patience if you want a good finish that will last.

    Its not difficult at all, its just very time consuming. Don't forget to take before and after pics :D

    Good informative post! Have you any before and after pics from your one?


  • Registered Users, Registered Users 2 Posts: 10,992 ✭✭✭✭partyatmygaff


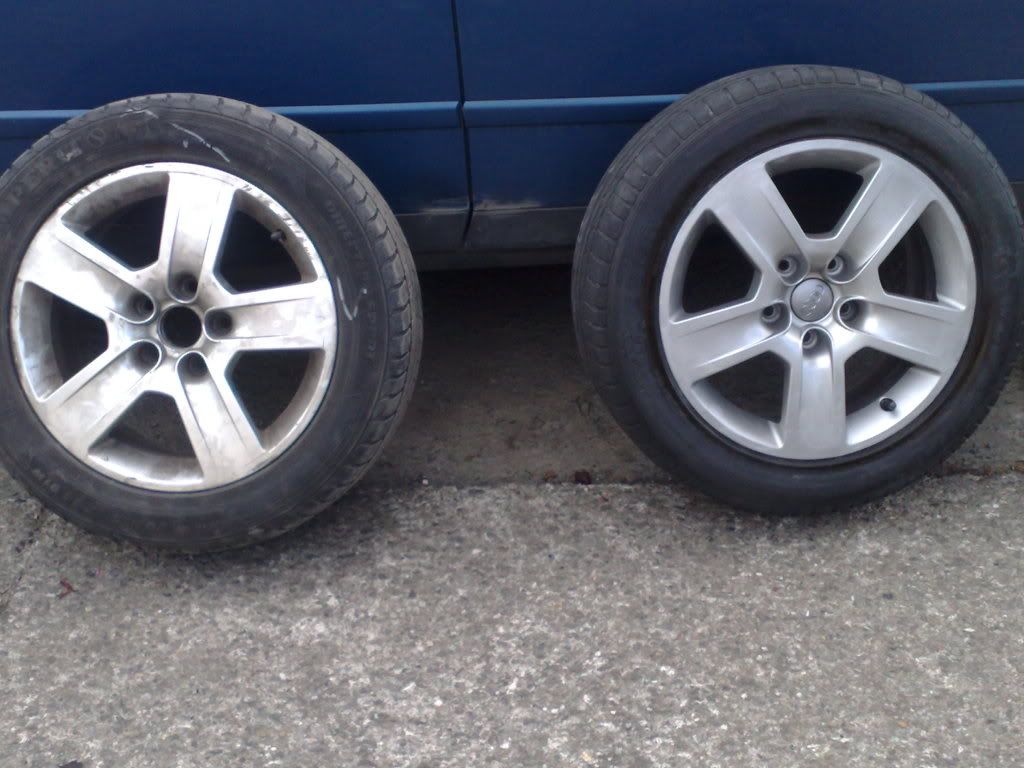
    Well not of the body scratches unfortunately. But I fixed some badly kerbed alloys for the same car and I have it all here. The steps are mostly the same but you have a lot more freedom when fixing alloys. The gouges were so deep I had to grind them before filling it, that obviously can't be done on a door. Anyways here is before and after (Kinda anyways). The one on the left is the spare wheel which was rarely used, the other 4 wheels were almost absolutely destroyed with gouges and kerbing. The one on the right was the wheel I just painted.


    09052009326.jpg


  • Registered Users, Registered Users 2 Posts: 659 ✭✭✭The-Game


    Great job on the alloys, had to do the same myself on alloys badly damaged, ended up sanding down and grinding back before going at it!


Advertisement