Advertisement
If you have a new account but are having problems posting or verifying your account, please email us on hello@boards.ie for help. Thanks :)
Hello all! Please ensure that you are posting a new thread or question in the appropriate forum. The Feedback forum is overwhelmed with questions that are having to be moved elsewhere. If you need help to verify your account contact hello@boards.ie
Hi there,
There is an issue with role permissions that is being worked on at the moment.
If you are having trouble with access or permissions on regional forums please post here to get access: https://www.boards.ie/discussion/2058365403/you-do-not-have-permission-for-that#latest

A restoration tale (with pics)

17810121317

Comments

  • Registered Users, Registered Users 2 Posts: 3,429 ✭✭✭dnme


    Christ, it could be a while before I get neaer that boat again. I went to Lidl (Carrick) yesterday to pick up one of their gazebo's, sold out! Went on cross country to Roscommon, sold out! It's not meant to be!


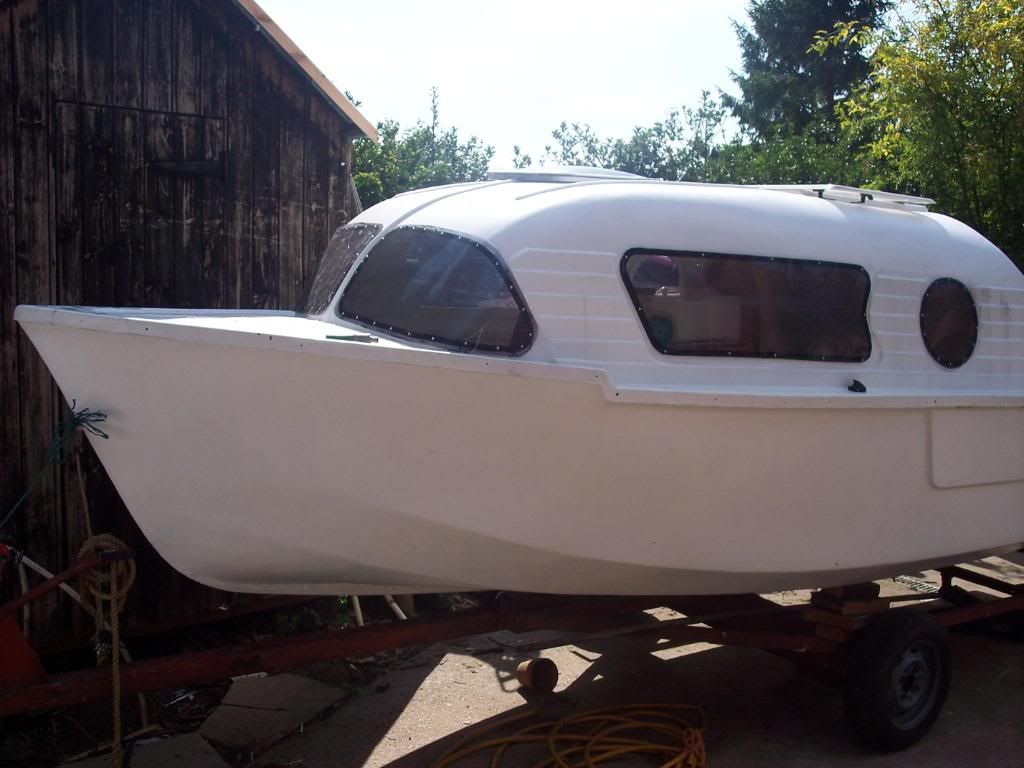
    Ladies and gentlemen, I give you . . . . . Summer 2011

    170881.jpg


  • Moderators, Motoring & Transport Moderators, Sports Moderators Posts: 6,346 Mod ✭✭✭✭fergal.b


    I did up a boat in a pvc tunnel, a local farmer had one that the plastic had ripped off and was not been used so I asked him for a lone of a few poles off it, with 4 poles I was able to cover a 23 foot boat it was also well able to stand up to the wind where as I think it would be a nightmare with one of those tents.
    Might be worth your while having a look around. This is the type I mean.

    CR%20PVC%20Hoop%20House%20Endwall%20Bear%20Creek%20Farm%20Osceola%20MO%2012_01%20TC.jpg


  • Closed Accounts Posts: 8 Fanintheattic


    Aazing stuff just read it from start to finish sorry present. Keep up the good work I would love to do somethng like this myself.Well done you. I,m a carpenter and not too far (Athlone) if you need any advice on fit out drop me a line not that i think you need it your doing so well by your own some. Oh on the windows keep the original 70,s bono wrap arounds soo cool!!!


  • Registered Users, Registered Users 2 Posts: 3,429 ✭✭✭dnme


    Aazing stuff just read it from start to finish sorry present. Keep up the good work I would love to do somethng like this myself.Well done you. I,m a carpenter and not too far (Athlone) if you need any advice on fit out drop me a line not that i think you need it your doing so well by your own some. Oh on the windows keep the original 70,s bono wrap arounds soo cool!!!

    Many thanks Fanintheattic

    I guess my next job is cutting out panels (access) in the top of the cabin seating. But then I need to run stringers across the deck floor and lay down a floor (18mm marine ply).

    Any tips as to how to get the shape / coutour right on the stringers? Lets say I run 3 stringers across, is it simple enough to get them all level with one another?

    ...and that's another thing? How do I know what level is in this boat? What's my reference point for levelling, I guess I can level her side to side but what about lengthways? Christ! hadn't thought about this too much


  • Registered Users, Registered Users 2 Posts: 3,429 ✭✭✭dnme


    fergal.b wrote: »
    I did up a boat in a pvc tunnel, a local farmer had one that the plastic had ripped off and was not been used so I asked him for a lone of a few poles off it, with 4 poles I was able to cover a 23 foot boat it was also well able to stand up to the wind where as I think it would be a nightmare with one of those tents.
    Might be worth your while having a look around. This is the type I mean.

    What did ya cover it with Fergal?


  • Advertisement
  • Moderators, Motoring & Transport Moderators, Sports Moderators Posts: 6,346 Mod ✭✭✭✭fergal.b


    I used plastic it was a bit warm on hot days but also a bit warm on cold days:D
    If you could get your hands on some corrugated sheeting you could make a themporary shed but the plastic would be the cheapest. It was also able to open at each end to keep it cool on very hot days "back when we had summers"

    DSCI0004-1-1.jpg


  • Registered Users, Registered Users 2 Posts: 57 ✭✭sausages79


    Love this project/story - I would love your patience and skill - I think the satisfaction you will get when launched will be great....cant wait for it.

    The only issue I see is you will then want that sense of satisfaction again that you will have to do it all over agin!!! And as a poster said earlier this time you will have to get RTE to do a show on it!!!

    Best of luck


  • Closed Accounts Posts: 4 NewHope


    Hi dnme, following your "adventure" for the last few days when my nephew sent me a link. You are an inspiration. All the blood sweet and tears will be worth it when you and the Lab are sitting on her watching the sun go down, or rise and you feel the peace, joy and tranquility of the lake, what a feeling.
    I might have a pair on original Freeman cabin lights, might suit a classic refit if they are any good to you PM me. What about “MeTime" for a name, you`ll need it by the time you’re finished..
    Good Luck Man....


  • Closed Accounts Posts: 8 Fanintheattic


    dnme wrote: »
    Aazing stuff just read it from start to finish sorry present. Keep up the good work I would love to do somethng like this myself.Well done you. I,m a carpenter and not too far (Athlone) if you need any advice on fit out drop me a line not that i think you need it your doing so well by your own some. Oh on the windows keep the original 70,s bono wrap arounds soo cool!!!

    Many thanks Fanintheattic

    I guess my next job is cutting out panels (access) in the top of the cabin seating. But then I need to run stringers across the deck floor and lay down a floor (18mm marine ply).

    Any tips as to how to get the shape / coutour right on the stringers? Lets say I run 3 stringers across, is it simple enough to get them all level with one another?

    ...and that's another thing? How do I know what level is in this boat? What's my reference point for levelling, I guess I can level her side to side but what about lengthways? Christ! hadn't thought about this too much


    Right I've been thinking about this so here it goes. Measure up 4" at front and back of deck area mark with a piece of tape above line string a line in a grid pattern of say six by six this grid is the true plane of the deck and you can measure down to the " floor " to get sizes of your stringers. It's not level as in spirt level level but it would be true and stable. If you wanted to get it true level I would imagine you'd need to get the water line the only way I can think of doing that is get the weight of the boat convert to volume fill water volume into boat and see where it settles allowing for displacement your water line would two inches higher than the level of the water in the boat I think. It's a long time since I did any volume to weight calculations.


  • Registered Users, Registered Users 2 Posts: 3,429 ✭✭✭dnme


    Right I've been thinking about this so here it goes. Measure up 4" at front and back of deck area mark with a piece of tape above line string a line in a grid pattern of say six by six this grid is the true plane of the deck and you can measure down to the " floor " to get sizes of your stringers. It's not level as in spirt level level but it would be true and stable. If you wanted to get it true level I would imagine you'd need to get the water line the only way I can think of doing that is get the weight of the boat convert to volume fill water volume into boat and see where it settles allowing for displacement your water line would two inches higher than the level of the water in the boat I think. It's a long time since I did any volume to weight calculations.

    Measuring 4" up is the problem. The floor is curbed, uneven etc. 4" up in one place is different to 4" up in another place. Look not to worry, I'll figure it out. I might actually fill it with water and see if i can choc it to what appears level, then mark a line at watertop etc.


  • Advertisement
  • Registered Users, Registered Users 2 Posts: 519 ✭✭✭harry21


    dnme wrote: »
    Measuring 4" up is the problem. The floor is curbed, uneven etc. 4" up in one place is different to 4" up in another place. Look not to worry, I'll figure it out. I might actually fill it with water and see if i can choc it to what appears level, then mark a line at watertop etc.

    Have you any old photos that show the water line on the outside. You could scale off measurements from them maybe and choc the boat level to these. It would be a start. Then you could fill the floor with water on inside to find a common level.

    Might want to keep in mind too that from now on, most of the weight added will be towards to front of the boat (but an old water line should take account of this I suppose).


  • Registered Users, Registered Users 2 Posts: 3,429 ✭✭✭dnme


    harry21 wrote: »
    Have you any old photos that show the water line on the outside. You could scale off measurements from them maybe and choc the boat level to these. It would be a start. Then you could fill the floor with water on inside to find a common level.

    Might want to keep in mind too that from now on, most of the weight added will be towards to front of the boat (but an old water line should take account of this I suppose).

    I wouldn't trust the old water line. Some joe just covered the bottom in black bitumen. I can level it side to side with a lath and a level. Bow to stern I'll do by eye I think.


  • Registered Users, Registered Users 2 Posts: 519 ✭✭✭harry21


    dnme wrote: »
    I wouldn't trust the old water line. Some joe just covered the bottom in black bitumen. I can level it side to side with a lath and a level. Bow to stern I'll do by eye I think.

    If thats the same 'Joe' that did some of the repairs (can I call them that??) you found so far I wouldn't blame you.:D

    Regards leveling it front to back there is a line (not sure if its a water line) in the 3rd picture of your first post. Might be a starting point??:confused:

    Sorry to hear about your back and neck:o... get well soon


  • Moderators, Motoring & Transport Moderators, Sports Moderators Posts: 6,346 Mod ✭✭✭✭fergal.b


    You could run 2 or 3 bits of string from one side to the other side along the white lines here at the side of the boat and tape them in place then run one from the transom to the bow and when it touches the other strings you should have a level floor line.:)
    166891.jpg


  • Registered Users, Registered Users 2 Posts: 3,429 ✭✭✭dnme


    Day 42

    Coming up on tonight’s ‘A restoration Tale…’
    Can the boat really be haunted?

    A rare break in the wet and grey for the afternoon. My neck drugs are kickin ion so I’m off out to hack away at the money boat. Thought I'd cut me some seat panels. Well….the idea is to cut out access panels in the cabin seat tops. I will then try and line them someway and make lids or perhaps ply seat covers on hinges, whatever.

    Now, in cutting out access panels, I was immediately reminded of the two repair patches on starboard bow that I never got round to investigating. Well it’s amazing how one job can not only lead to another, but become another – altogether. So…I’m no longer working on seat panels, I am now working on more hull repairs. One step up, two steps back (great song – Springsteen).

    1. Now, what about my attention grabbing red top headline? We’ll I’m not saying that the boat is haunted one way or another, but all I know is that I went in and made a cup of coffee. I brought it out along with a plate containing 5, yes “Five” Jaffa cakes. I placed the plate down on the port side of the deck and went in to the cabin to do something. When I returned, the plate only contained 3, yes “Three” biscuits. Compelling evidence I think you’ll agree, I mean; what else could it be ?
    171025.jpg


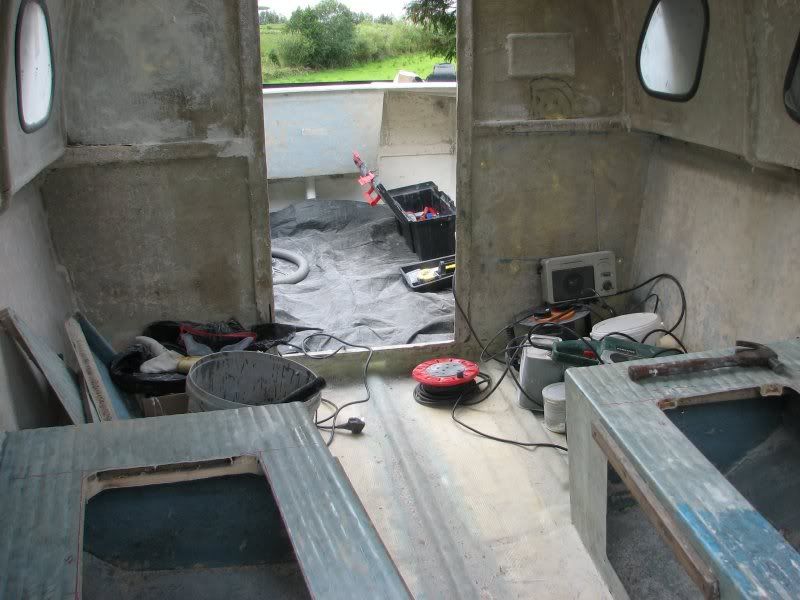
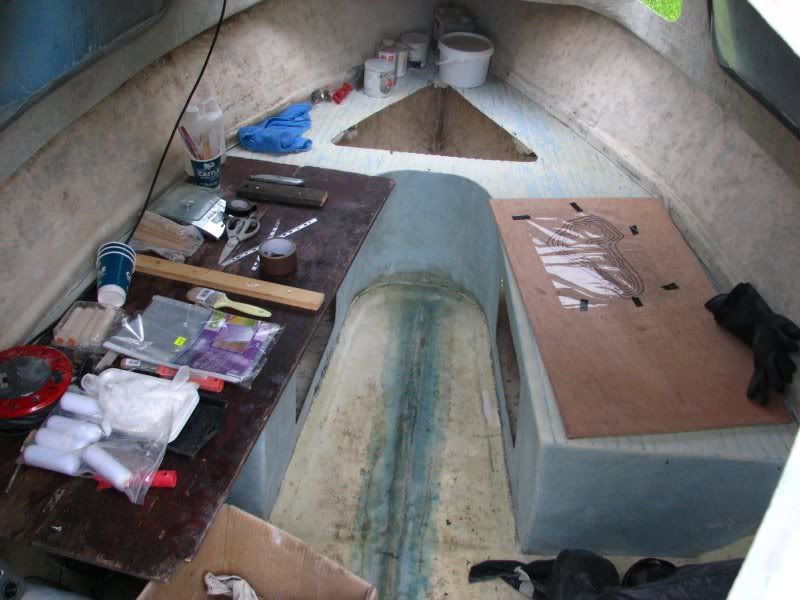
    2. Drawing lines and stuff, nothing in the boat is true, level or even etc; so reference points are hard to come by. The rectangles that you see on each side seat correspond to the inside of the glassed timber supports underneath, and even these do not mirror each other at all.
    171026.jpg


    3. Every sodding pilot hole I drilled, went into timber, who knew?
    171027.jpg


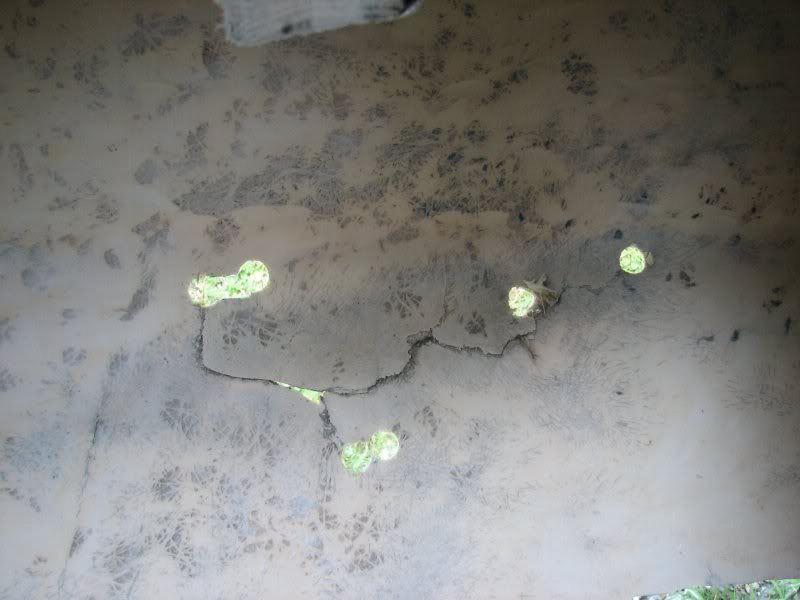
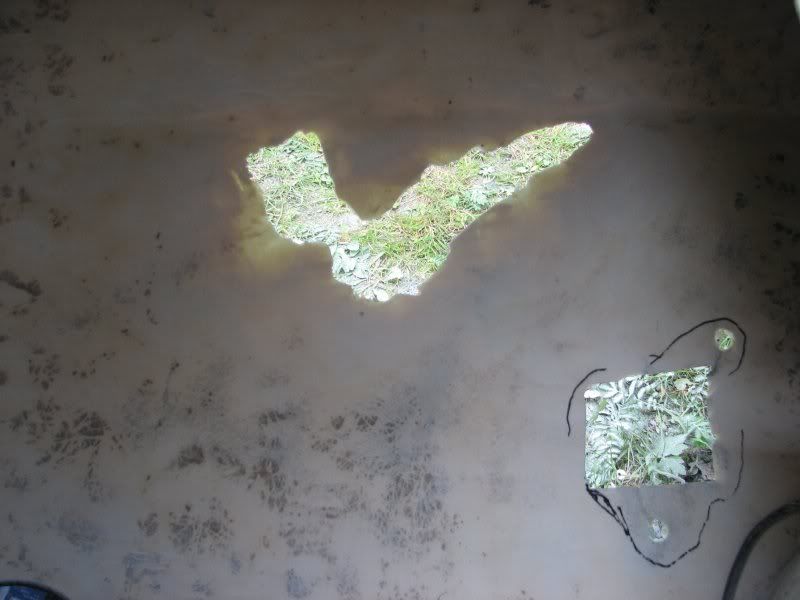
    4. I wonder when was the last time that bow hull saw daylight?
    171028.jpg


    5. Just wanted to mention these. The sanding disks are 12 quid for a pack of 5 in my local hardware. Here is a pack of 25 for the same 12 quid from Amazon. I rest my case, who could buy anything in this crazy country anymore.
    The torch is one I just bought to replace one I broke in anger when at the boat last week. I mention it because it could be the very thing for all boaters. Its a Lenser P7. Youtube it. It's one of the most incredible things I have ever owned. It arrived yesterday and I took it out last night for a trial. It was like artificial daylight. It lit up my entire neighbourhood. It has a beam focus, you can spotlight or wide area. It is so awesome. Serious little piece of kit, it also has low and high settings and aparently very long battery life. And it takes regular aaa's so you can buy rechargables etc. highly recommended.
    171029.jpg


    5. And from the activity above, new horrrors. So much so, that I decided to film for a bit. Hope you find these interesting, let me know if its boring.


  • Registered Users, Registered Users 2 Posts: 714 ✭✭✭ValerieR


    Reading the updates to this thread religiously every night - Thanks and well done for the very interesting, entertaining and humoristic documentation of each and every step towards a soon-to-come successful and rewarding achievement ! :)

    Just a thought, now that you have opened up the bow, would it be an idea to keep it accessible in the future? There always are plenty of things on a boat you want to store somewhere and have no place to keep it.

    As far as the colour scheme and naming of the boat, I suggest yellow and white. Yellow is always nice and cheerful on a boat. For the name, I suggest "Black Arrow" : Black for the Sligo colours and Arrow for the Lough ! :) Of course, these reasons in additional to the actual novel of adventure and romance (between your boat and yourself that is ! :D).

    The ghost ... is not that greedy really - he should really have taken the 5 Jaffa Cakes :)

    I have to add I love the doggie - she is absolutely gorgeous ! :)

    Keep up the good work ! :)

    ValerieR


  • Registered Users, Registered Users 2 Posts: 3,429 ✭✭✭dnme


    ValerieR wrote: »
    Reading the updates to this thread religiously every night - Thanks and well done for the very interesting, entertaining and humoristic documentation of each and every step towards a soon-to-come successful and rewarding achievement ! :)

    Just a thought, now that you have opened up the bow, would it be an idea to keep it accessible in the future? There always are plenty of things on a boat you want to store somewhere and have no place to keep it.

    As far as the colour scheme and naming of the boat, I suggest yellow and white. Yellow is always nice and cheerful on a boat. For the name, I suggest "Black Arrow" : Black for the Sligo colours and Arrow for the Lough ! :) Of course, these reasons in additional to the actual novel of adventure and romance (between your boat and yourself that is ! :D).

    The ghost ... is not that greedy really - he should really have taken the 5 Jaffa Cakes :)

    I have to add I love the doggie - she is absolutely gorgeous ! :)

    Keep up the good work ! :)

    ValerieR

    Well god bless ya Valarie. Its the silly season I guess and replies are thin on the grounf atm. Great to hear from you.

    1. Opened up the bow, well opened up the seating. The whole point being to create access panels for accessing the space underneath for storage.

    2. The ghost - who knows! All I can say is, If I hadn't returned when I did, the entire plate was history. But the dog is a she. Her name is Honey. Shes a rescue so I didn't name her. I brought her up from Kerry last year after posting a request on Irishdogs.ie. Shes a dote, highly intelligent and very vocal - loads of loud yawns, moans when I talk to her, snores, howls and kicks the door to get in etc. Shes a beauty, I love her dearly.


  • Registered Users, Registered Users 2 Posts: 714 ✭✭✭ValerieR


    dnme wrote: »

    2. The ghost - who knows! All I can say is, If I hadn't returned when I did, the entire plate was history. But the dog is a she. Her name is Honey. Shes a rescue so I didn't name her. I brought her up from Kerry last year after posting a request on Irishdogs.ie. Shes a dote, highly intelligent and very vocal - loads of loud yawns, moans when I talk to her, snores, howls and kicks the door to get in etc. Shes a beauty, I love her dearly.


    LOL - it does sound very much like ours. He's a black lab-collie X and his name is Casper (a real ghost !!! :p)

    p1090863-mod_400x300_9cee10cd6993fe8af3ae997e4c6cf660.jpg

    I hope the day is as nice and sunny up there as it is promised here.

    ValerieR


  • Registered Users, Registered Users 2 Posts: 2,041 ✭✭✭blindsider


    Keep up the trojan work dnme - you're doing so well!

    The vid is great - I know you don't have time to be doing too many of them, but maybe a weekly update/review of progress is an option?

    Those 2 'new' holes in the hull are a real pain - but you're right to tackle them now. They would nag at you forever otherwise.

    As you're being plagued by rain, here's a link to a good weather site:

    http://www.meteoblue.com/en_GB/point/forecast/week/f/7914/c/ie

    It shows the 7 day forecast for Sligo - if you click on the icon/pictogram under Day/Date, it give the hour by hour forecast.

    The RainSpot feature lower down the page is useful also.

    Met.ie's Rainfall radar is good for current conditions, but Meteoblue is good for 3 days out - I don't think anyone will commit to longer unless we get get a big high or low pressure system.

    Anyway, hope it helps a bit, and I'll keep reading!


  • Registered Users, Registered Users 2 Posts: 3,429 ✭✭✭dnme


    Many thanks blindsider and I'll have a look at that link today.


  • Advertisement
  • Registered Users, Registered Users 2 Posts: 3,429 ✭✭✭dnme


    ValerieR wrote: »
    LOL - it does sound very much like ours. He's a black lab-collie X and his name is Casper (a real ghost !!! :p)

    I hope the day is as nice and sunny up there as it is promised here.

    ValerieR

    Your dog is a stunner, but whats with the life jacket? are you far out at sea?


  • Closed Accounts Posts: 8 Fanintheattic


    fergal.b wrote: »
    You could run 2 or 3 bits of string from one side to the other side along the white lines here at the side of the boat and tape them in place then run one from the transom to the bow and when it touches the other strings you should have a level floor line.:)
    166891.jpg[/Quote

    Just another thought on finding a starting point for levelling the deck. In some of your recent photos I noticed you can still see where the original seating was( just above Honey's shoulder in most recent photo ) the seats were prob level with original deck if you measure down from this line you would be very close if not spot on level. Save you the hassle of complicated conversions and filling the boat with water. How about "no hassle" for a name I'm feeling ironic today as I started a job that would only take two hours at nine this morning and I'm only half way through, did no trades man in this country have a level back in the boom times ducking ridiculous


  • Closed Accounts Posts: 31 big zeb


    Hi dnme, firstly like everyone else whos commented before me congrats on the work so far, I take my hat off to you. Having done various rebuild projects on cars/ campers etc in the past I know how difficult it can be to find the drive to keep going when your at it on your own day after day but there's a chink of light shining at the end of the tunnel as bright as your new torch:D. So now that i've offered up my tuppence woth of moral support I can only give you a suggestion or two for a name for your legacy of patience. I suggest "The Enemy Within" (dnme within get it?) or maybe An Namhaid for an irish twist. Anyway keep the faith and keep posting.


  • Registered Users, Registered Users 2 Posts: 3,429 ✭✭✭dnme


    big zeb wrote: »
    Hi dnme, firstly like everyone else whos commented before me congrats on the work so far, I take my hat off to you. Having done various rebuild projects on cars/ campers etc in the past I know how difficult it can be to find the drive to keep going when your at it on your own day after day but there's a chink of light shining at the end of the tunnel as bright as your new torch:D. So now that i've offered up my tuppence woth of moral support I can only give you a suggestion or two for a name for your legacy of patience. I suggest "The Enemy Within" (dnme within get it?) or maybe An Namhaid for an irish twist. Anyway keep the faith and keep posting.

    many thanks Zeb.

    By the way folks, I mentioned in an earlier post that "I felt the hand of history upon us":cool: as the boat was now watertight for the first time since I got her. Well we're gonna have to take the hands off for a few days :D cos after last nights escapades, we're back to holes in hulls.

    Also, there may be good news on the front windows issue. Waiting for a phone call tonight. Watch this space for breaking news:D


  • Registered Users, Registered Users 2 Posts: 375 ✭✭Gerard93


    Watch this space for breaking news

    We're all watching dnme with Baited Breath:D:D

    Sorry I can't offer anything more constructive, enjoying the posts and vids your making powerful progress;)


  • Registered Users, Registered Users 2 Posts: 748 ✭✭✭Yawlboy


    I love this thread - cannot wait to see the finished product. I just hope it isn't too soon. :D


  • Registered Users, Registered Users 2 Posts: 714 ✭✭✭ValerieR


    dnme wrote: »
    Your dog is a stunner, but whats with the life jacket? are you far out at sea?

    Thank you ! I think he is a stunner too !! ;)

    Galway Bay can be big and wild ... we are assuming that if the dog went overboard, the life jacket would help him staying afloat. It takes a while with a (sailing) boat to manoeuvre back to a man-over-board (or dog-over-board in this case) especially in rough conditions ... Plus, it would be easier to pull a wet 35kg+ dog back on board with a handle on his back than just a regular collar.

    Valerie


  • Registered Users, Registered Users 2 Posts: 3,429 ✭✭✭dnme


    Day 43 - The Thief of Bagdad Ballinafad

    Yesterday evening, myself and Honey took a spin up to our good neighbours the McDermottRoe's. Karl is a builder and I went to ask him if he might know where I could lay my hands on some scaffolding to try and make a shelter for the boat. Being the decent soul he is, he said I could use some of his. Many thanks again Karl if you’re watching.

    Anyway, while there, Kay brought me in for a cup of tea. I left honey in the yard playing with their dog 'Guinness' (b/w sheepdog :D). I was chatting away to herself and Henry. She produces a cup of tea and a plate of homemade heaven. Whatever it was, I dunno but it was like a ginger cake packed with fruit and served in slices with butter. Kay is known for her baking and this thing was as good as home baking gets.

    We shot the breeze for a half hour and then I upped and headed back out to retrieve my dog and head home. There in the yard by the back kitchen door (which had been open), was Honey, she was sorta savaging something. I looked down, in her mouth was half the cake, the rest of it was on the ground. She had obviously gone into the kitchen, up on the countertop and scarpered with the prize. I had to go back in and tell Kay. Talk about a mix of guilt, shame, wry smiles and sheepishness. I was truly humbled. Kay laughed it off. I did try to make good today with a shop bought confection......never be the same! Honey has brought shame to the family. :rolleyes::o:p:D:cool::eek::D

    What?? ...... .. . . . Boat???? .... . . . . . .. . . oh yeah, ahem sorry!

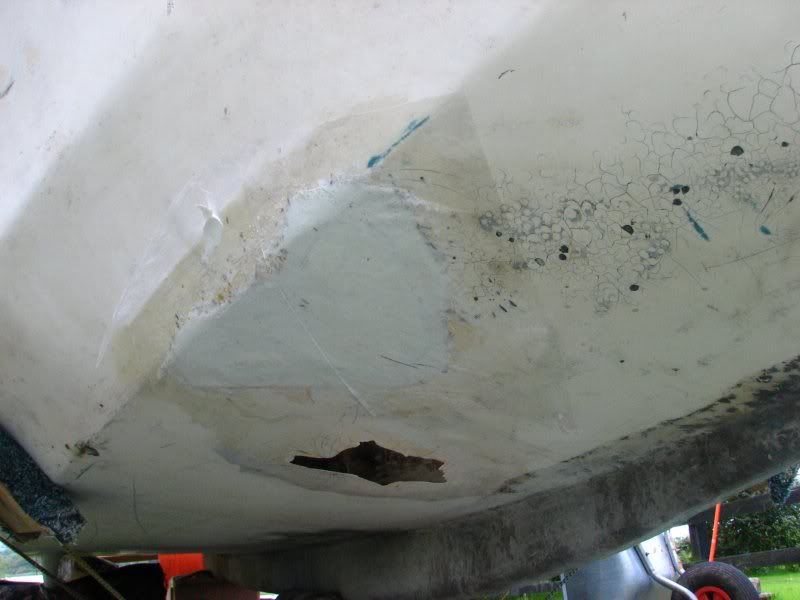
    Today was a minor update really in the story of this vessel. I just spent the day grinding (careful now). I was simply going to get in at the bow and repair those holes, but it then occurred to me that to do that, I would need to grind them clean, so why not do all the dam grinding in one go and get it over with. It’s such a horrible dangerous and unhealthy job that I want it done and out of the way.

    I finished cutting out my access panels. To do this I just decided to ignore the constraints of the underside supports and design my panels from the top. As nothing was really true, I resorted to nature to find my measurements and lines. If you’ve never heard of the magic ratio, google it. Also when lacking precise reference points, always resort to tapers and curves, that’s what I did and I have to say, the side panels look very pleasing to the eye.

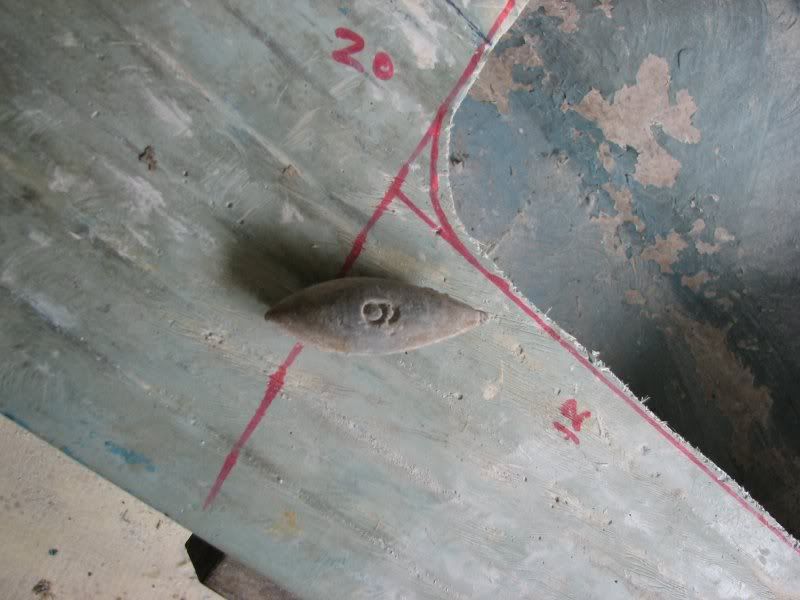
    Once these were out and edges cleaned up, I was then able to get to that grinding I mentioned above. I ground out the entire cabin floor underneath all that seating. Years of old blue paint and crap. I found a big old lead fishing weight down there, the type you’d use for sea angling. So she must have been at sea in her past. It again occurred to me – the last time this grp saw daylight and all the history she has known since. If only she could talk, I’d listen to her for days on end.

    So the cabin is ground clean. I also used the opportunity to start at the top of the seating. It’s a corrugated profile, horrible, awkward, caked in years of crap. I intend to grind it back a bit and fill it flat. So I got that grinding done tonight also. The grinder just ate up that corrugated profile like butter.

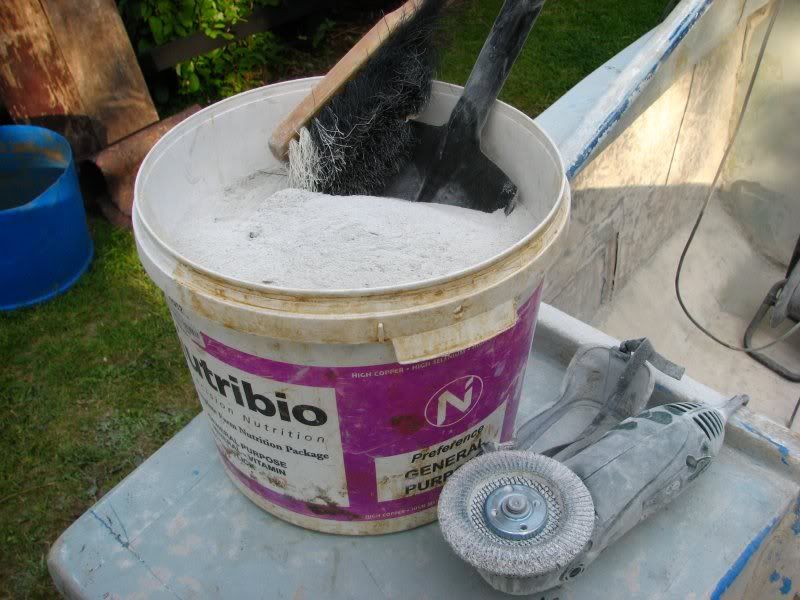
    I gotta say one thing about that grinder. From here on in I am going to refer to it as “The Bitch”. It’s so dangerous, you have a disk spinning just by your hand at 11000 rpm. There is no guard. Your hands naturally tend to slip up along its body towards the disk. Today I put myself in so much danger trying to over reach in under that seating with this bitch ready to rip into my flesh at any given moment. While working on the bow, it slipped out of my hands. I just became aware of this crazy noise, clouds of dust and sparks as it danced around out of control and my brain struggled to find the solution - which was to get to the extension lead socket and unplug the thing. Why is it, whenever you’re in panic, a simple thing like unplugging a plug, takes ages and never goes smoothly! Mind you – I also have to say, the bitch is helping me sail through large volumes of work. If only I’d known about using it with those disks in the early days of this boat restoration, it would have saved me weeks of time spent with wire brushes, sanders, scrubbers etc. It’s doesn’t f’about, it just removes material at a very fast aggressive rate….so you gotta keep it moving, but by god it works.


    1. Cutting out access panels. The magic ratio, curves and tapers along with some good measurements always make for an aestheticly pleasing design.
    Image1.jpg


    2. That was one busy boat today
    Img_7085.jpg


    3. More history, and old lead fishing weight under the seating.
    Img_7081.jpg


    4. before and after grinding, both taken today.
    Image2.jpg


    5. The bitch
    Img_6634.jpg


    6. The other bitch (ah my teen years, those were the days and I've invited her to the launch, ke ke ke ke)
    bitch_poster_01.jpg


  • Registered Users, Registered Users 2 Posts: 1,550 ✭✭✭Slig


    Those battens along the side of the seats are to hold up your bed so dont forget about them:D.

    The pieces of string levelling method that was mentioned above sounds the best. You'll never have a level boat. The engine to cabin furniture weight ratio will always be changing and the bow rises when you go faster......and those inconvenient wave things rock it about abit aswell. As for lateral levels, your steering and controls will be on one side along with your good self and that will distort the level across the beam.

    I was just thinking about it there abit but is there an upstand between the cabin and the outside deck now that you are putting in a deck above the hull on the outside part?
    Pretty important if you want to keep the cabin dry and it should allow you to put in the outside floor at a level that gives you the most deck space as opposed to whats true level.


  • Advertisement
  • Registered Users, Registered Users 2 Posts: 3,429 ✭✭✭dnme


    Slig wrote: »
    Those battens along the side of the seats are to hold up your bed so dont forget about them

    What battens?
    Slig wrote: »
    I was just thinking about it there abit but is there an upstand between the cabin and the outside deck now that you are putting in a deck above the hull on the outside part?
    Pretty important if you want to keep the cabin dry and it should allow you to put in the outside floor at a level that gives you the most deck space as opposed to whats true level.

    A what? - upstand? can you explain?


  • Registered Users, Registered Users 2 Posts: 3,429 ✭✭✭dnme


    The window situation is not good. I had a few quotes from Fabricators and it's all over the shop. I have been emailing these fabricators, briefly telling them the story, sending them the link to this thread and attaching 6-7 photos showing the boat windows, the moulds I made, and how I made them. So they all know the storty, they know the size, scale, rough boat value etc.

    Future Plastics in Leixlip quoted me €1350 !!!!!!!!!! :eek:
    That to me is part of what's wrong with this country. It's either a badly run business with a cost base so out of control that it is eating itself, or it was an opportunistic act of greed and profiteering.

    I have had another quote from Sean at Plastioco, Westport, Co. Mayo. He's a gentleman who spent some time with me through 2 or 3 phone calls. He came in at €330.

    Then there's my old friends at Ballina Collins Plastics. I emailed them on the 10th but was told they are on holidays until September :eek:

    There are two others I emailed that have not replied.

    I have already spent about 100 quid making the moulds, buckets of filler went into them - not cheap stuff when you add it up. Not to mention serious amounts of time sanding them. Then remember I have also spent 70 quid on a sheet of plastic for my own failed attempts. Granted that has given me the side windows but its still a cost.

    So my cost to far on the front windows, lets call it 150. And now I gotta spend another 300 at least? This is becoming a serious problem. I'm running out of options here.

    1. Do I try again with my own efforts? means spending another 70 quid on a new sheet of plastic, and making up another oven (have to purchase ply, insulation etc). Then what if the results are crap again which I fear they will be, it will have been more cash down the toilet.

    2. Do I spend 300 with a fabricator who cannot guarantee the results? I just cant waste any more money on this issue.

    3. Do I reshape the windows, glasss in the wraparounds and end up with reasonably regular rectangular (rrr:rolleyes:) apertures into which I should be able to make my own windows?


  • Registered Users, Registered Users 2 Posts: 1,550 ✭✭✭Slig


    dnme wrote: »
    What battens?


    A what? - upstand? can you explain?

    Expalined throught the medium of Section via .pdf :D


  • Registered Users, Registered Users 2 Posts: 3,429 ✭✭✭dnme


    So when you say battens, you mean those thingy-ma-bob bits of yokes under the whatchyamacallit places where ya sit? is that it? huh? :D

    Im ahead of you there, I'm planning to galss in/up new supports under the seating. as they are right now, they are elastic to the point of being fun! My access panel escape weakened them seriously but I knew that.

    Upstand? threshold into cabin? The bulkhead goes across the floor (about 2-3" high) under door etc. .But the cabin and deck floor are the same height / piece of hull. My raised floors may be different heights, I'll see how it goes.


  • Closed Accounts Posts: 1,270 ✭✭✭tin79


    For the windows I would cut them flat but to shape with a blank and use thin enough perspex and then bend them into position. Easiest way.


  • Registered Users, Registered Users 2 Posts: 76 ✭✭gardoyle27


    dnme wrote: »
    1. Do I try again with my own efforts? means spending another 70 quid on a new sheet of plastic, and making up another oven (have to purchase ply, insulation etc). Then what if the results are crap again which I fear they will be, it will have been more cash down the toilet.

    2. Do I spend 300 with a fabricator who cannot guarantee the results? I just cant waste any more money on this issue.

    3. Do I reshape the windows, glasss in the wraparounds and end up with reasonably regular rectangular (rrr:rolleyes:) apertures into which I should be able to make my own windows?

    i agree companies in this country don't understand how to be competative.

    as for the windows i know you originally tiried them in a homemade perspex oven, would a better option be to use the heat gun directly on the perspex, it'll be longwinded but the results may be better.

    option 3 should be banished, it'll totally change the look of the boat ;)


  • Advertisement
  • Moderators, Motoring & Transport Moderators, Sports Moderators Posts: 6,346 Mod ✭✭✭✭fergal.b


    gardoyle27 wrote: »

    option 3 should be banished, it'll totally change the look of the boat ;)

    I agree it would be like taking the headlights off a frogeyed sprite.:D

    Have you tried these they do blow moulding http://www.futureplastics.ie/Moulding__/99


    images?q=tbn:ANd9GcT9xVBRtZhnyIa2W9aZeXl7HBgNSlKgb8Wq9Qj4EKtl_CM_qCCpbA


  • Registered Users, Registered Users 2 Posts: 3,429 ✭✭✭dnme


    gardoyle27 wrote: »
    as for the windows i know you originally tiried them in a homemade perspex oven, would a better option be to use the heat gun directly on the perspex, it'll be longwinded but the results may be better.

    Gar, that was the first thing I tried, the worst results by far. The uneven heat causes distortion, region stretch, bubbling etc, no matter what way you try to operate the heat.
    fergal.b wrote: »
    I agree it would be like taking the headlights off a frogeyed sprite.biggrin.gif

    Have you tried these they do blow moulding http://www.futureplastics.ie/Moulding__/99

    Fergal, re-read my post #482


  • Registered Users, Registered Users 2 Posts: 76 ✭✭gardoyle27


    dnme wrote: »
    Gar, that was the first thing I tried, the worst results by far. The uneven heat causes distortion, region stretch, bubbling etc, no matter what way you try to operate the heat.

    apologies, well i do remember when i was back in school we would use a heat element to manipulate perspex but it was something very similar to this

    also, this might also be a good way of doing it if you can heat enough water!!!


  • Registered Users, Registered Users 2 Posts: 76 ✭✭gardoyle27


    dnme wrote: »
    Fanintheattic, can you delete your last two quote posts ? thanks

    think boards is acting the maggot it done that on me earlier too


  • Registered Users, Registered Users 2 Posts: 3,429 ✭✭✭dnme


    Day 44

    It was a strange day, at lunch it looked nice out at the lake but looking out the front windows showed threatening black cloud. It was a dead calm day, lake like glass the way I love it so if it did rain, it would be sure to hang around for a while. Well rain it did! And hang around it did. But I was in the cabin and relatively dry and comfortable. Not to mention that glorious sound of rain hitting your roof, making you feel even more altogether snug and sheltered.

    I have decided to stop messing with todays post and have a go at making it into a tutorial on grp patching, repairing holes in boat hulls. Now I have read extensively on this, I have trawled youtube (which can be a good and bad thing) and so with my humble beginners knowledge, I have thrown together all the best practices and some of my own concoctions to suggest perhaps…..a good way to do these kind of repairs. I’d welcome your constructive comments on this.

    So onward, as this is a tutorial, I have been prolific in my picture taking. I also put in a bit of video which serves no real purpose other than to mix things up. Enjoy.


    Note. The csm I am using is compatible with epoxy as it is powder coated. Also, there is an image limit of 15 per post even using external image servers, so I have had to split this post/


    1. Video introduction, setting the scene and showing the ground out damage area.


    1. I drill holes at the end of each damage line, this prevents the crack from extending any further in the future.
    bIMG_7097.jpg


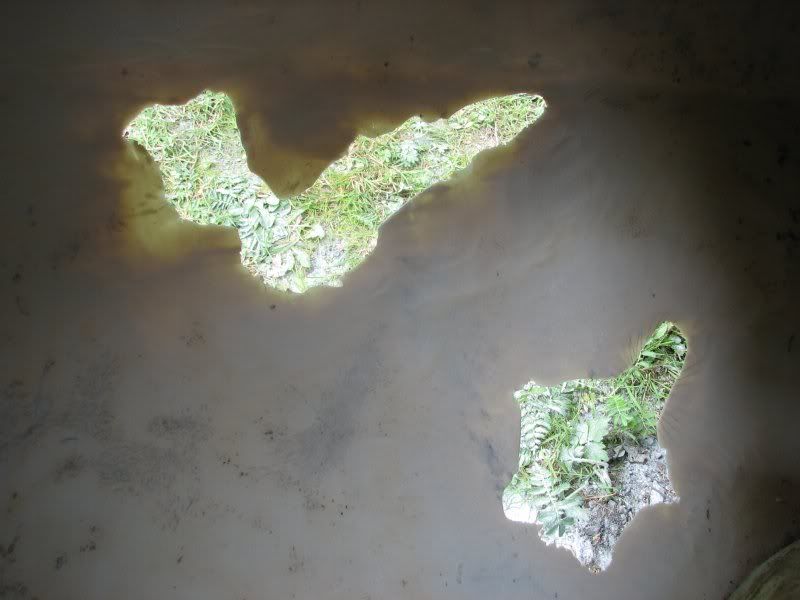
    2. I cut out any sharp edges and bad or contaminated grp. Here you can see, after a bit of grinding, I inspect and mark out the areas than need further grinding. You can't see much with the goggles so marking up helps.
    bIMG_7100.jpg


    3. The damaged areas fully grinded back to clean grp. I've tapered and feathered in forming a 3-4" border.
    bIMG_7105.jpg


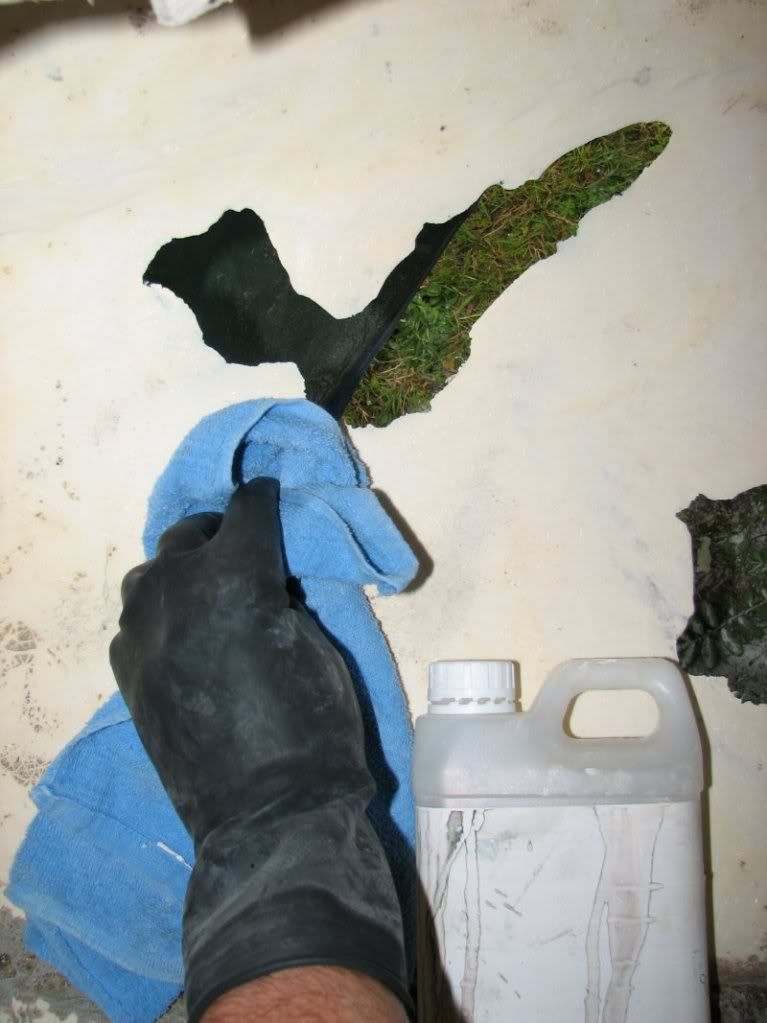
    4. After sweeping and vacuuming up the dust, I clean the area thoroughly with acetone.
    Img_7109.jpg


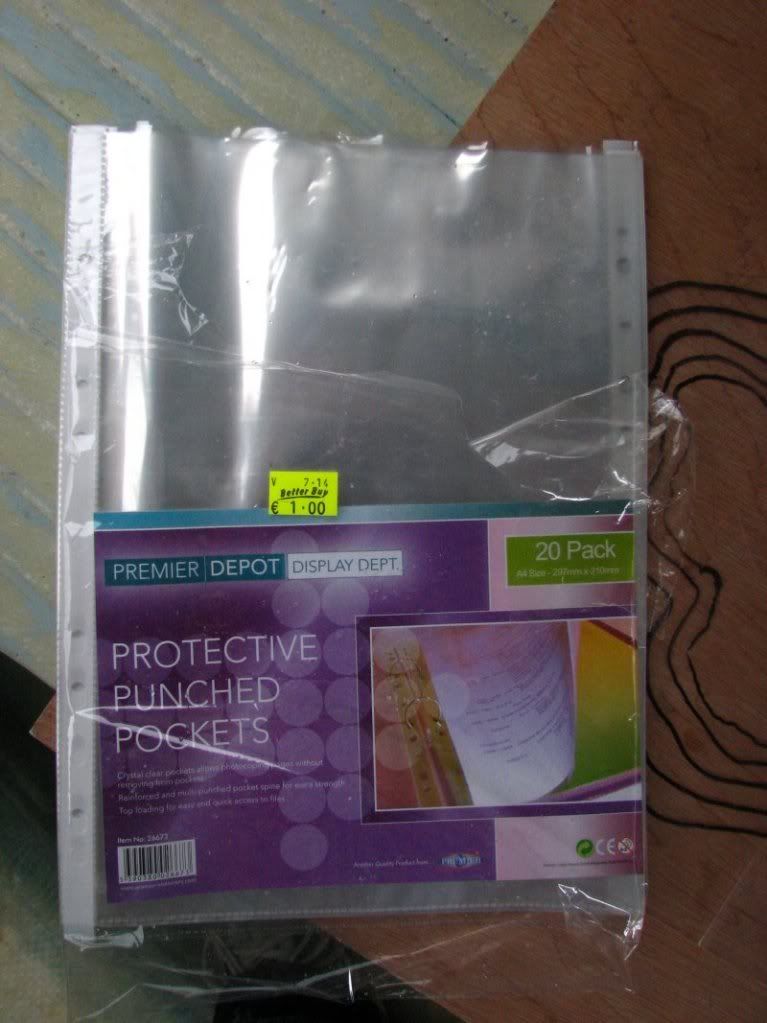
    5. I need some clear sheets of plastic, so into my local pound shop.
    Img_7114.jpg


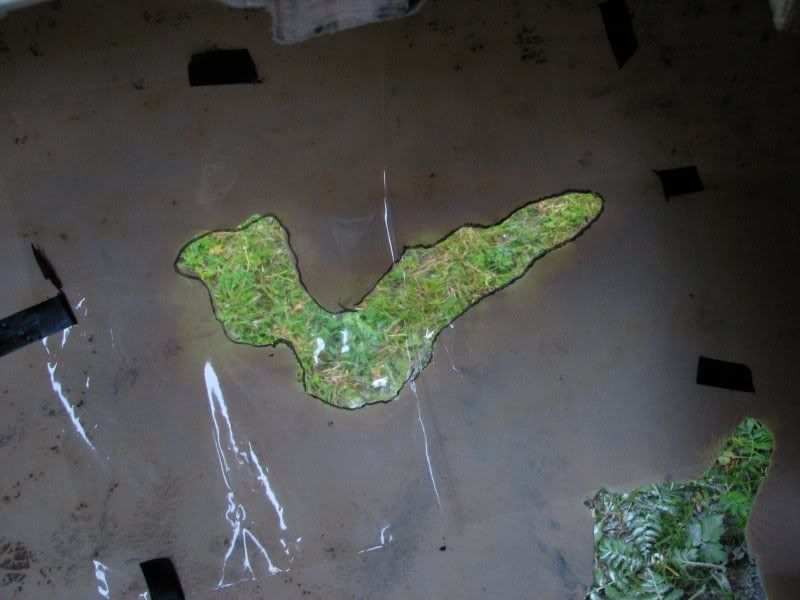
    6. I tape some clear plastic over the wound and trace out the hole.
    Img_7112.jpg


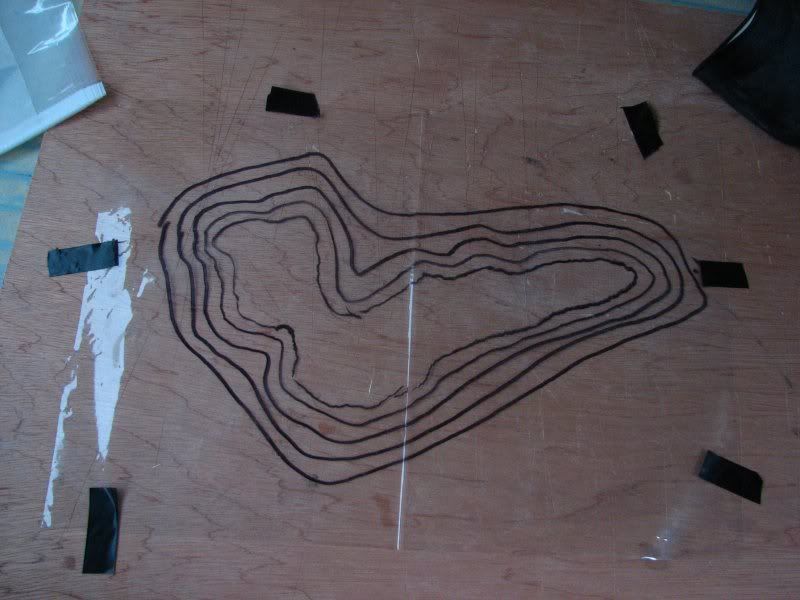
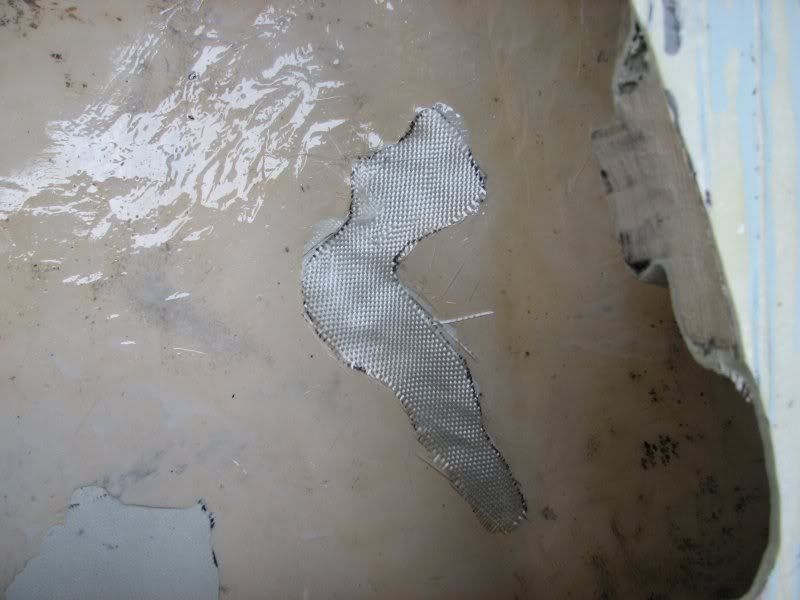
    7. I then take the clear sheet away and draw five more borders each one roughly following the previous about 6-10mm bigger. I will then use this to cut out my pieces of glass fibre cloth tracing and cutting both the cloth and clear plastic.
    Img_7113.jpg


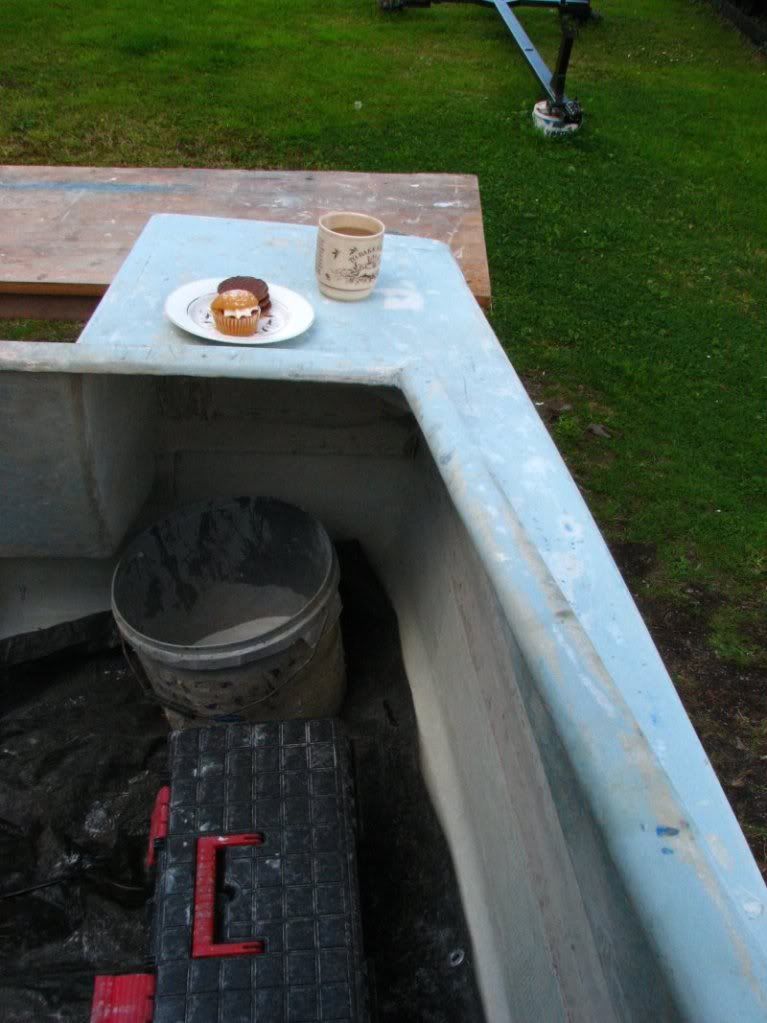
    8. No ghosts today, biscuits left intactbiggrin.gif
    Img_7119.jpg


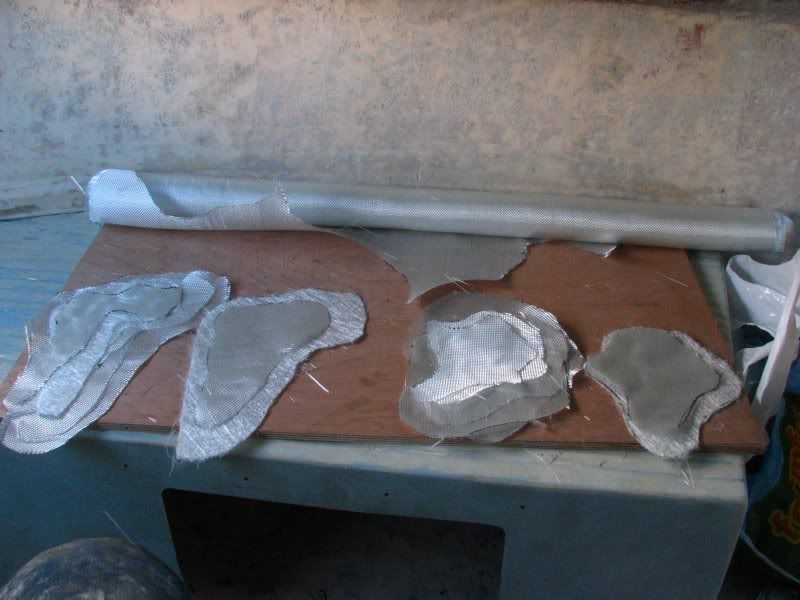
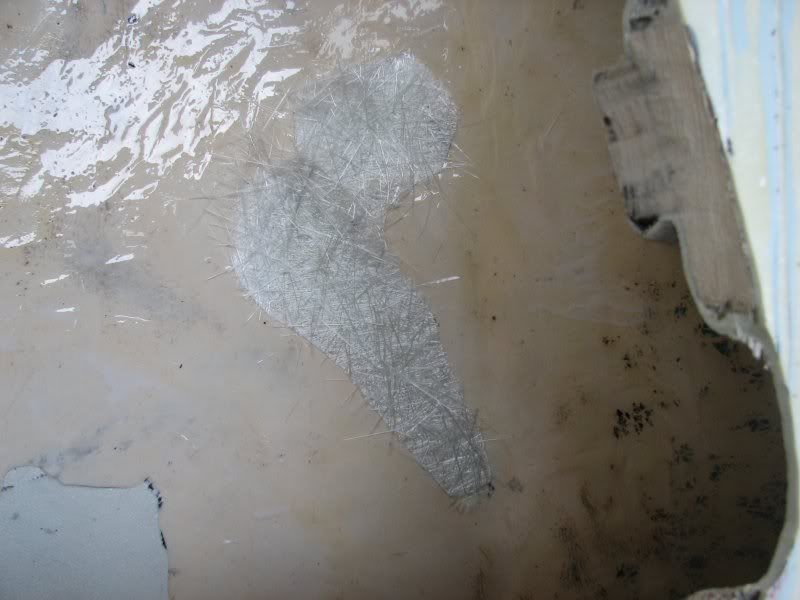
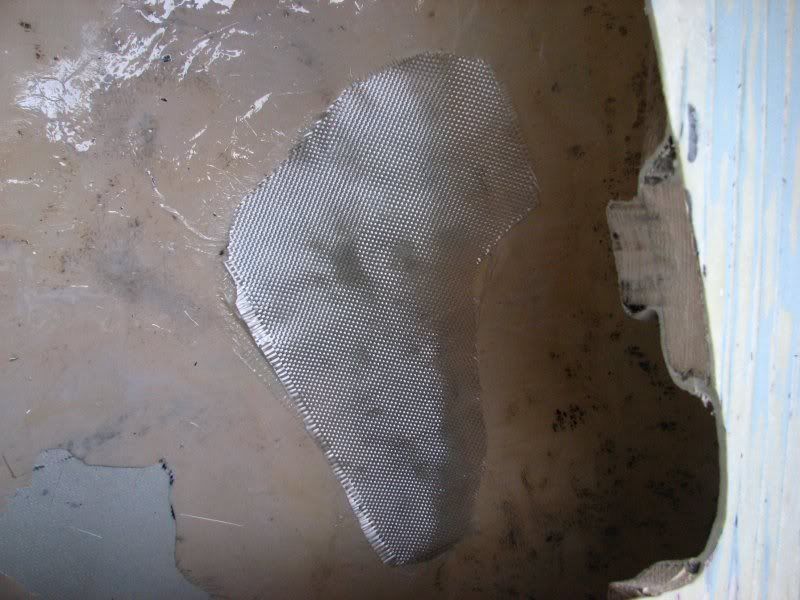
    9. Using the clear plastic sheet, I cut out all my patch pieces. Here I have four patches. I am going to patch each hole on both the inside and out. The outside patch consists only of two pieces, 1 x light woven roving and 1 x csm. This will sand easy and hopefully give the overall repair a more robust and secure finish.
    Note that woven roving is a criss cross weave so gives optimal strength in only two directions. Therefore I cut each piece of cloth at varying rotations. When the pieces are combined, this gives me optimal strength in several directions. Mixing in a piece of csm also helps with this.
    Img_7120.jpg


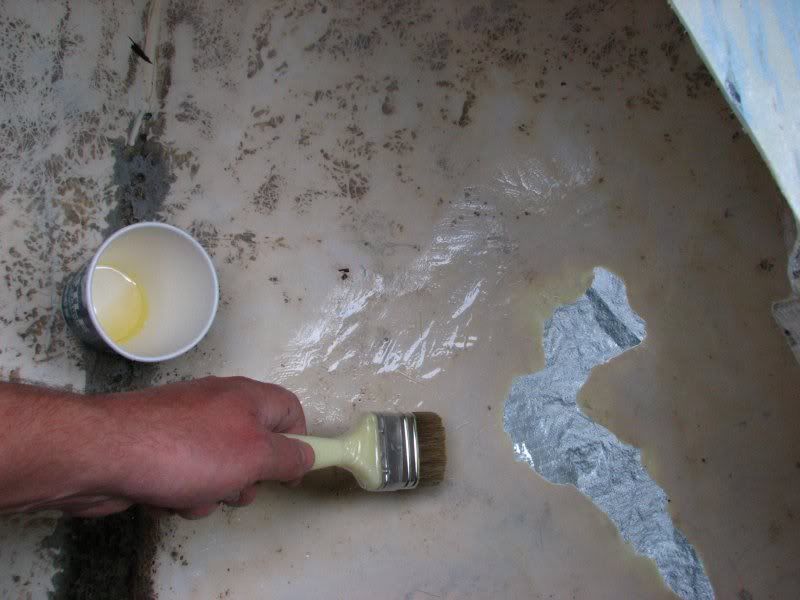
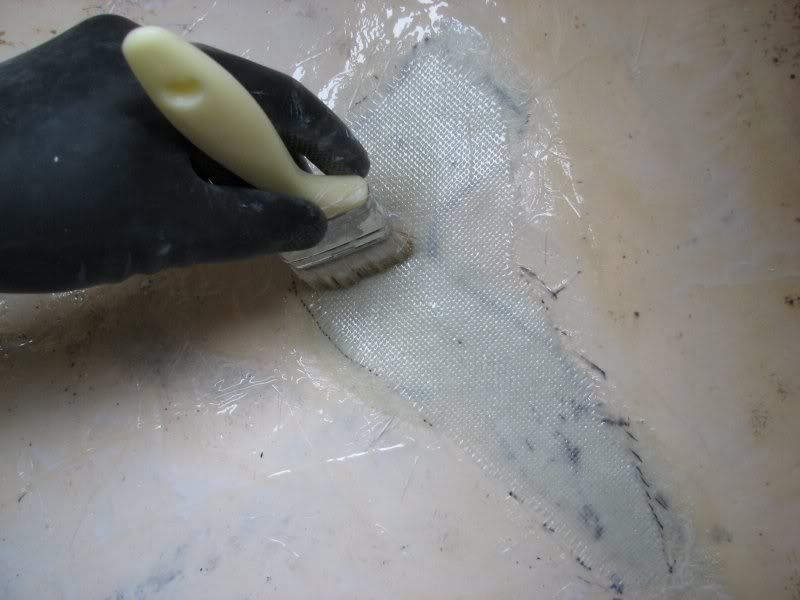
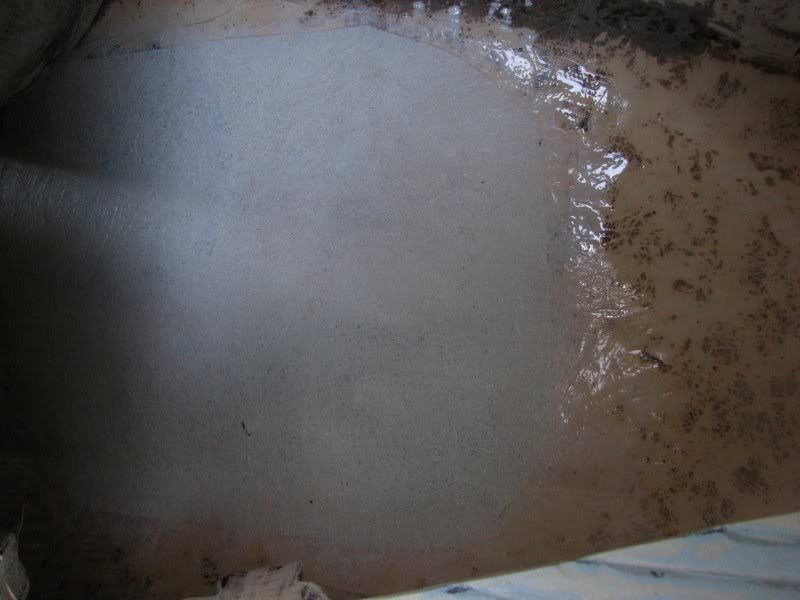
    10. I mix up a small batch of epoxy and wet all mating surfaces (inside and out) thoroughly. Really dab this in heavy to get it into all the microscopic pits and lans on the old grp surface.
    Img_7123.jpg


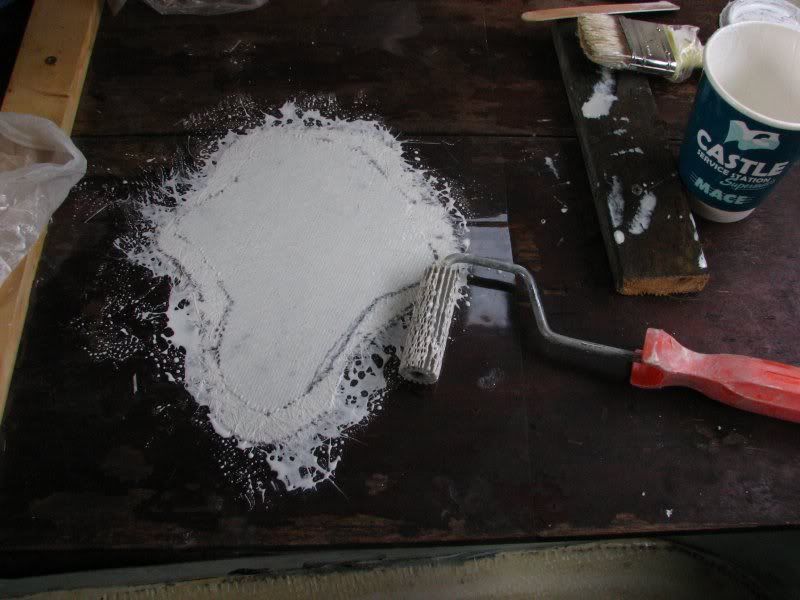
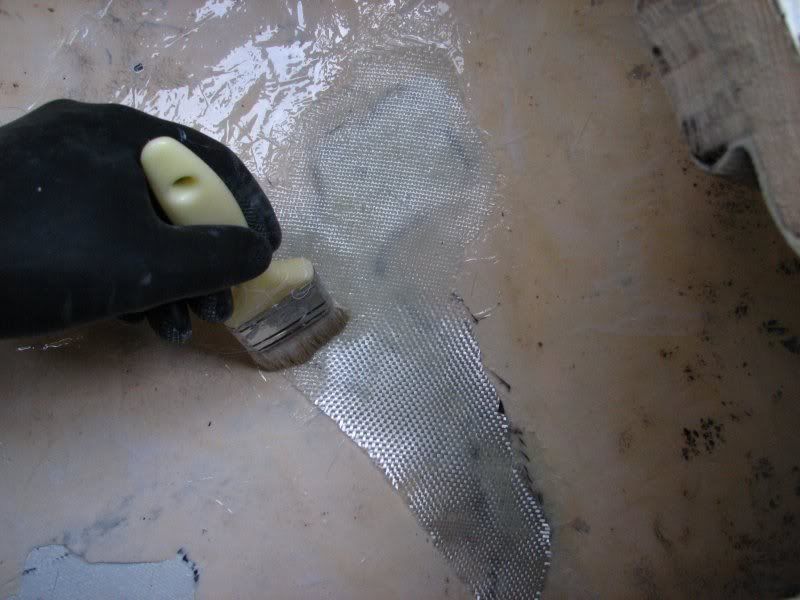
    11. Now while the areas are left to get tacky, I wetout patches for the outside. The outer piece (bottom) is csm, then one piece of woven roving. It's wetted out on another sheet of clear plastic using epoxy mixed with white pigment, then rolled to remove any air etc.
    Img_7125.jpg


    12. The patches are presented to the holes, I leave the clear plastic sitting on the patch. I use my roller to press the mating edges.
    Img_7126.jpg


    13. I make up some backer plates using pieces of thin plywood wrapped in cling film so that they wont bond or stick to anything. I then cover each repair patch with the plates and support them with scrap battons. This is temporary, it serves to give me backing support when I start my repair work from the inside.
    Image1.jpg


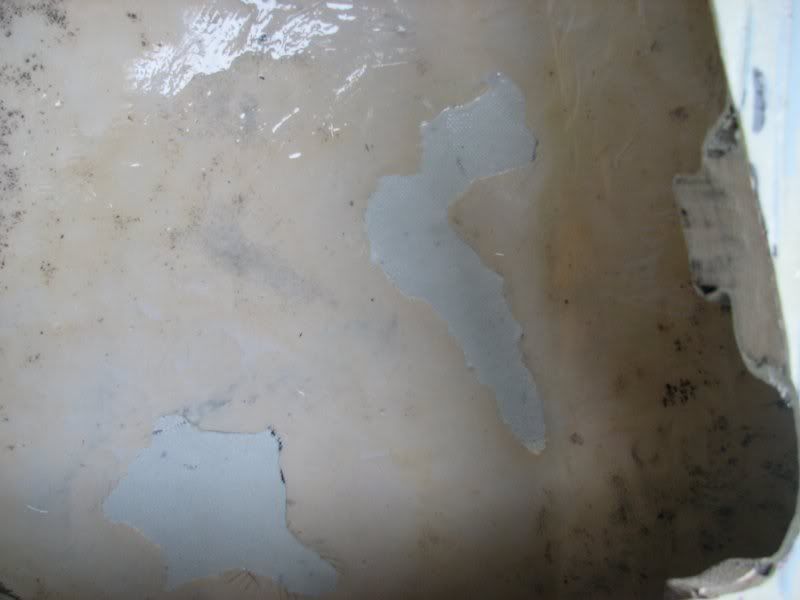
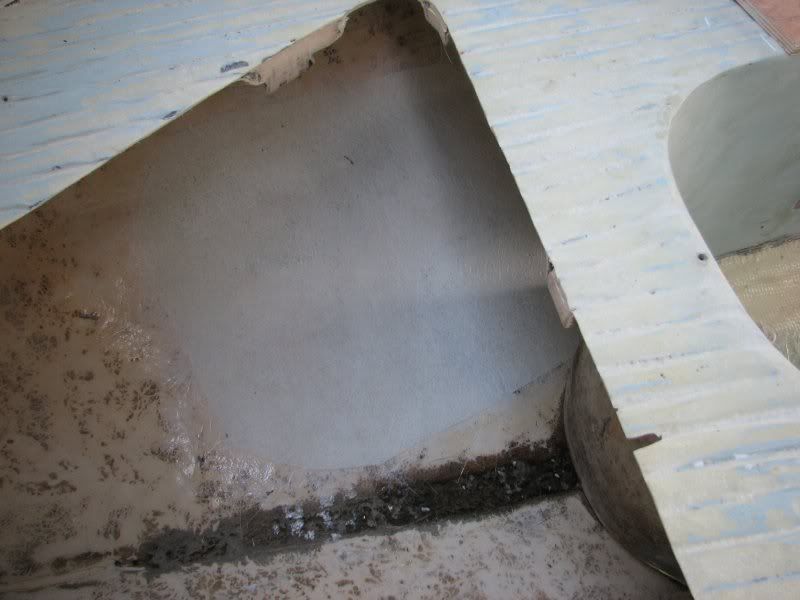
    14. Now this is what I see from inside the boat.
    Img_7130.jpg

    Part b to follow . . .


  • Advertisement
  • Registered Users, Registered Users 2 Posts: 3,429 ✭✭✭dnme


    Day 44 (part b, continued from part a)


    14a. This might give you a good context shot of my workspace.
    Img_7115.jpg


    15. I start applying and wetting out each piece. In this example, I am choosing to place the smallest piece first, it is often shown in the textbook being done the other way round (biggest piece first). Who knows, I think I prefer this way.
    Img_7131.jpg


    16. Wetting out each successively bigger piece of cloth over the repair area.
    Img_7132.jpg


    17. Wetting out each successively bigger piece of cloth over the repair area.
    Img_7133.jpg


    18. Wetting out each successively bigger piece of cloth over the repair area.
    Img_7135.jpg


    19. Wetting out each successively bigger piece of cloth over the repair area.
    Img_7137.jpg


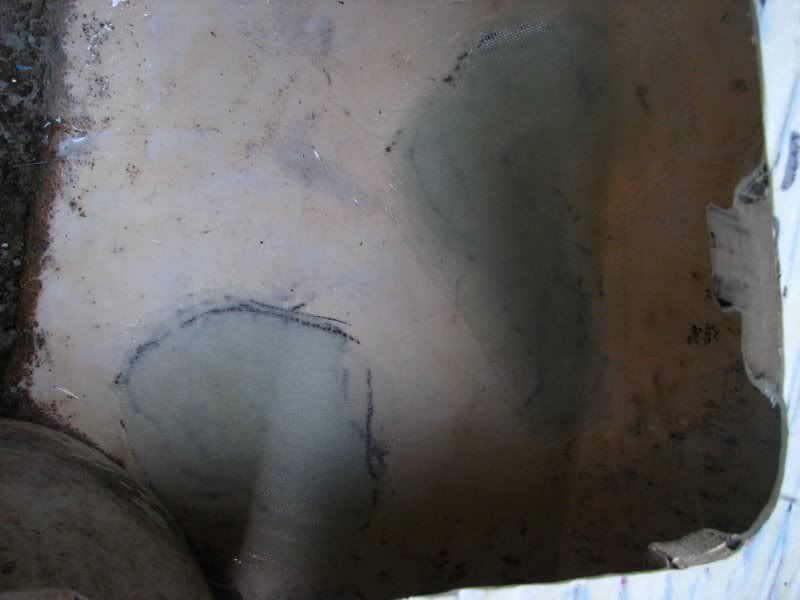
    20. Finished wetting out the cloth. Time to give them a run with the roller to tighten and compress them, remove any air and excess epoxy etc.
    Img_7140.jpg


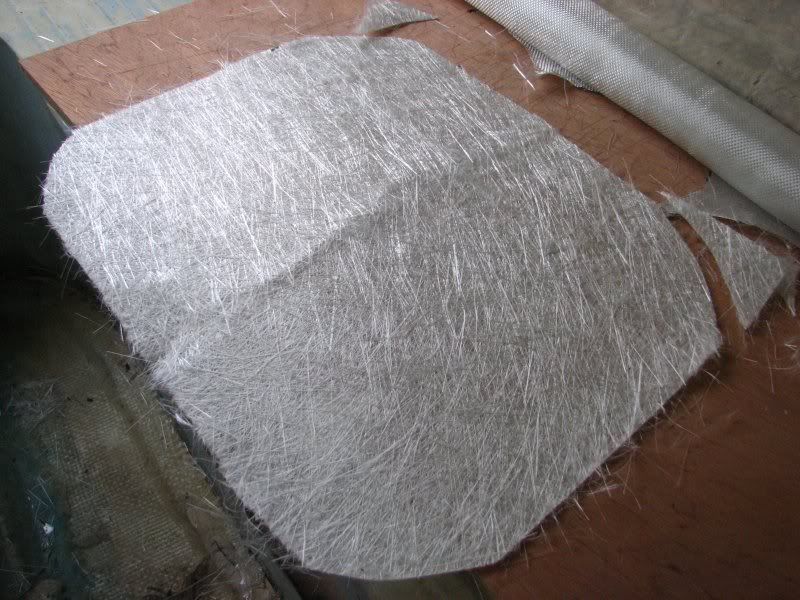
    21. I decide to cover the entire repair area in one large piece of csm. This will hide the two patches and add strength and stability to the repair and give me a nice sanding surface.
    Img_7142.jpg


    22. The cover csm wetted out with whitened epoxy
    Img_7145.jpg


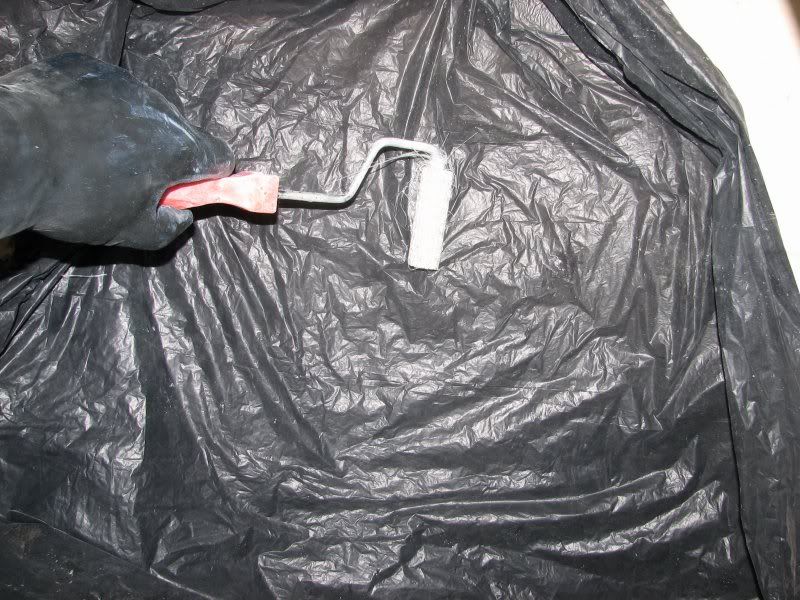
    23. I give it a run with the roller, I place an old bin liner down first to prevent strand lifting (That csm tends to lift with the roller when tacky).
    Img_7146.jpg


    24. The interior of the repair from anothe rangle.
    Img_7147.jpg


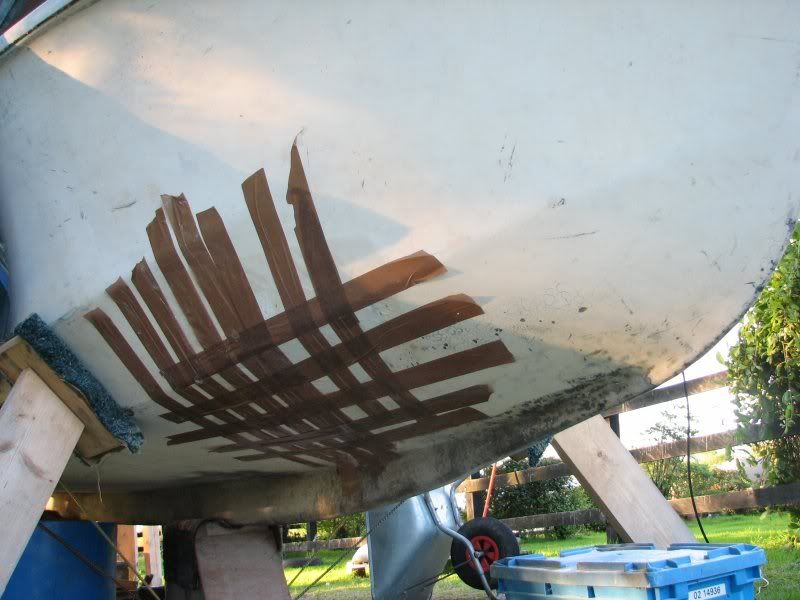
    25. I go back out side and remove my plywood backers because I dont want flat spots in the repair when it sets up. This area of the bow is naturally curved so I opt to run strands of tape to hold the patch clear plastic sheets nicely in place using just a little tension. It probably doesn't even need this but just in case it did decide to sag.....etc. The lengths of tape support the repair and allow it to conform more to the natural shape of the bow.
    Img_7150.jpg


    Note. The csm I am using is compatible with epoxy as it is powder coated.


  • Registered Users, Registered Users 2 Posts: 4,081 ✭✭✭sheesh


    I've been watching the thread for a while. (I love it!)

    your technique seems to have gotten so much more refined. great stuff.


  • Registered Users, Registered Users 2 Posts: 219 ✭✭ScabbyLeg


    Excellent tutorial, great to see all the steps and the final job looking so well. It's nice to see the inside of the cabin now since you spent so long working outside. It really strikes me how big and airy the cabin is. And now you know the roof isn't leaking :p

    Is the central keel there also hard wood bolted on like the other two? Hard to tell since it looks as though it blends smoothly into the bow shape.


  • Registered Users, Registered Users 2 Posts: 3,429 ✭✭✭dnme


    ScabbyLeg wrote: »

    Is the central keel there also hard wood bolted on like the other two? Hard to tell since it looks as though it blends smoothly into the bow shape.

    Central keel !!! ????? !!! (arrhghghghgh) :eek::eek::eek::eek::eek:

    lets not go there, I am terrified what may lie beneath. I have no idea how it's attached, what its made of etc. I dont think I can handle or afford exploring it. The old grp covering it seems a bit brittle so I might tab it with a layer of cloth.

    I posted about the same central keel a while back while installing new stringers. I had grinded out a mating surface along the keel length (topside) and ended up looking at a deep channel of old grey bondo or some kinda filler. I asked if anyone knew what it was or what the architecture of the keel fitting was, dont think anyone knew. Have a look for the post and you'll see.


  • Registered Users, Registered Users 2 Posts: 219 ✭✭ScabbyLeg


    Oh yea I remember now, hmm that is a strange one alright. You'd think they'd have it fixed with a bolt or something at either end.

    Still if I remember that bondo stuff was rock solid when you found it, so that can only be a good sign?


  • Registered Users, Registered Users 2 Posts: 3,429 ✭✭✭dnme


    ScabbyLeg wrote: »
    Oh yea I remember now, hmm that is a strange one alright. You'd think they'd have it fixed with a bolt or something at either end.

    Still if I remember that bondo stuff was rock solid when you found it, so that can only be a good sign?

    yeah, I drilled into it and it seems deep, as in like 2", that's about as far as I drilled. I then screwed my new keel timber into it using ss screws, sh whatever it is, it's taking the weight of the entire boat,... and me:D, its deep, dam hard and held my ss screws solid. But there's gotta be timber in there too, surely to god.


  • Closed Accounts Posts: 8 Fanintheattic


    gardoyle27 wrote: »
    think boards is acting the maggot it done that on me earlier too

    Sorry guys reposting was un-intentional. I was viewing the tread from my phone in a poor reception area and boards kept asking me to login. I did not realise that the posts were being re-posted. Sorry


  • Registered Users, Registered Users 2 Posts: 125 ✭✭Jack_regan


    1. Do I try again with my own efforts? means spending another 70 quid on a new sheet of plastic, and making up another oven (have to purchase ply, insulation etc). Then what if the results are crap again which I fear they will be, it will have been more cash down the toilet.

    2. Do I spend 300 with a fabricator who cannot guarantee the results? I just cant waste any more money on this issue.

    3. Do I reshape the windows, glasss in the wraparounds and end up with reasonably regular rectangular (rrr) apertures into which I should be able to make my own windows?


    Hi dnme

    Not sure if your ever up in Dublin but this crowd have a good lot of off cuts of polycarbonate for sale. Might be a bit cheaper than buying a full size sheet.

    http://goldstarplastics.ie/Polycarbonate-Acrylic-Plastic-Sheet/

    This is probably going to cause a bit of controversy but if I was in your shoes, I'd definitely be considering option number 3. I think you have got to remember that you are supposed to be on a budget, don't forget the end goal of getting out on the water the less you spend on doing the windows the more you'll have for the outboard,( I know where I'd prefer to be spending my money!)

    I'm guessing you probably have enough resin and mat left over to do the glassing in job, and if you manage to get a couple of off cuts of polycarbonate from somewhere for say €20, sounds better than €330!

    I know the purists won't think it's a good idea but there not the ones paying for it, you are! I really think you've spent enough money on the windows so far with the previous experimentation.

    Keep it simple, trust me your life will be so much easier, plus it will make your Norman 17 stand out from the crowd. I think once the job is done and the rectangular windows are in you'll forget what all the fuss was about. Lets not forget that you only paid €530 for the whole boat. I honestly can't see how you could then justify spending €330 for two windows.

    Why not tape up the windows with a bit of cardboard to the shape you think you would be able to make yourself and post a picture and see what others on the forum think of the new shape. I don't think it will spoil the visual appeal of the boat myself.

    And if in a few years time when we've all forgotten about the recession and you want to revert to the wraparounds you can always cut them out again!

    Anyway keep up the good work.

    P.s. I think there is only one name for the boat

    "Dnme"

    (Do Not Mention Epoxy)


  • Registered Users, Registered Users 2 Posts: 3,429 ✭✭✭dnme


    Hi Jack,

    Many thanks for the post. Regarding money, it's a hit and miss thing with me. I am poor but happy. I don't drink or smoke so my only vice is this boat. I actually bought this boat for the experience of repairing it. If it never gets on the water I won't mind. I just love getting out there on a day and pottering about at it. I use it as a cure for various ills. Infact I'll be sorry when/if it gets finished.:)

    If I need to purchase a sheet of some material, it's not really a problem. Also, epoxy.......I'm going through it like water. I update my supply about every 2 weeks from the crowd up north. They never have what I want in stock though. This week I wanted to bite the bullet and order an 11kg kit - not in stock. So I had to resort to another 3kg (quick hardner as they had no slow :eek:).

    WRT windows, I am a perfectionist (to a degree) but I really am running out of options with these bitches.
    Have a look at what this person did to get his windows (similar boat in UK). http://www.normanboats.co.uk/topic.asp?TOPIC_ID=6373 Looks looks like the boat is taking part in some bondage S&M game:D (no offence grandad if you're watching :D)

    Photo0811_1.jpg


  • Registered Users, Registered Users 2 Posts: 748 ✭✭✭It BeeMee


    big zeb wrote: »
    ... I can only give you a suggestion or two for a name for your legacy of patience. I suggest "The Enemy Within" (dnme within get it?)

    Until it floats, you could call it "dnme without" :D:D


  • Advertisement
Advertisement