Advertisement
If you have a new account but are having problems posting or verifying your account, please email us on hello@boards.ie for help. Thanks :)
Hello all! Please ensure that you are posting a new thread or question in the appropriate forum. The Feedback forum is overwhelmed with questions that are having to be moved elsewhere. If you need help to verify your account contact hello@boards.ie
Hi all! We have been experiencing an issue on site where threads have been missing the latest postings. The platform host Vanilla are working on this issue. A workaround that has been used by some is to navigate back from 1 to 10+ pages to re-sync the thread and this will then show the latest posts. Thanks, Mike.
Hi there,
There is an issue with role permissions that is being worked on at the moment.
If you are having trouble with access or permissions on regional forums please post here to get access: https://www.boards.ie/discussion/2058365403/you-do-not-have-permission-for-that#latest

A Lean-To Tale (with pics & maybe vids)

124

Comments

  • Registered Users, Registered Users 2 Posts: 28,404 ✭✭✭✭vicwatson


    Light fitting? oh god yeah. Good man, I totally forgot. I'll have to take it down tomorrow and just terminate the cable to a junction box. I'll go with a fluorescent tube or two.

    I just couldn't see what happened to it from those pics from yesterday is all.

    You'll use this supply of electricity to power the tubes I guess.
    Re-tarps, way ahead of yousmile.gif

    Great minds think alike - Fools seldom differ :p:p:D


  • Registered Users, Registered Users 2 Posts: 3,418 ✭✭✭dnme


    Day 11

    During a wet morning, as I sat in and waited for a delivery of pvc sheets; the phone rang. It was Maura from Reynolds telling me the stuff would not be delivered today. Sod that!!! Out with a socket set, out with the front seat of my car, and off to Carrick I went. This time we managed to fit the sheets in. I got my 20 quid back and headed home with a open boot, held down onto a pillow which in turn was held to the 14 sheets of roofing.

    After throwing up the first sheet, I wasn't happy with the way the rafters overhung, if I wanted to install a gutter for example, It would be tricky. So down with the sheet, and then I spent the next three hours trimming the rafters flush with the last runner. I also took the time to add a little decorative detail to the rafter ends....and I notched in the outer runner. It looked ridiculous un-notched compared to the others. The job looks better now, and my head is happier and easier with it too.

    Then on to the pvc sheets. I started at the back door. This is a complex area so there is cutting to be done. Mother of jesus can anyone please tell me.....how do you cut this stuff? I found it likes to crack easy enough. You have a saw blade whizzing and all of a sudden there's a crack 4-6cm long perpendicular to the cut. It's scary, maddening.......JESUS!!!!!!!!!!!!! How do you cut this stuff?

    I tried a jigsaw. Big mistake!. I went back to the circular saw. It seems to be the lesser of all evils. I found that holding back the guard and plunging the blade into the material yields the best results. I cut all the convex peaks, then finish the concave pieces with a knife or blade hand held. Nerve wrecking I can tell you. How would you go about cutting this at an angle?

    That Cuprinol stuff has the place destroyed. Everywhere is oily and stained. Me, clothes, tools, yard etc. Its smearing all over the sheets too. Just another of my many mistakes and very frustrating. My hands and arms are stained to the extent that I look like a girl from Essex called Debbie who does whatever it takes to cope with poor British summers.


    I can waits na'more! Go and get the dam sheets myself. God bless the old lift-back Corolla. You could get a snooker table into it.
    Img_7923.jpg


    Redoing the rafters and outer rail. A little decorative chamfer and round over makes the job look so much nicer.
    Img_7926.jpg


    Also notched in the outer runner to match the others. (See I told you I'm a novice)
    Img_7927.jpg


    Starting sheet #2 or is it #3.
    Img_7928.jpg


    A bitch of a corner to work in.
    Img_7929-1.jpg


    I cut nicely in to the L wall.
    Img_7930.jpg


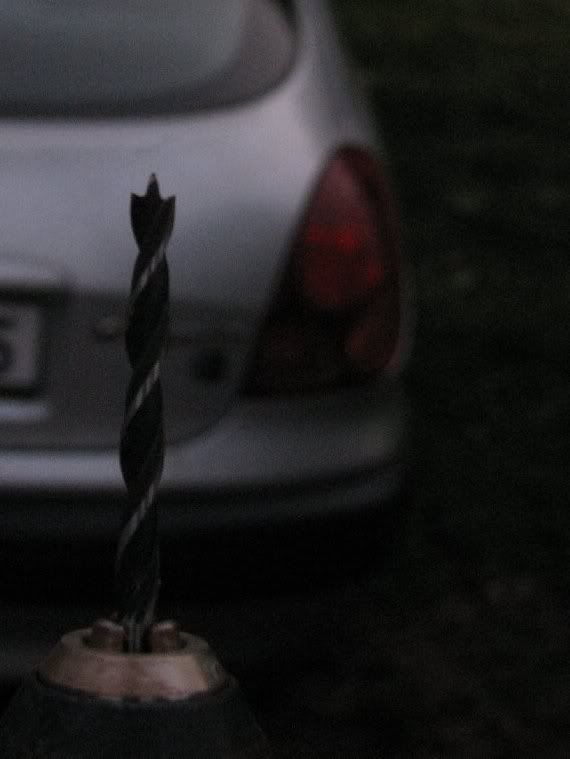
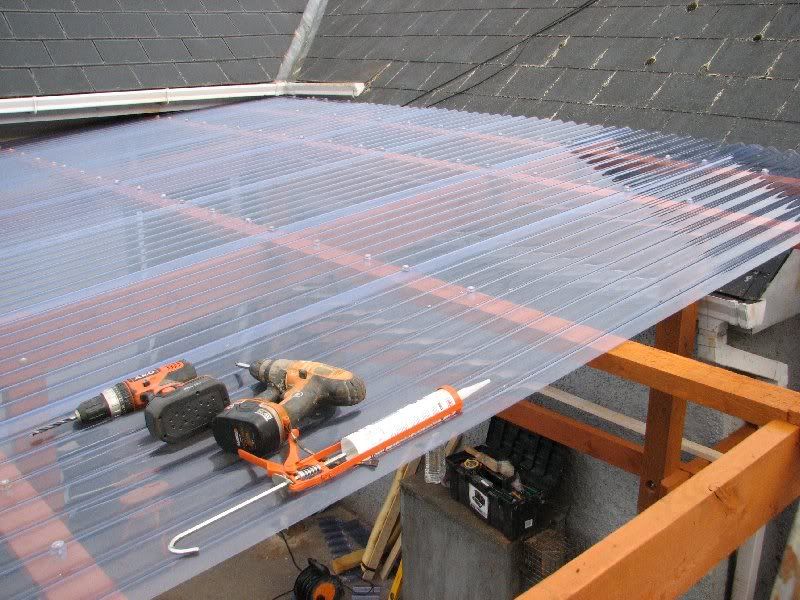
    I found drilling the sheets in place was the easiest, provided you use a wood dowel bit. It has a sharp point that gains immediate purchase to the shiny convex surface of the pvc.
    Img_7933.jpg


    The sheets have 9 convex peaks. So I am confused as to how to evenly get three or even 4 fixings across. Bear in mind we need a fixing in the first and last peaks as each side accommodates an overlap, but that leaves you with 7 peaks to either 2 or 1 fixings. What I ended up doing was 1 2 3 4 5 6 7 8 9/1 2 3 4 5 6 7 8 9/1 but as you can see, this is not uniform. Is this ok? I can't figure out a better way....???
    Img_7931.jpg


    These are the sheets I'm using. I was thrilled when I saw this. These are heavy duty sheets. Normally you see this stuff in 0.8mm and that's what I thought I had bought. Boy did I get good value on these.
    Img_7935.jpg


  • Closed Accounts Posts: 902 ✭✭✭DoneDL


    great thread:D


  • Registered Users, Registered Users 2 Posts: 7,562 ✭✭✭10-10-20


    I just got the same sheets for a somewhat similar lean-to I'm doing. I'm laying the concrete at the moment. It's going to be my wood-store for the winter. Getting good ideas here (like using preservative... :)) so keep up the good work.


  • Registered Users, Registered Users 2 Posts: 28,404 ✭✭✭✭vicwatson


    Then on to the pvc sheets. I started at the back door. This is a complex area so there is cutting to be done. Mother of jesus can anyone please tell me.....how do you cut this stuff? I found it likes to crack easy enough. You have a saw blade whizzing and all of a sudden there's a crack 4-6cm long perpendicular to the cut. It's scary, maddening.......JESUS!!!!!!!!!!!!! How do you cut this stuff?

    It could be sloowwwww but how about with your dremmel that you got in Lidl or Aldi for the boat project ? It should give you a nice neat cut without all the cracking and vibration.

    Looks the danglies !!!

    dnme - check out page 8 here for "Working with Marvec PVC" -

    http://www.brettmartin.com/plastic-sheets/products/pvc/~/~/media/Files/Plastic%20Sheets%20Documents%20English/Marketing%20Documents%20English/marvec_rooflightandglazing_brochure_eng.ashx


  • Advertisement
  • Registered Users, Registered Users 2 Posts: 3,418 ✭✭✭dnme


    vicwatson wrote: »
    It could be sloowwwww but how about with your dremmel that you got in Lidl or Aldi for the boat project ? It should give you a nice neat cut without all the cracking and vibration.

    Looks the danglies !!!

    dnme - check out page 8 here for "Working with Marvec PVC" -

    http://www.brettmartin.com/plastic-sheets/products/pvc/~/~/media/Files/Plastic%20Sheets%20Documents%20English/Marketing%20Documents%20English/marvec_rooflightandglazing_brochure_eng.ashx


    That says and I quote
    To accommodate thermal movement, holes for screws must
    be 10mm (3/8") diameter for sheets up to 3.05m (10') and
    12mm (1/2") diameter for sheets up to 3.66m (12') long.
    (These figures assume standard PVC fixings are used.)
    Holes to accommodate nails in Miniature profile should be
    6mm (1/4") diameter. Failure to accommodate thermal
    movement will cause buckling or cracking of the sheet
    So does this mean I should be drilling 10mm holes? The fixing screws I'm using are 4mm. Please can someone tell me.


  • Registered Users, Registered Users 2 Posts: 365 ✭✭Gerard93


    To accommodate thermal movement, holes for screws must
    be 10mm (3/8") diameter for sheets up to 3.05m (10') and
    12mm (1/2") diameter for sheets up to 3.66m (12') long.
    (These figures assume standard PVC fixings are used.)
    Holes to accommodate nails in Miniature profile should be
    6mm (1/4") diameter. Failure to accommodate thermal
    movement will cause buckling or cracking of the sheet

    Could be totally wrong dnme, but your sheets are on a Lean to which is exposed and I think you have allowed for a small gap on the fixed wall side for Air movement, cannot imagine there will be much thermal movement on your fixture, with front and side exposed, the above guide could be referring to where the sheeting is covering an enclosed structure where there would be a 'heat' build up.... what do you think?


  • Registered Users, Registered Users 2 Posts: 3,418 ✭✭✭dnme


    I need to know either way. Someone here in the DIY forum might know. What size holes should I go with ? I'm currently drilling 6mm holes for 4mm fixing screws. Do I need to increase the size of the hole to 10mm? I need to know fairly urgently before I carry on any further.

    Also can anyone advise me on this...
    The sheets have 9 convex peaks. So I am confused as to how to evenly get three or even 4 fixings across. Bear in mind we need a fixing in the first and last peaks as each side accommodates an overlap, but that leaves you with 7 peaks to either 2 or 1 fixings. What I ended up doing was 1 2 3 4 5 6 7 8 9/1 2 3 4 5 6 7 8 9/1 but as you can see, this is not uniform. Is this ok? I can't figure out a better way....???


  • Registered Users, Registered Users 2 Posts: 28,404 ✭✭✭✭vicwatson


    Could be totally wrong dnme, but your sheets are on a Lean to which is exposed and I think you have allowed for a small gap on the fixed wall side for Air movement, cannot imagine there will be much thermal movement on your fixture, with front and side exposed, the above guide could be referring to where the sheeting is covering an enclosed structure where there would be a 'heat' build up

    +1 - I think you have sufficient open air space to prevent thermal movement (assuming they mean heat build-up), I think you are good on the 6mm holes, I certainly wouldn't go back over what you've done.

    If you were putting them on a lean-to in Spain - well.... but Ireland, nah I think you'll be ok. Panic over !

    Maybe to put your mind at ease and to be 100% you should give them a call in the morning before you continue -

    Brett Martin Ltd
    24 ROUGHFORT ROAD
    MALLUSK, CO ANTRIM
    BT36 4RB
    TEL: +44 (0) 28 9084 9999
    FAX: +44 (0) 28 9083 6666
    Email: mail@brettmartin.com


  • Registered Users, Registered Users 2 Posts: 3,418 ✭✭✭dnme


    any advice on spacing the fixings?


  • Advertisement
  • Registered Users, Registered Users 2 Posts: 28,404 ✭✭✭✭vicwatson


    I think they way you are spacing them is the best way.

    At the end of the day it's all about fixing them securely to the runners so the more fixings the better but as for uniformity........it's pure asthetics :)

    From the pics you posted they look solid as a rock. Hurricane Charlie couldn't lift them :eek:


  • Registered Users, Registered Users 2 Posts: 1,257 ✭✭✭Pete67


    I think the concern regarding the hole size relates to the thermal expansion of the sheets, which can be quite a bit even in a (supposedly) moderate climate like ours.

    It's a long time since I've had to do the calcs, but a quick google tells me that the coefficient of linear expansion for PVC is 50.4 x 10^-6 m/m/K so it should be easy enough to work out how much the sheet will expand if you make some assumptions:

    Lets say the coldest you are likely to experience is -20C, and the hottest +30C, so thats a possible 50C temperature variation.

    For a 10ft sheet (3048mm) that translates to an increase in length of (50.4 x 10^-6)*50*3048mm, or 7.68mm purely due to thermal expansion. So if one end of the sheet is fixed, then the other will move by nearly 8mm.

    If the center of the sheet is restrained, then either end will move by almost 4mm over that temperature range etc etc.

    However, right now it's approx 10C, so you are not too far from the mid-point of the possible temp range. So in colder weather the sheets will contract by just less than 4mm from their current size, and in very hot weather they will expand by just about 4mm. Again if the midpoint is restrained, the ends will move inwards by 2mm in cold weather and outwards by 2mm in midsummer. So an 8mm hole size seems about right for a 4mm fixing. Hope this helps.

    The wood also expands/contracts with temperature but only about by about 10% compared to the PVC.

    Edit - the suggested 8mm hole size assumes that each fixing is in the exact centre of its' hole in the PVC sheet, I guess the manufacturers recommendation for 10mm is to allow for some margin here. A quick phone call might be in order as vicwatson suggests.


  • Registered Users, Registered Users 2 Posts: 3,418 ✭✭✭dnme


    Pete67 wrote: »
    I think the concern regarding the hole size relates to the thermal expansion of the sheets, which can be quite a bit even in a (supposedly) moderate climate like ours.

    It's a long time since I've had to do the calcs, but a quick google tells me that the coefficient of linear expansion for PVC is 50.4 x 10^-6 m/m/K so it should be easy enough to work out how much the sheet will expand if you make some assumptions:

    Lets say the coldest you are likely to experience is -20C, and the hottest +30C, so thats a possible 50C temperature variation.

    For a 10ft sheet (3048mm) that translates to an increase in length of (50.4 x 10^-6)*50*3048mm, or 7.68mm purely due to thermal expansion. So if one end of the sheet is fixed, then the other will move by nearly 8mm.

    If the center of the sheet is restrained, then either end will move by almost 4mm over that temperature range etc etc.

    However, right now it's approx 10C, so you are not too far from the mid-point of the possible temp range. So in colder weather the sheets will contract by just less than 4mm from their current size, and in very hot weather they will expand by just about 4mm. Again if the midpoint is restrained, the ends will move inwards by 2mm in cold weather and outwards by 2mm in midsummer. So an 8mm hole size seems about right for a 4mm fixing. Hope this helps.

    The wood also expands/contracts with temperature but only about by about 10% compared to the PVC.

    Many thanks for a brilliant post.

    Jesus I have to go back, undo all that work and redrill those holes. good god!


  • Registered Users, Registered Users 2 Posts: 28,404 ✭✭✭✭vicwatson


    Jesus I have to go back, undo all that work and redrill those holes. good god!

    Sleep on that dnme.

    I really don't think it's going to make one iota of a difference.

    Pete67 says an 8mm hole is good for a 4mm fixing right? (great post BTW Pete67)

    Manufacturer says to drill a 10mm hole - for what size fixing - do they specify ???

    All I'm saying is how exact is the reality of the science in situ on YOUR roof?

    When I was much younger I fitted similar pvc corrugated to the roof of a shed, never thought about size of drill holes, never allowed for "thermal" expansion etc, infact I drilled them the size of the fixing :o

    They never cracked, warped or other and are still in perfect situ to this day. Ah the good ole days..;)

    Up to you of course but........


    Here's something to keep you awake all night (apart from the wind and rain ! ;-) )

    http://en.wikipedia.org/wiki/Coefficient_of_thermal_expansion


  • Registered Users, Registered Users 2 Posts: 3,418 ✭✭✭dnme


    vicwatson wrote: »
    Sleep on that dnme.

    I really don't think it's going to make one iota of a difference.

    Pete67 says an 8mm hole is good for a 4mm fixing right? (great post BTW Pete67)

    Manufacturer says to drill a 10mm hole - for what size fixing - do they specify ???

    All I'm saying is how exact is the reality of the science in situ on YOUR roof?

    When I was much younger I fitted similar pvc corrugated to the roof of a shed, never thought about size of drill holes, never allowed for "thermal" expansion etc, infact I drilled them the size of the fixing :o

    They never cracked, warped or other and are still in perfect situ to this day. Ah the good ole days..;)

    Up to you of course but........


    Here's something to keep you awake all night (apart from the wind and rain ! ;-) )

    http://en.wikipedia.org/wiki/Coefficient_of_thermal_expansion

    I'll probably leave the existing sheets alone and from here on, use 8mm.


  • Registered Users, Registered Users 2 Posts: 2,025 ✭✭✭blindsider


    dnme - you're doing a great job - keep it up!

    (We'll get you on RTE with Duncan yet! :D)


  • Registered Users, Registered Users 2 Posts: 3,418 ✭✭✭dnme


    Day 12

    I'm nearly there. I've only three sheets left to fit. As I feared, the sheets are skewing off of square to the rafters, so the last sheet will require a nightmare if a cut at an awkward angle along its length.

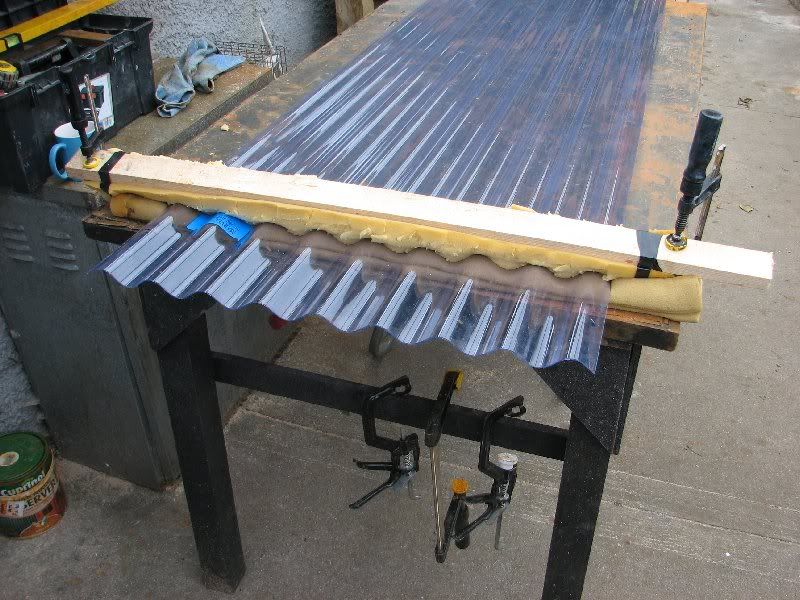
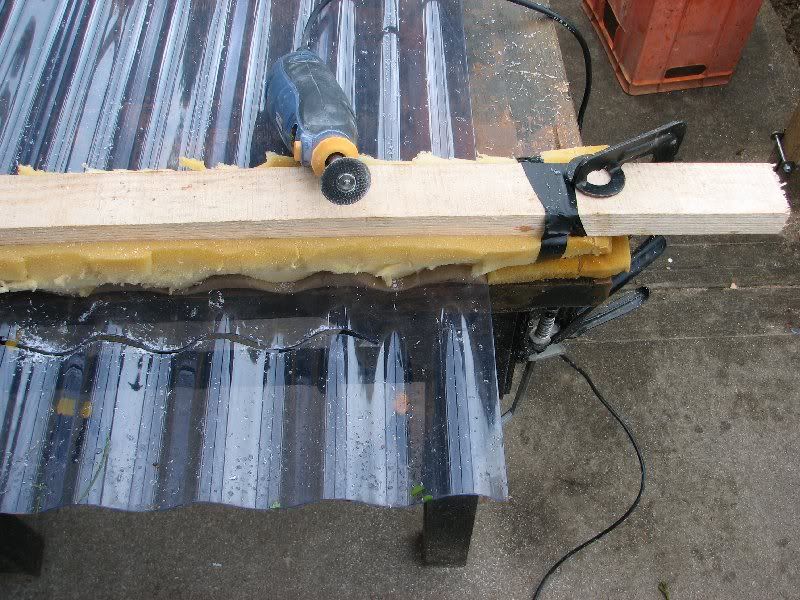
    I am finished with most of the cutting thank god. Today I tried making a clamp out of foam rubber on both the underside and top of the sheet. It helps a little when using the circular saw but there were still small cracks and chips. So thanks to a suggestion yesterday, I dug out the dremmel with one of the mini cutting discs and gave that a try. 110% success! That is the way to go. No vibration and I found that I can adjust the speed on the dremmel to introduce a slight melting which I think is ideal. The only problem with the dremmel is that you are using a cutting tool perpendicular to the direction of travel and it's not brilliant for directional accuracy. You can't for example use it along a straight edge etc.

    The feeling of having shelter is sweet. There were a couple of light showers today and I just sat there on a chair under the new roof, enjoying that glorious sound the rain makes on impact. I'm really looking forward to that sound when I'm in bed on cold rainy nights, then new roof being just outside my bedroom window. Apart from that, the day was beautiful weather wise. It was especially plesent being up there working at roof level and looking out at the vista before me. You see your neighbourhood from a whole new angle and notice things you never noticed before.

    I'm going to post a couple of videos. One purely for anyone who might be curious about the fixings and another showing the dremmel cutting. I have found that I am getting better with the fixings as I progress through the job. Today I have also taken to cleaning each sheet once it's fixed in place. I'm using a clean cloth dabbed in white spirit followed by a rub of kitchen towel. The difference in quality between today's work and yesterdays is noticeable.

    If you are going to build a leanto, purchase the fixings from Ebay. He sells these in 5 packs of 10, (50 for £6.99). That's about a 500% reduction on the price you'll pay in the shop. Delivery will take about 10 days on these to Ireland.


    Made a clamp of foam rubber. It helped somewhat but I was still left with small cracks and chips when using the circular saw.
    Img_7937.jpg


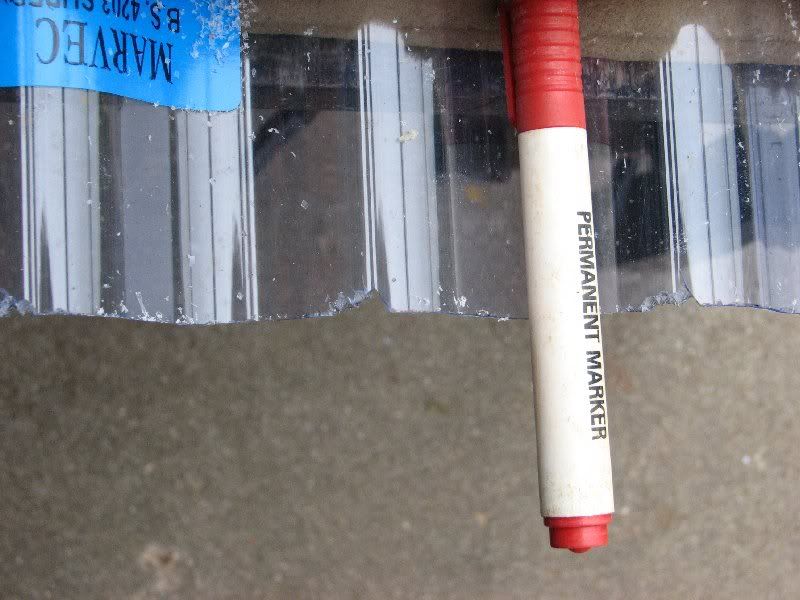
    From the above image, this was the result.
    Img_7940.jpg


    Tried the dremmel with mini cutting discs instead. This is the way to go. Perfect non-vibration cuts. Slight melting helps to cauterize the cut in a way.
    Img_7944.jpg


    Dremmel cut. Perfect apart from the line :D
    Img_7945.jpg


    Here's a video showing the dremmel in action. No fuss, no surprises. It cuts the stuff perfectly, easily, no vibration etc.


    Here's an image of the piece I just cut in the video.
    Img_7949.jpg


    Here's a little tip that really helped me. When I offer up a new sheet and get it placed just right, I clamp it to the previous sheet (very gently with loads of cushioning). This keeps it in place as I go about drilling and installing the fixings.
    Img_7947.jpg


    This is how far I am going in under the gutters
    Img_7961.jpg


    Progress, after lunch, time for a cuppa and a play with Honey.
    Img_7951.jpg


    Progress. Finished off this sheet and that's it for the night.
    Img_7964.jpg


    Here's a video of the fixings and whats involved with them.


  • Registered Users, Registered Users 2 Posts: 28,404 ✭✭✭✭vicwatson


    So thanks to a suggestion yesterday, I dug out the dremmel with one of the mini cutting discs and gave that a try. 110% success! That is the way to go. No vibration and I found that I can adjust the speed on the dremmel to introduce a slight melting which I think is ideal.

    More than welcome :D:p


  • Registered Users, Registered Users 2 Posts: 2,182 ✭✭✭alexlyons


    That, my friend, looks incredible! Its extremely well made, very precise, and the colors that come out in the photo make it look amazing!


  • Registered Users, Registered Users 2 Posts: 3,418 ✭✭✭dnme


    alexlyons wrote: »
    That, my friend, looks incredible! Its extremely well made, very precise, and the colors that come out in the photo make it look amazing!


    Thanks alex. I tell ya what, doing up a sketchup drawing made a big difference. It all seems to be coming out as it did on the plan. Sketchup forces you to measure and then measure again. I'd recommend anyone to take the time to draw up their project whatever it may be.

    Now having said that, I don't know how I'm going to terminate/trim the last sheet. Its gonna hit at a bit of an angle.


  • Advertisement
  • Registered Users, Registered Users 2 Posts: 28,404 ✭✭✭✭vicwatson


    dnme - your video up above 12a, do you need to put a silicone top on or are you just doing that to make them very secure and waterproof ?

    Looks the business fair play to you. You have now to think back on the times you thought about throwing in the towel, look at what you've acheived with dedication. Brilliant stuff. Well done you and fair play for not giving up.


  • Registered Users, Registered Users 2 Posts: 3,418 ✭✭✭dnme


    vicwatson wrote: »
    dnme - your video up above 12a, do you need to put a silicone top on or are you just doing that to make them very secure and waterproof ?

    You've answered your own question vic. Silicone is definitely recommended. I inject it into the hole, down into the stand off, then when I screw the cap down, I smear the squeezed out remainder to fill the cap cover. You need to waterproof these holes and protect the screws.


  • Moderators, Motoring & Transport Moderators, Sports Moderators Posts: 6,337 Mod ✭✭✭✭fergal.b


    bravo_smiley.gif


  • Registered Users, Registered Users 2 Posts: 3,418 ✭✭✭dnme


    Kat1170 wrote: »


    Kat, I actually think a saw would be led astray at shallow angles by the profile of the sheet. If I could draw a straight line at an angle on the sheet, I might have a go with the dremmel and a belt sander to smooth and even out. I'll try it on scrap pieces first.


  • Registered Users, Registered Users 2 Posts: 542 ✭✭✭5T3PH3N


    Have you got an angle grinder or access to one? I had to do the same thing last year with about 8 sheets(crazy angles everywhere!)and I flew through them with a grinder. Gives a clean, precise cut once you manage to actually mark out the sheets correctly!


  • Registered Users, Registered Users 2 Posts: 3,418 ✭✭✭dnme


    5T3PH3N wrote: »
    Have you got an angle grinder or access to one? I had to do the same thing last year with about 8 sheets(crazy angles everywhere!)and I flew through them with a grinder. Gives a clean, precise cut once you manage to actually mark out the sheets correctly!

    I have one yeah. I suppose its just a bigger version of the dremmel, same material used on the cutting discs. I think it might be easier to control the dremmel though. I'll give it a go on scrap pieces.


  • Registered Users, Registered Users 2 Posts: 2,921 ✭✭✭2 stroke


    I know the anglegrinder trick myself, it works well with a stainless steel disc on a mini grinder. However I would never advise anyone to use an anglegrinder, for something it wasn't intended for, on a public forum. One important bit of safety advice, destroy the disc afterwards, don't be tempted to use it again.


  • Registered Users, Registered Users 2 Posts: 3,418 ✭✭✭dnme


    This is what I'm left with.

    175594.jpg

    It looks straight in the picture but it's not. The rafter tapers away as you go back. What would you do? Will I install the last piece and allow say a 6" overhang? I have about that much to play with if you look at the runner closest to you (bottom of image). Perhaps overlap the sheet by as much as it takes to avoid cutting at all? I could then trim the remaining runners to it!

    What do you think?


  • Advertisement
  • Registered Users, Registered Users 2 Posts: 2,182 ✭✭✭alexlyons


    dnme wrote: »
    Perhaps overlap the sheet by as much as it takes to avoid cutting at all? I could then trim the remaining runners to it!

    personally i'd do this. gives a good coverage, and allows for a uniform finish


  • Registered Users Posts: 748 ✭✭✭It BeeMee


    +1
    Also it save you the hassle of cutting the last sheet.
    And it's not as though the bit you cut off will be of any use anywhere else.


  • Registered Users, Registered Users 2 Posts: 28,404 ✭✭✭✭vicwatson


    personally i'd do this. gives a good coverage, and allows for a uniform finish

    +1

    Plus the fact that it will give it extra strength there where you'll need it most - at the end. Should be stronger because of potential updraft.

    Overlap is good.


  • Registered Users, Registered Users 2 Posts: 789 ✭✭✭Samoa Joe


    Over lap it as you will be able to use the extra peaks in case you damage the end of the sheet.


  • Closed Accounts Posts: 407 ✭✭LLU


    +1 for overlap.

    That would be a very long cut to have to make and if you're talking about 6 inches then it's only a few more peaks. Do you still have to cut a bit out of the upper end to accomodate the down pipe?


  • Registered Users, Registered Users 2 Posts: 28,810 ✭✭✭✭looksee


    How long before a washing line appears under it?

    Great job btw!


  • Advertisement
  • Registered Users, Registered Users 2 Posts: 519 ✭✭✭harry21


    The overlap idea seems the best.

    Just to be different, and thinking back to the perspex windows on the boat, I wonder if it would be possible to return the sheeting downwards along the outer rafter to give it extra protection.

    But how would you bend the sheet?


  • Registered Users, Registered Users 2 Posts: 3,418 ✭✭✭dnme


    Stand by for breaking news.......:cool:


  • Registered Users, Registered Users 2 Posts: 2,921 ✭✭✭2 stroke


    You've reached the stage that would have me kicking myself. If you had doubled your overlap on each sheet, you may have worked out better at the end, and your screws would have been evenly spaced I think. (I'm just home from the pub).
    Best thing to do now is overlap and trim timber to suit.


  • Registered Users, Registered Users 2 Posts: 3,418 ✭✭✭dnme


    Day 13

    newsflash.jpg

    My new(ish) Lenovo laptop was falling apart. The left hinge broke away and started to rip the plastic around it. So I rang Lenovo during the week and they came and carted it off for repair. That means I have had to dig out my old Acer. This thing is on it's last legs. It has suffered 4 years of living with me. In that time I have had it completely apart three times. Last time was to install a third wi-fi antenna inside the screen casing. When I opened it up that time, I broke the coupling that accepts the keyboard ribbon. So last night, I had a go at repairing that. It's now held in with a piece of card covered in tape. It works ok but every now and then it misses a key press:D so bear with me on this post.

    Well the job is done. There's now a flaming lean-to hanging around at the back of my house. Where the hell did that come from? It's wierd! Like a dream. I didn't do it, or so it seems.

    In the end I went for the overlap. The last sheet overlaps the predecessor by about 4 or 5 rows. It sticks out about 6-8 inches from the gable wall which is very exposed so I went to town with the fixings. One every second peak across all four runners (20). Someone above asked if I had to cut around the down pipe. Yes indeed I did. It was very simple. I just offered up the sheet as far as the down pipe. Then marked it at each side of the pipe. Measured the difference between this sheets depth, and it's neighbours, and that gave me my cut line. The dremmel made the cut itself a breeze.

    It occurred to me today that I should have doubled up on the overlaps right across the job. I should have overlapped two rows instead of one. I read a pdf today recommending this for my particular fall-off angle. It would have cost an extra 3 sheets or so but maybe I should have done it that way regardless. As it is, I'll see how the single overlaps behave. I did double the overlaps for the sheets today, the ones getting near the gable where it is extra exposed to the wind, and of course the last one is as discussed above.

    Lessons:
    ========
    Research, Read up on the product. I failed to do this and it remains to be seen if I am lucky.

    Buy the heavy duty sheets. The ones in the large chain stores are very thin (0.8mm). From working with the heavier stuff (1.3mm) I am really glad that I ended up with that weight (a happy accident).

    Cut the sheets with a dremmel and those small cutting discs, trust me!

    Use silicone with the fixings.

    Some Builders providers are not nice places. Don't take any shjt! You're a customer spending your hard earned cash.

    Keep everything clean and retail packed. At the end of the job, you can bring unused materials back for a refund. (I got 40 quid back yesterday).

    Good ladder(s), and tie them up top with a bungee chord.

    Plenty of tea.

    Don't work in the rain or bad weather, work quality plummets as does your mood.

    Shop around and haggle the be-jesus out of everyone.

    Never trust women!:cool:

    Get a dog.:p

    Give up the fags.:mad:

    Stop reading boards.ie:confused:

    Do it yourself!!!!!:)


    This is where I left you
    Img_7965.jpg


    I decided to overlap the last sheet deep into its predecessor, this gave me this edge and negated the need for any cutting.
    Img_7966.jpg


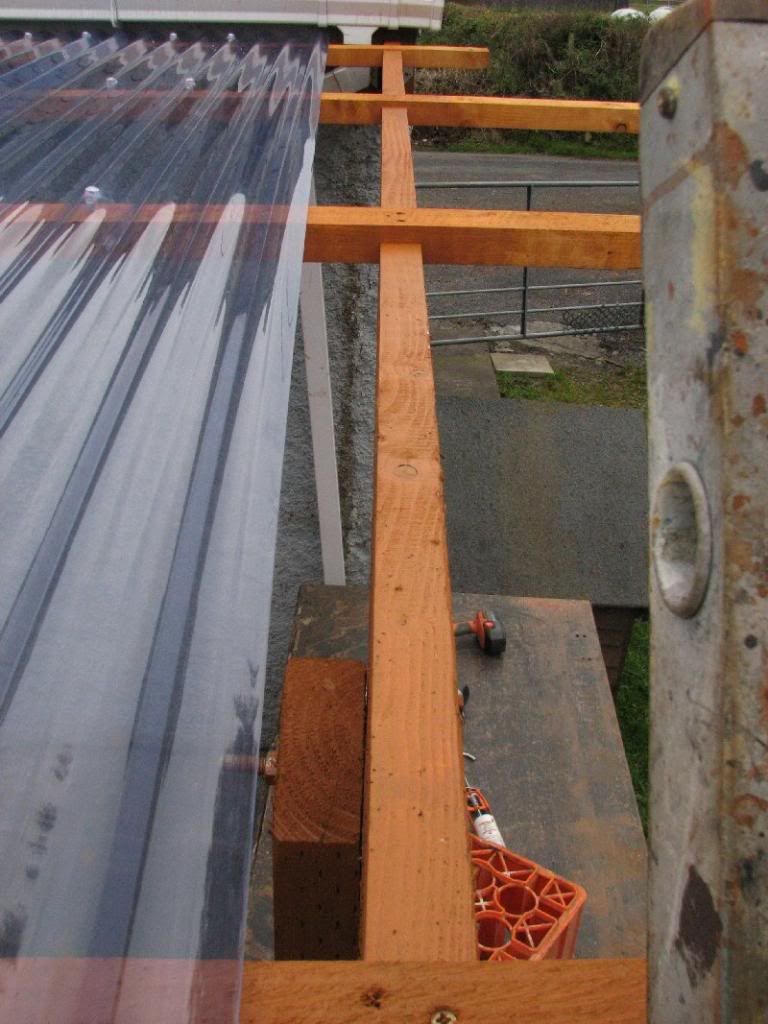
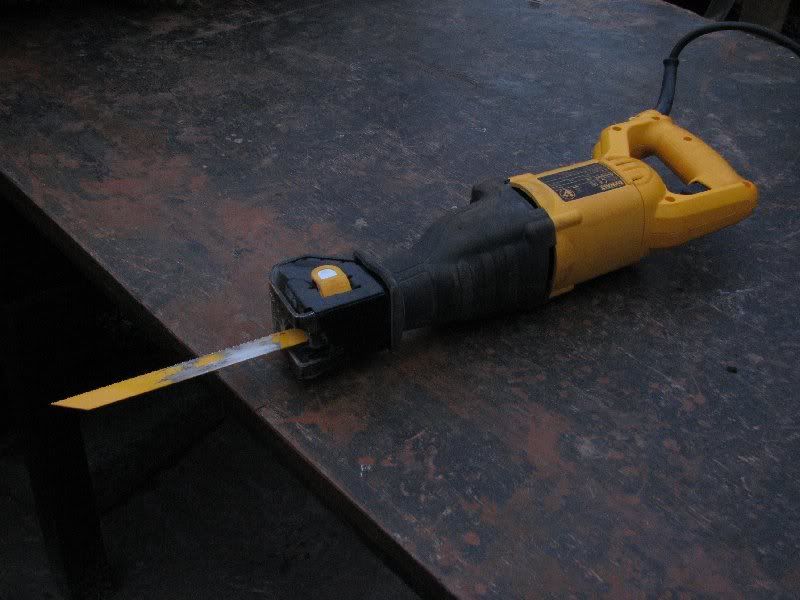
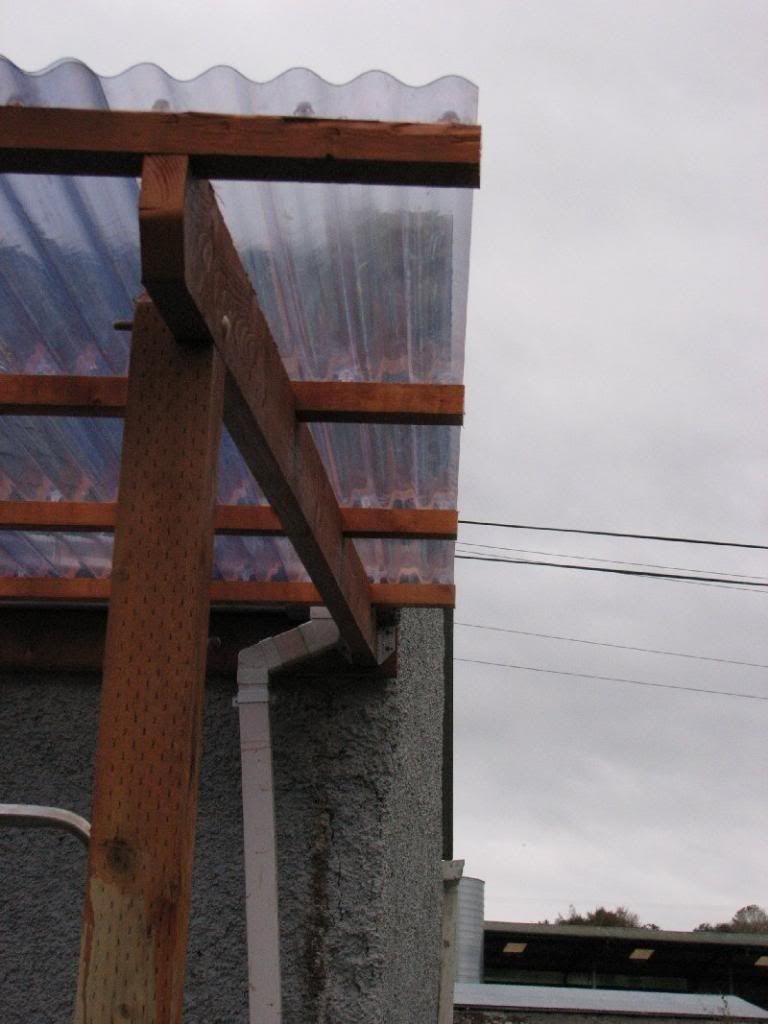
    Used this puppy to lob off the runner ends flush to the pvc shet. I love that tool!
    Img_7969.jpg


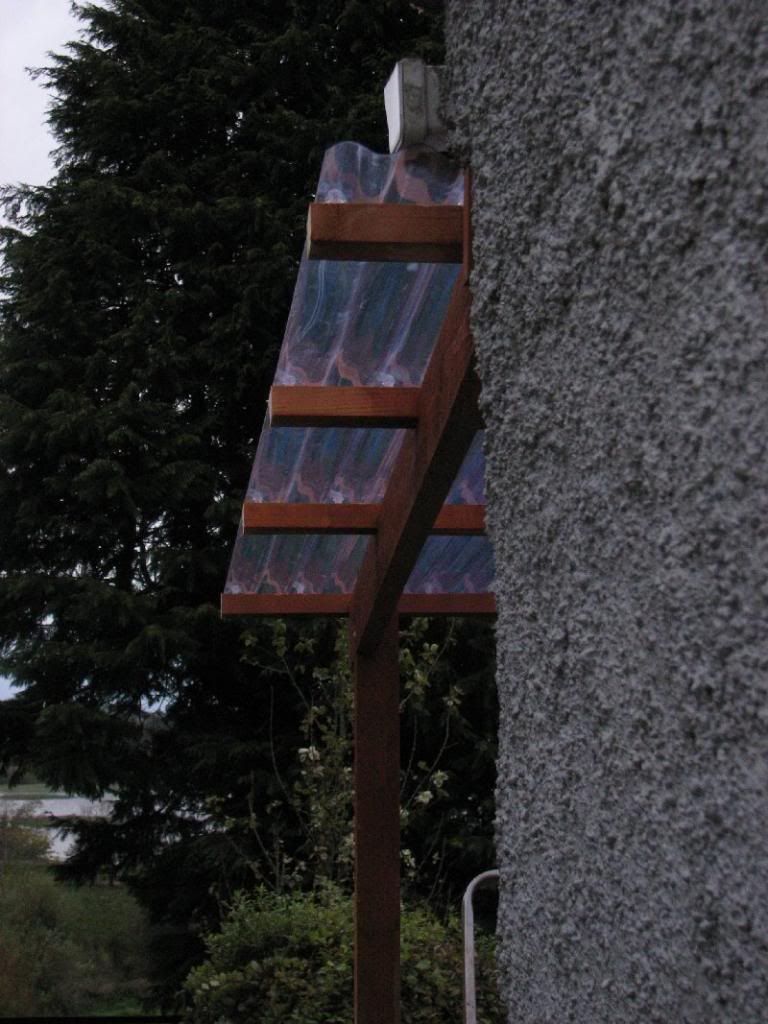
    As you can see, the roof extends beyond the gable by 6-8 inches. You cannot notice the taper at all. It would look better with a rafter trim along the outer edge but this will have to do for now. I used 20 fixings in the last sheet. If it goes, the house goes!
    Img_7968.jpg


    Look at it there! I have since dolloped the runner end grain with preservative
    Img_7967.jpg


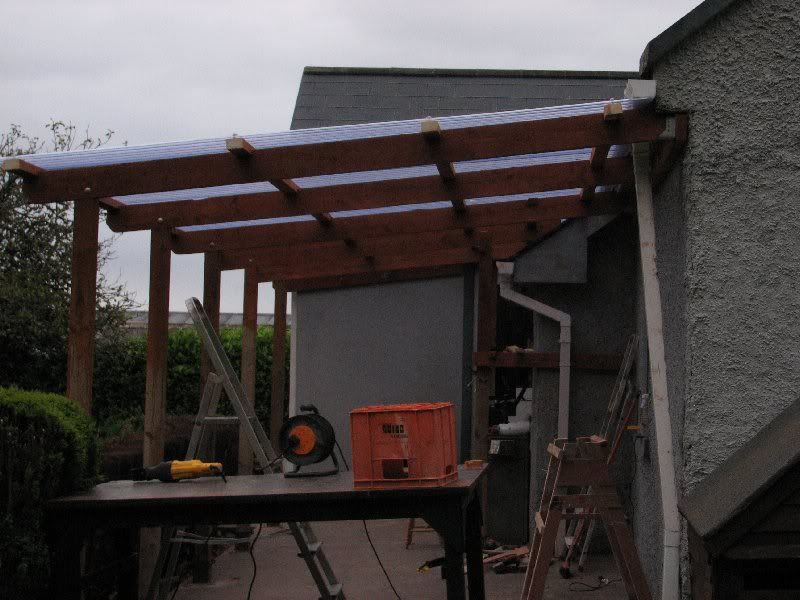
    It was too dark for any more photos. I might take a few tomorrow or perhaps a video to show the final look. All I have left to do now is get the gutters re-fitted properly. I'll probably have to buy one or two extension pieces to make them fit. I bought a standard outside bulkhead light today along with an exterior junction box. I'll fit that near the back door and then eventually get a 4ft double fluorescent light for over the boat.


  • Registered Users, Registered Users 2 Posts: 1,257 ✭✭✭Pete67


    Superb job dnme, looking forward to seeing the boat tucked in there!


  • Advertisement
  • Registered Users Posts: 689 ✭✭✭wush06


    Looks great dnme well done.


  • Registered Users, Registered Users 2 Posts: 3,418 ✭✭✭dnme


    Just looking at the 9oc news. Heavy rain on the way.....I can't wait! Bring it on. :D:D:D


  • Registered Users, Registered Users 2 Posts: 1,167 ✭✭✭TopTec


    Nice neat job dnme. Job satisfaction eh!

    You are like a kid with a new bike. smile.gif

    Promise that you will do a recording of a rainstorm hitting that?


    TT


  • Registered Users, Registered Users 2 Posts: 2,182 ✭✭✭alexlyons


    Really, really great job.
    After all the on going work on the boat, the pain, hassle and frustration, no to mention the extremely successful work so far, it's really brilliant to see this project complete, or at least 98% complete. It's usable almost to the max, it needs a light etc like you said and there may be a small snag list, but its done.

    Now, transfer this feeling and great sense of achievement and pride over to the boat thread, and imagine what that will feel like when you get the boat done. You have a great asset now to make the restoration much more enjoyable and easier to achieve. It's really great to see this complete and as professionally done as it is.

    You're some man, and well done again.


  • Registered Users Posts: 748 ✭✭✭It BeeMee


    dnme wrote: »
    Just looking at the 9oc news. Heavy rain on the way.....I can't wait! Bring it on. :D:D:D

    Be careful what you wish for...:D

    Great job, dnme.

    On behalf of Honey, I would ask you move the kennel back in before the rain hits...


    TopTec wrote: »
    Promise that you will do a recording of a rainstorm hitting that?

    A new intro to "In from the cold" perhaps...
    Just don't reverb the bejaysus out of it :cool:


  • Registered Users, Registered Users 2 Posts: 3,418 ✭✭✭dnme


    It BeeMee wrote: »
    On behalf of Honey, I would ask you move the kennel back in before the rain hits...

    She's never used that kennel. She only sheepishly goes into it if I tell her to, and at that, shes back out again after 10 seconds. She's too clever. The house is much warmer and more comfy. That dam kennel is in the way tbh. Might put it on adverts.


  • Registered Users, Registered Users 2 Posts: 519 ✭✭✭harry21


    Well done dnme, great job....


  • Registered Users Posts: 219 ✭✭ScabbyLeg


    Well you flew through that, some job.

    You should post a photo of the new setup from down the garden like in the first photo in the thread so we can compare! It's only when I look at the PVC roof of it that I realise what big an area you have covered now, fair play.


  • Registered Users, Registered Users 2 Posts: 28,404 ✭✭✭✭vicwatson


    You should post a photo of the new setup from down the garden like in the first photo in the thread so we can compare!

    Yes +1

    Would love to see the before and after pic.

    Congrats on a job well finished dnme. You can have a party ANYtime now - no excuses ! Don't forget us all :D

    Edit - also dnme - does it feel really solid? to give it a shake - does it feel rock solid? It looks it anyways


  • Registered Users, Registered Users 2 Posts: 2,921 ✭✭✭2 stroke


    Well done, but I think to finish the job the ends of those runners need a little decorative chamfer.


  • Advertisement
Advertisement