Advertisement
If you have a new account but are having problems posting or verifying your account, please email us on hello@boards.ie for help. Thanks :)
Hello all! Please ensure that you are posting a new thread or question in the appropriate forum. The Feedback forum is overwhelmed with questions that are having to be moved elsewhere. If you need help to verify your account contact hello@boards.ie

Your current / planned brews

Options
1293032343557

Comments

  • Closed Accounts Posts: 9,828 ✭✭✭gosplan


    Quick question. Thinking about giving some home-brewing a try, gonna try with a with a basic pale ale starter kit but then dry hop the **** out of it to get some decent flavour into it. Is this likely to work, or am i just wasting my time (and hops). Are starter kits really much easier, or am I just better off buying all the stuff separately and jumping in at the deep end?

    I can't tell you about the deep end but I've gained a lot from doing kits the last two years. 6 in total.

    There are some options and a few things that can go wrong, a few more with dry hopping.

    It's worth it just to get used to half the process, then move up.

    Tbh though I've never heard of anyone that made a kit first and found it a waste of time.

    The bulldog four fingered jack pale ale seems good and comes with the dry hops for you.


  • Registered Users Posts: 718 ✭✭✭calnand


    I got kegs off alealex on adverts, really nice guy sorted me out with everything I need, just have to find a suitable fridge.


  • Registered Users Posts: 745 ✭✭✭baron von something


    Brewday looms and I'm itching to let loose and create my own IPA but I'd like a bit of advice on my base malts.i have 3kg of light LME,1kg of wheat DME and 1 kg of crystal grains.do you think this might be a bit much,maybe just use half the crystal?

    i plan on using 3 varieties of hops at different intervals and to dry hop


  • Closed Accounts Posts: 2,592 ✭✭✭drumswan


    Brewday looms and I'm itching to let loose and create my own IPA but I'd like a bit of advice on my base malts.i have 3kg of light LME,1kg of wheat DME and 1 kg of crystal grains.do you think this might be a bit much,maybe just use half the crystal?

    i plan on using 3 varieties of hops at different intervals and to dry hop

    Put your ingredients into beersmith or brewersfriend and see


  • Registered Users Posts: 4,251 ✭✭✭KeRbDoG


    calnand wrote: »
    I got kegs off alealex on adverts, really nice guy sorted me out with everything I need, just have to find a suitable fridge.

    Ah, should have checked adverts :) gent, asking the lad now if he has more + other kit


  • Advertisement
  • Closed Accounts Posts: 1,484 ✭✭✭Elbow


    I did a bit of experimenting over the weekend.....

    c080bea4-392e-4e00-95e8-65082cd07ab8_zps39981c73.jpg

    Only time will tell how successful it was but the wort tasted acceptable so i'm hopeful of a good result :o

    OG was 1.040


  • Closed Accounts Posts: 14,748 ✭✭✭✭Lovely Bloke


    Brewing up a New Zealand IPA tomorrow, got Pacific Jade and Wai Tai in our last order, can't wait for it to be drinkable.

    Also brewing Red Ale #5.

    Bottling the Blue Moon-clone and a Red Ale #4 tomorrow too.


  • Registered Users Posts: 19,309 ✭✭✭✭alastair


    Bottled my Belgian Christmas Ale the week before last, along with a Vanilla and Chocolate Milk Stout. Tasted the stout at the time and it seems to be okay - although too sweet with the priming sugar. The Ale won't be ready til, eh, Christmas.

    Have a Coopers two-can porter on the go at the moment (a can of stout and a can of dark ale, with a can of LME). I'm going to cold-brew 250 grams of coffee beans that I'm roasting tomorrow, and add when bottling in a couple of weeks.

    Next up - a double dose of BruPak "Beers of the World" Steam Beer


  • Registered Users Posts: 8,146 ✭✭✭Ronan|Raven


    I was planning on kegging the Coopers IPA I put on two weeks ago but thanks to an order I placed a few days ago with HBW not shipping with vital new seals I can forget about that. The misery of bottling will have to be done instead. ( I know I could leave it for another while but I need the fermenter..)


  • Registered Users Posts: 19,309 ✭✭✭✭alastair


    Brupak Steam beer now in the fermenting fridge. I only noticed today that the yeast for this was labeled as a lager yeast (aren't steam beers supposed to use ale yeasts?). So it's gone in fridge at 13* as per kit instructions.

    Coconut porter up next, or possibly a Black Rock bock.


  • Advertisement
  • Registered Users Posts: 1,557 ✭✭✭Knifey Spoony


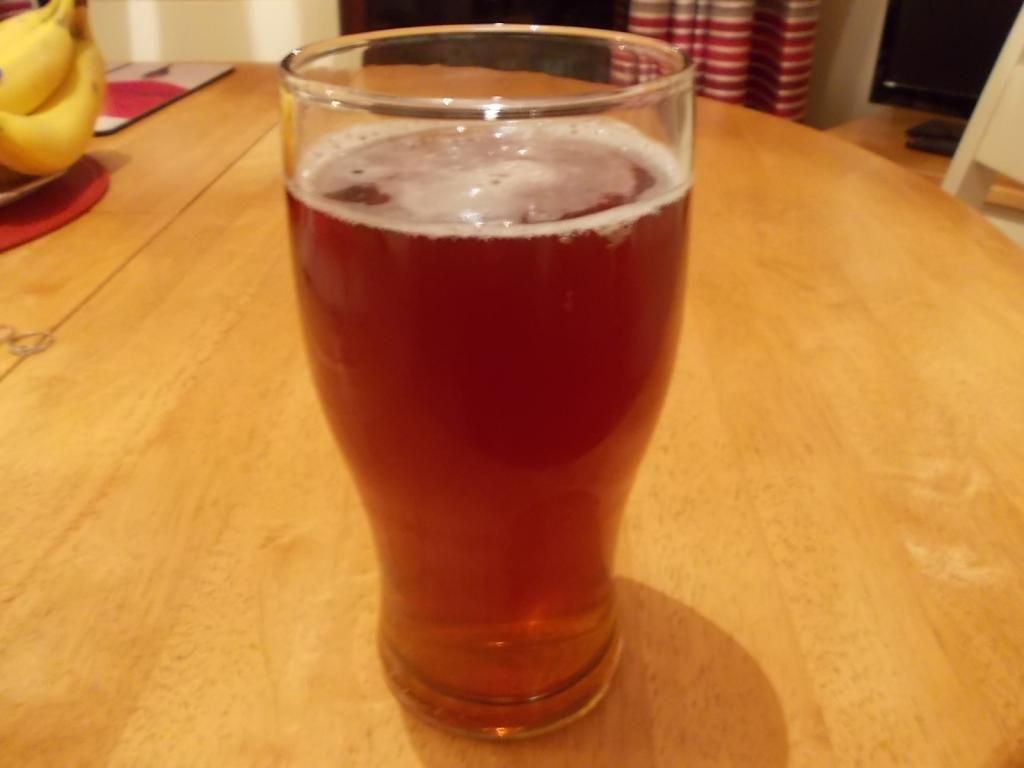
    I cracked open the first bottles of my first extract brew this weekend. It is an American style, single hop pale ale, brewed and dry hopped with Amarillo. It is pretty damn tasty. It has a sweet aroma of caramel and sweet citrus fruits (tangerines, red grape fruit). The taste is more of the same sweet citrus fruits which leads into a smooth lasting bitterness, nicely balanced by the caramel malts. It tastes what I expect a pale ale to taste like!

    DSCN1693_zps2a332b94.jpg

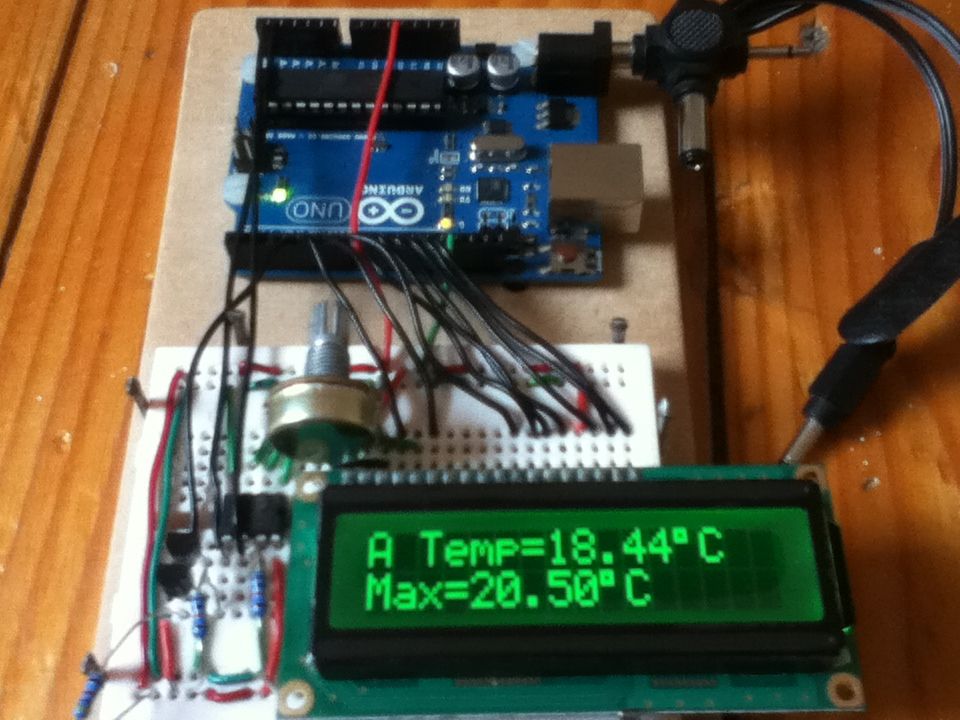
    I also came through on my treat to get some temperature monitoring done on an Arduino. I used two temperature sensors (one for the fermentation temp and the other for the ambient air temp), an LCD screen and an EEPROM. The LCD screen displays the current fermenter and air temperature and keeps track of the max. and min. temps reached by both sensors. Every fifteen minutes the current air and fermenter temps are saved to the EEPROM. After three weeks, I was then able to download the temperature data from the EEPROM and plot them out in Excel. I am going to slowly improve upon this first design and work towards full temperature control.

    IMG_0052_zps988b019b.jpg


  • Closed Accounts Posts: 960 ✭✭✭cletus van damme


    made my first ever homebrew. Bulldog 4 finger jack.

    been in bottles 10 days - had a sample yesterday.
    seem alright , not super but did taste like beer and had a glorious hop aroma.

    guessing it a little immature yet.
    prob wait another week for more.

    just an update .
    had a few of these at the weekend - the extra time in the bottles really makes a difference. The beer is quite nice now.
    Had some people over and they seemed to like it and nobody died.

    over time is less "hoppy" than 2 weeks ago. some people even said they'd like more hops ....:eek: I doubt they would have said that 2 weeks ago or liked it.

    so roll on brew number 2 - undecided yet on what i'll do.

    I want to do a few kits get comfortable with the process and then attack from 1st principals.


  • Closed Accounts Posts: 15,116 ✭✭✭✭RasTa


    Just thinking back to my first brew and smiling as I used bread yeast... Crazy how much you learn with each attempt.


  • Closed Accounts Posts: 2,592 ✭✭✭drumswan


    I also came through on my treat to get some temperature monitoring done on an Arduino. I used two temperature sensors (one for the fermentation temp and the other for the ambient air temp), an LCD screen and an EEPROM. The LCD screen displays the current fermenter and air temperature and keeps track of the max. and min. temps reached by both sensors. Every fifteen minutes the current air and fermenter temps are saved to the EEPROM. After three weeks, I was then able to download the temperature data from the EEPROM and plot them out in Excel. I am going to slowly improve upon this first design and work towards full temperature control.

    Any guides on how the temp monitor is put together?


  • Registered Users Posts: 85 ✭✭flanaganred


    Delighted with my first extract brew,it is a oatmeal stout which I modified from a homebrew west extract stout kit,so much better then my two previous stout kits,great body and mouth feel from the added oatmeal


  • Closed Accounts Posts: 9,828 ✭✭✭gosplan


    Yay, I have finished bottling my summer beer.

    Pain in the arse - 60 litres or so but done!!!! Yahoo.


  • Registered Users Posts: 1,557 ✭✭✭Knifey Spoony


    drumswan wrote: »
    Any guides on how the temp monitor is put together?

    The temperature sensors that I'm using are DS18B20, which give a digital output and communicates with the Arduino using the One Wire system. The LCD is tricolour (red, green and blue). As well as using the LCD to display the current fermenter and air temperatures, it displays the max and min temps reached by each sensors and changes the background colour if the fermenter temperature is too hot or cold for the yeast being used (red if it is too hot, blue if it is too cold and green if it is just right). Finally, the EEPROM the 24AA512, which can hold 512kbytes of info. The EEPROM communicates with the Ardiuno using I2C.

    The code itself is pretty straight forward. There are libraries that can be found online that make it easy to use One Wire and I2C, and also to control the LCD. The final layout of the circuit is different from the one pictured, I moved everything onto veroboard and built my own Arduino shield so that everything sits nicely on top of it.

    The whole point of the project is to give a quick, clear and accurate reading of the fermenter temp, without having to rely on reading the little stick on thermometer. The fermenter sensor was taped to the outside of the FV and then a layer of foam was taped over the sensor to make sure that the sensor is only measuring the FV temp. Saving the temp data every fifteen minutes to the EEPROM will allow me to see how temperature varies throughout fermentation and with room temperature. I'll eventually use this data to design a temperature controller.


  • Registered Users Posts: 2,339 ✭✭✭The One Doctor


    The temperature sensors that I'm using are DS18B20, which give a digital output and communicates with the Arduino using the One Wire system. The LCD is tricolour (red, green and blue). As well as using the LCD to display the current fermenter and air temperatures, it displays the max and min temps reached by each sensors and changes the background colour if the fermenter temperature is too hot or cold for the yeast being used (red if it is too hot, blue if it is too cold and green if it is just right). Finally, the EEPROM the 24AA512, which can hold 512kbytes of info. The EEPROM communicates with the Ardiuno using I2C.

    The code itself is pretty straight forward. There are libraries that can be found online that make it easy to use One Wire and I2C, and also to control the LCD. The final layout of the circuit is different from the one pictured, I moved everything onto veroboard and built my own Arduino shield so that everything sits nicely on top of it.

    The whole point of the project is to give a quick, clear and accurate reading of the fermenter temp, without having to rely on reading the little stick on thermometer. The fermenter sensor was taped to the outside of the FV and then a layer of foam was taped over the sensor to make sure that the sensor is only measuring the FV temp. Saving the temp data every fifteen minutes to the EEPROM will allow me to see how temperature varies throughout fermentation and with room temperature. I'll eventually use this data to design a temperature controller.

    Just take a temp reading at the same time every day. Cuts out the electronics and programming.


  • Registered Users Posts: 1,557 ✭✭✭Knifey Spoony


    Just take a temp reading at the same time every day. Cuts out the electronics and programming.

    Where's the fun in that?


  • Registered Users Posts: 14 Mandelbrotset


    I am going to slowly improve upon this first design and work towards full temperature control.

    Nice little project there, have you checked out BrewPi?
    It's an open source project that can do all your temp monitoring, logging and control with a Raspberry-pi, looks like it may be perfect for what you are planning on doing, unless of course re-inventing the wheel is the aim, as that is sometimes far more satisfying;)

    Probably going to go the BrewPi / Arduino route myself when I finally move my kit into the shed. Although I'm fairly new to this game, I think being able to profile the temps during fermentation should be very interesting, as the below quote from the site suggests:

    "An example of what you can do with a temperature profile:

    You start at 20°C for 36 hours, right in the middle of the temperature range for your yeast to make it easy for them to start up and multiply.
    After 36 hours, when your beer is bubbling well, you want drop the temperature to reduce ester formation. You set the profile to be at 17°C at 3 days.
    You decide to keep the beer at 17°C for 3 days, but fermentation is slowing down.
    Yeast is more active at higher temperatures, so you slowly raise to 22°C over 5 days: as the yeast consumes more and more complex sugars, it can do this at a higher temperature.
    After reaching 22°C, you keep it at that temp for 2 days (diacetyl rest), before cold crashing at 3°C.
    Using temperature profiles, you can do gradual changes in temperature. Yeast is sensitive to sudden temperature changes: a sudden drop in temperature can cause them to drop out of suspension because they need time to adapt to a new set point."


  • Advertisement
  • Registered Users Posts: 8,146 ✭✭✭Ronan|Raven


    I picked up the IPA from "The Craft Range" in the mottlybrew yesterday.

    qNbUC17l.jpg

    In the box you get the following:
    3KG pouch of extract.
    650g Brewing Sugar
    100g Priming Sugar
    10g Beer Yeast
    Muslin Bag
    75g bag of hop pellets. (no idea of the variety!)

    z39NwiHl.jpg

    Making the kit was the nothing out of the ordinary, sanitise all your gear.
    Heat the pouch of extract for 15 minutes
    Empty the pouch into the fermenter, mix with 3L or so of boiling water.
    Add the sugar.
    Top up to 23L with cold or hot in order to reach a temperature of 20-24c
    Hydrometer reading was taken and OG of 1050 was noted.
    Pitch yeast and cover.


    I have to say this kit smelt really good, one of the nicest smelling kits I have made.

    Not much activity yet but it is early days.. (under 18 hours in)


  • Registered Users Posts: 745 ✭✭✭baron von something


    Did 1 gallon of JAOM earlier.might do another gallon tomorrow.it'd be a nice Christmas drink.

    was about to start an extract brew aswel but numbnuts here did a wee mischief.i was setting everything up and didn't realise the switch in the wall was on,and the element in my boiler happened to be touching the bottom of the fermenter and i may have burned a hole in it.idiot.*le sigh*

    so i ended up putting on a better brew lager kit and added about 150g of oak chips to it


  • Registered Users Posts: 14 Mandelbrotset


    All grain Belgian dubbel in the fermenter at the moment, all done and time to bottle. OG 1064, FG 1007, good and strong. Had a little taste, and it is very interesting, a little peppery and lots of citrus. Looking forward to this one, and after brewing with a light candi sugar, I plan to add some darker candi for bottle conditioning. It is full of yeast though, and that's after a 24hr cold crash.. so better be prepared for a bunch of trube in the bottle.

    Also on the go, Peters peculiar stout (all grain), hopefully turn out a little more tame (4.3%) than the last batch of fantastic stout I did, which was about 7%+..That way I can drink more...

    Got a couple of cheap Chinese PIDs, and SSRs, so going to be digitally controlling mash temps and boils in the future...

    @Baron, where did you get the oak chips?


  • Registered Users Posts: 745 ✭✭✭baron von something


    Got them from homebrewwest.they do a variety of them e.g. Light/medium/dark and from america/france.i used them before in a brew and got exactly what I'd hoped from them


  • Registered Users Posts: 14 Mandelbrotset


    Got them from homebrewwest.they do a variety of them e.g. Light/medium/dark and from america/france.i used them before in a brew and got exactly what I'd hoped from them

    Thanks, I think I'll pick up some Whiskey oak chips for my next brew. Great Idea, cheers. Innis&Gunn do a very nice rum finished beer and I'd like to try something similar, the chips would certainly be a lot easier to work with than barrels. How long did you leave them in, and did you just dump them into the primary, or waited until secondary?


  • Registered Users Posts: 745 ✭✭✭baron von something


    it was actually an Innis&Gunn brew that i tried to recreate.their Highland Cask special edition.i put them into primary.i didnt do a secondary with that particular one,just left them for 2-3 weeks before bottling


  • Registered Users Posts: 2,249 ✭✭✭GY A1


    it was actually an Innis&Gunn brew that i tried to recreate.their Highland Cask special edition.i put them into primary.i didnt do a secondary with that particular one,just left them for 2-3 weeks before bottling

    let us know how that comes out and some pics please :D


  • Registered Users Posts: 363 ✭✭tteknulp


    Dunkel Hefeweizen

    i just brewed this today i thought id share for any users who like German Beer
    I hope its gonna be a good one ,my house still smells like St. James gate hours later

    5.5% abv ish O.G. 1052 Expected F.G.1010

    (1.5 kg) plain amber malt extract syrup
    (1.5 kg) plain dark malt extract syrup
    (340 g) crystal malt
    (110g) chocolate malt
    (110 g) German Caraffe black malt
    (600g) dextrose
    (42g) Crystal hops (boiling)
    (28g) H. herbucker hops (flavor and aroma)

    German yeast

    Brewed to 22 ltrs


  • Registered Users Posts: 85 ✭✭flanaganred


    Started 34 litres of elderflower champagne yesterday interesting to see how it turns out,it was bubbling away after only an hour!


  • Advertisement
  • Registered Users Posts: 2,249 ✭✭✭GY A1


    Started 34 litres of elderflower champagne yesterday interesting to see how it turns out,it was bubbling away after only an hour!

    what was ur recipe :pac:


Advertisement