Advertisement
If you have a new account but are having problems posting or verifying your account, please email us on hello@boards.ie for help. Thanks :)
Hello all! Please ensure that you are posting a new thread or question in the appropriate forum. The Feedback forum is overwhelmed with questions that are having to be moved elsewhere. If you need help to verify your account contact hello@boards.ie
Please note that it is not permitted to have referral links posted in your signature. Keep these links contained in the appropriate forum. Thank you.

https://www.boards.ie/discussion/2055940817/signature-rules

Today I did something to my car (volume 2)

Options
1100101103105106327

Comments

  • Registered Users Posts: 1,363 ✭✭✭bmstuff


    Upgraded stock radio 310 VW Golf 6 radio to Kenwood DNX521DAB
    Fantastic upgrade. Pricey at 800 euros but you get everything in one unit. BT/DAB/Garmin navigation.

    Sorry poor phone pictures only...

    1.jpg
    2.jpg
    3.jpg
    4.jpg
    5.jpg
    6.jpg
    7.jpg
    8.jpg


  • Registered Users Posts: 9,660 ✭✭✭Voodoomelon


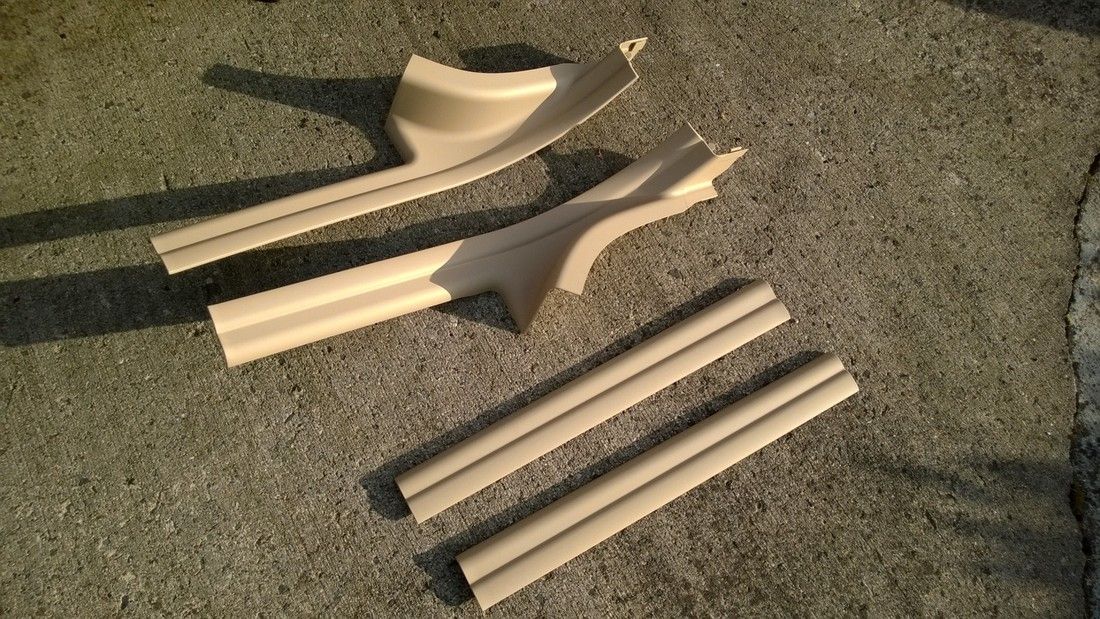
    Can't beat a nice big box from BMW.

    WP_20140607_0021_zps038f3b63.jpg

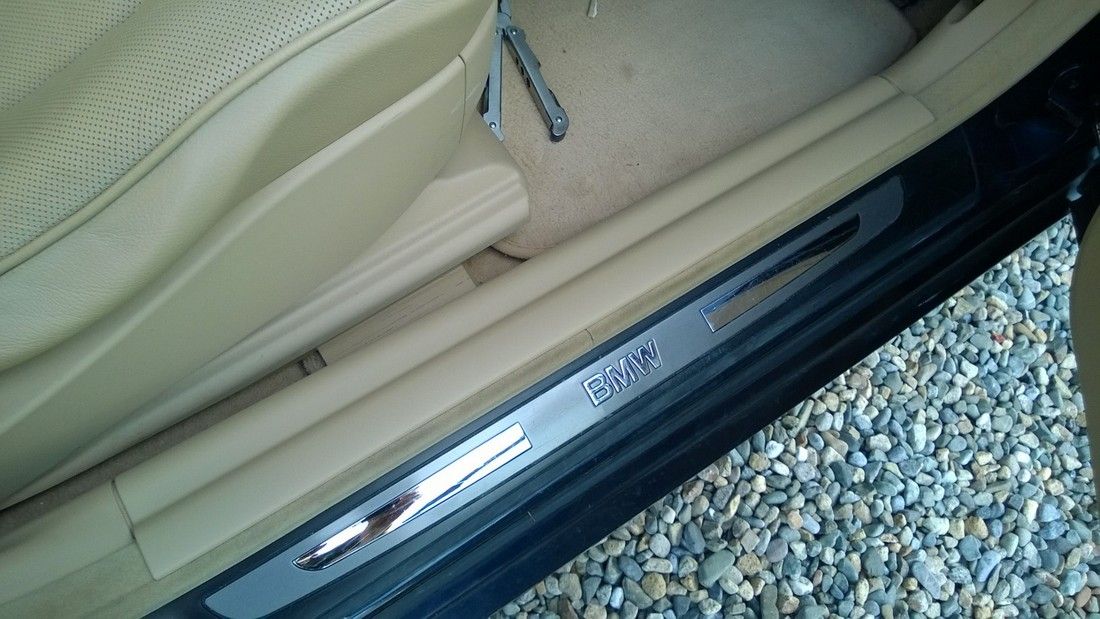
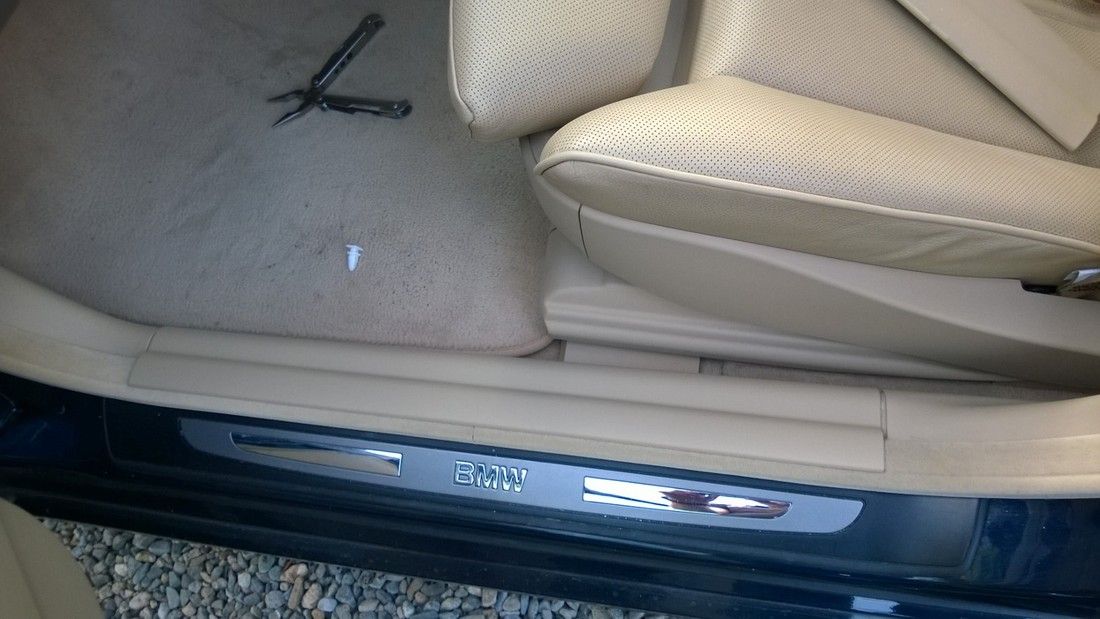
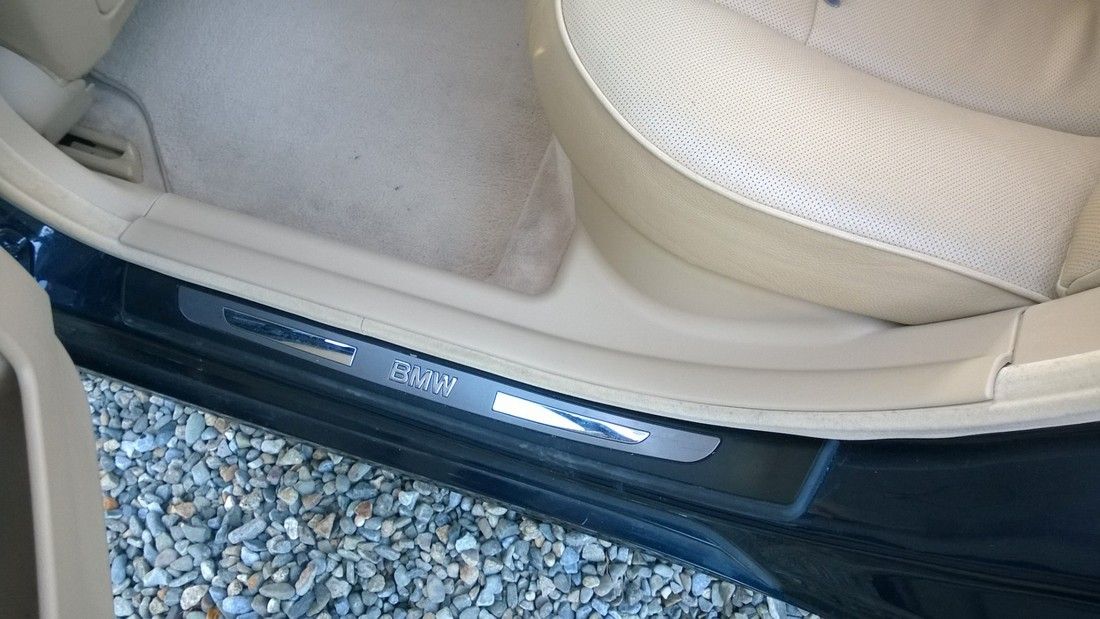
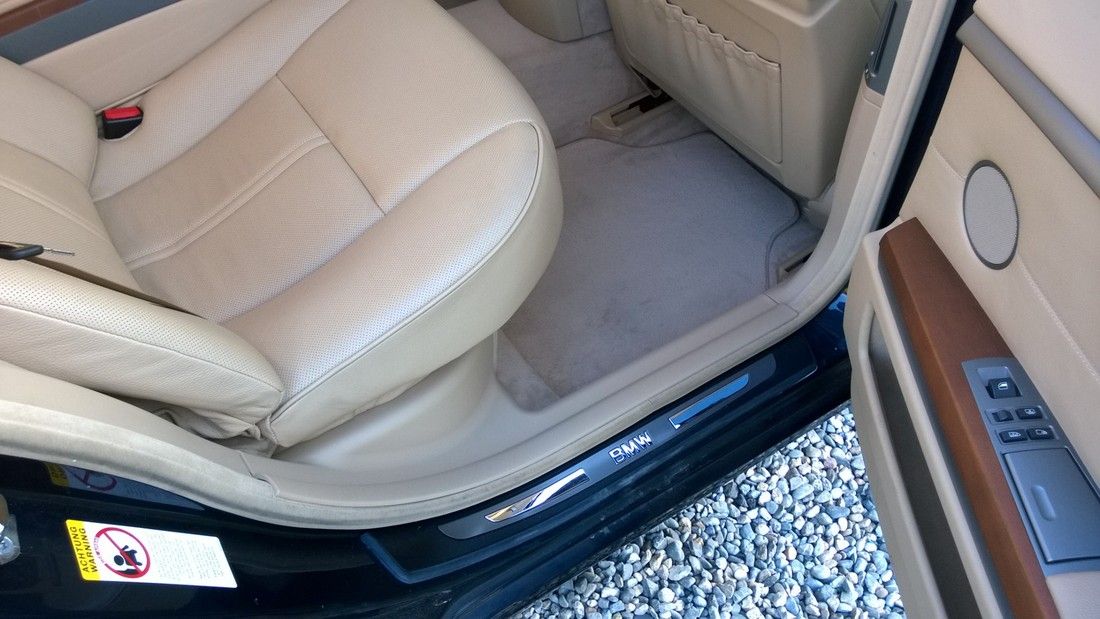
    New door sills for the 740. They have a rubberised coating on them so spray painting wasn't really an option and they worked out surprisingly cheap from the dealer.

    WP_20140607_0032_zps6d459e10.jpg

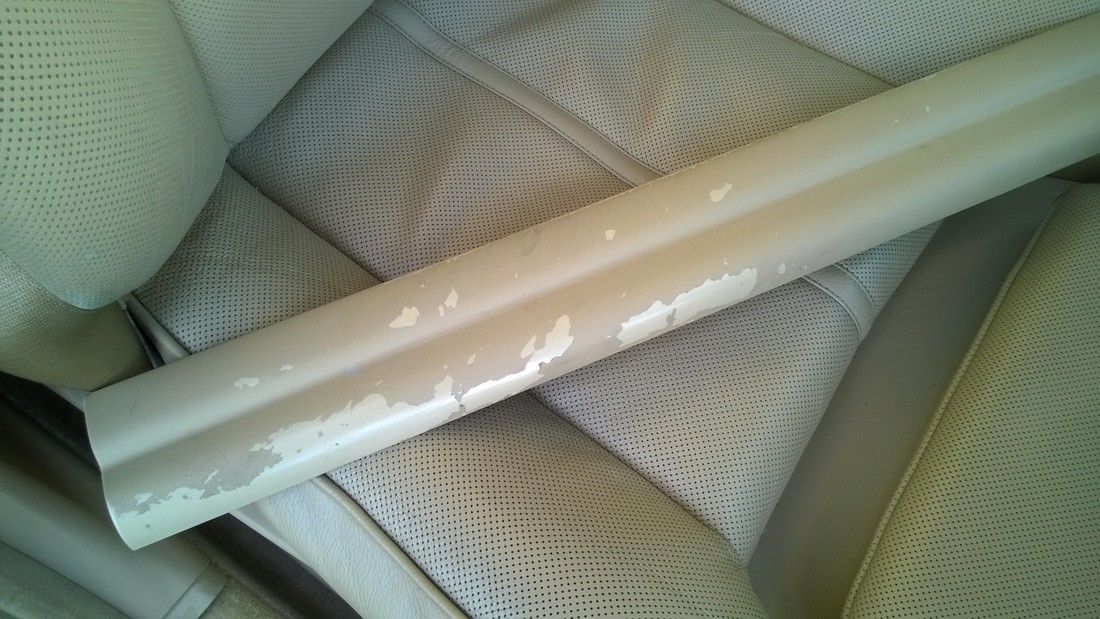
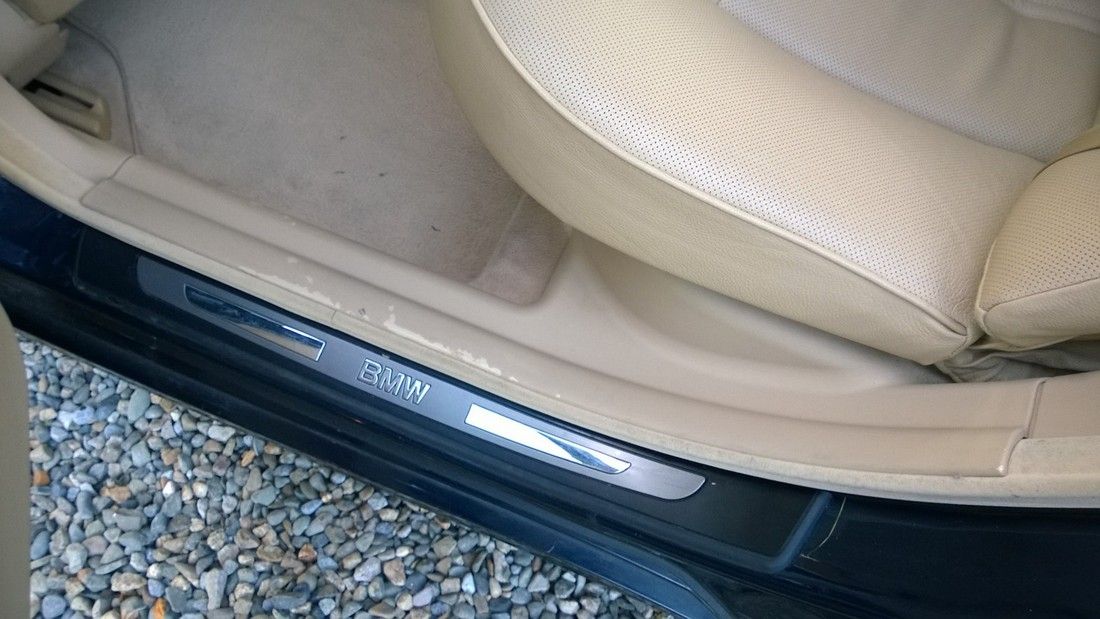
    Old ones were in a terrible state, a common problem on all E90/E60/E65 models.

    WP_20140607_0043_zps0d06cfa4.jpg

    WP_20140607_0087_zps0a026c54.jpg

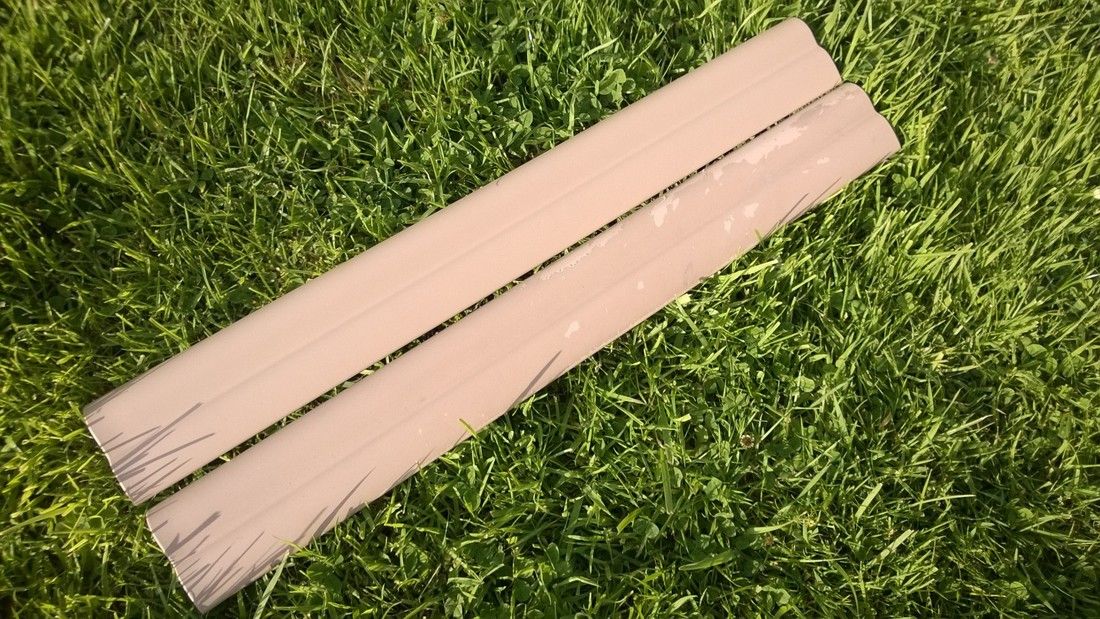
    Old and new:

    WP_20140607_0054_zps8b492591.jpg

    WP_20140607_0065_zps217007b3.jpg

    WP_20140607_0076_zps67f0d9be.jpg

    These rear ones were a bastard to get in again. I think the reclining seats went in after the sills were installed but I still managed it in the end.

    WP_20140607_0098_zpsdbb68257.jpg

    WP_20140607_0109_zps808c46db.jpg


  • Registered Users Posts: 1,363 ✭✭✭bmstuff


    Genuine Alcantara gaiter made today for the e39

    1.JPG
    2.JPG
    3.JPG
    4.JPG
    5.JPG
    6.JPG
    7.JPG
    8.JPG
    9.JPG
    10.JPG
    11.JPG
    12.JPG
    13.JPG


  • Registered Users Posts: 5,925 ✭✭✭GvidoR


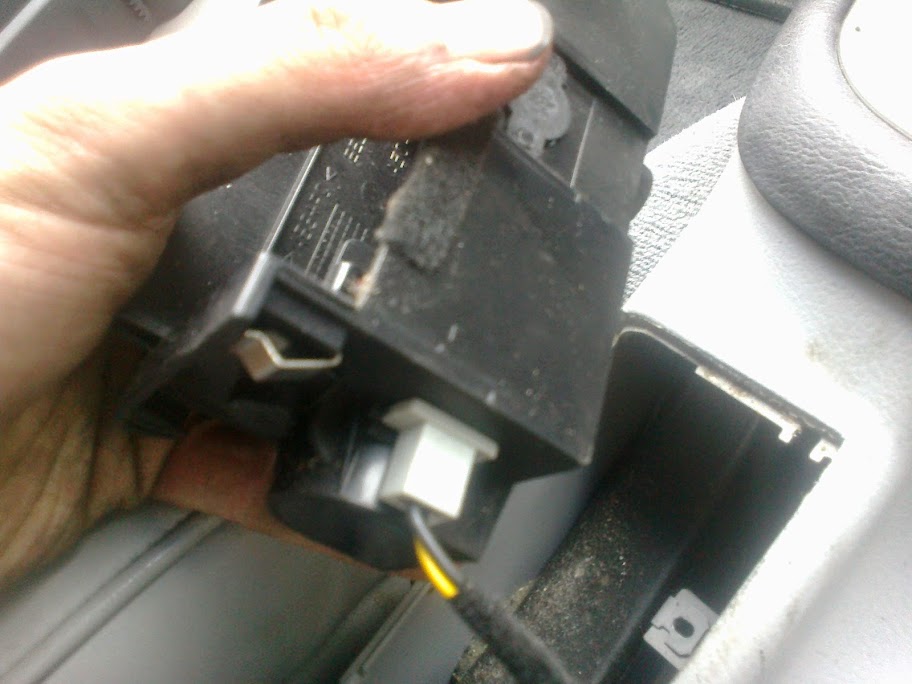
    Replaced the interior light dimmer switch thing because the old one was driving me insane.

    14372048694_b2ce35d198_c.jpg

    14186524527_e985bfb884_c.jpg

    14186407340_1ebf9da092_c.jpg


  • Closed Accounts Posts: 12,985 ✭✭✭✭dgt


    The humble ashtray. A keeper of butts, a holder of coins, a keep safe for screws.

    A simple design consisting of a liftable/removable tray to contain the contents and dispose of them at ease.

    Automakers started to silently phase them out sometime in the mid 90′s. By the 2000′s, most cars only offered them as optional features. Today, many cars don’t even do that.

    Eliminating lighters and ashtrays as standard equipment on millions of cars saved money for automakers, most who now sell optional “smoker’s packages” for $15 to $100 for items once included with every new car.

    Or maybe it's subliminal? Some say it's more about subtle behavior modification. If there are no ashtrays in the car, maybe you’ll give up the habit?

    Whatever the reason, I enjoy a good ashtray to hold coins. So naturally, when this came into the yard with a broken ashtray, I couldn't let it out without a functioning one!

    Here is a full step by step procedure on replacing the ashtray

    First step: Enter the vehicle. You need to be in he vehicle to change the ashtray, unless you're a giraffe with a special mouth
    Image1281.jpg

    Next, put the car in gear
    Image1283.jpg

    This is to ensure we can put the handbrake down safely, for more access to the ashtray
    Image1282.jpg

    Next, we need to clear the passenger seat, seeing as this is such a big job, we will need all the room we can afford to have
    Image1284.jpg

    As you can see, this sophisticated tool is required for this task
    Image1285.jpg

    Now, we need to open the ashtray. To do this, we simply press on the part of the ashtray that says push. By the action of the spring on the bottom of the ashtray, it will open. But! There is a damper mechanism to restrict the speed in which the lid opens. So it opens gracefully
    Image1287.jpg

    Since there are no instructions on the ashtray on how to release the actual tray, I shall now demonstrate how to release the tray from the ashtray. One must simply press the top cover of the ashtray further than the fully open position. This releases a catch, which allows a spring to operate the tray, which is also damped. Pampered with refinement!
    Image1288.jpg

    Now, to remove the tray from the ashtray, simply grip the tray with the metal clasp kindly provided and withdraw the tray from the ashtray
    Image1289.jpg

    Here is a view of the ashtray without the tray that sits into the ashtray. We can see the complexity of the device in it's entirety. The round circular fastner holding the ashtray to the car must be extracted with the special tool I depicted earlier in his very post
    Image1290.jpg

    To remove the circular fastner, we insert the special tool into the top, thus lining the end of the tool with the top of the fastner. Then, we rotate the fastner in an anti-clockwise manner. Don't get confused with which way it turns, it will only either get tighter or looser
    Image1291.jpg

    Once the circular fastner is sufficiently loosened, we can withdraw the ashtray from it's resting place
    Image1292.jpg

    The very eagle eyed will have noted there appears to be a pair of cables affixed to the ashtray. These heavy duty cables provide sufficient power to a halogen bulb. This is to illuminate the tray, which when situated in the ashtray at night becomes illuminated. This is to provide sufficient lighting to allow the operator of the ashtray to see what he or she is doing.
    Image1293.jpg

    To remove the complex lighting mechanism, special removing tools have been carefully crafted into the light itself to allow the technician working on the ashtray without the tray in the ashtray to withdraw the lighting device from the ashtray without the tray.
    Image1294.jpg

    The ashtray without the tray is now sufficiently disconnected from the vehicle
    Image1295.jpg

    It may now be carefully placed in a suitable location in order for the technician to take a break from this gruelling task
    Image1296.jpg

    But wait! There's more to come.....


  • Advertisement
  • Closed Accounts Posts: 12,985 ✭✭✭✭dgt


    In my previous post, I discussed the technical and complex procedure to withdraw the ashtray from the vehicle. Now, I will depict how to install the ashtray.

    First, here is the new ashtray. This time, I've carefully taken the photo so it clearly says where to push the lid in order to open the ashtray
    Image1297.jpg

    Using the information just learned, the lid of the ashtray may now be opened
    Image1298.jpg

    A key point to this step is removal of the tray from the ashtray, as we cannot install the ashtray with the tray still inserted in the ashtray, so the tray from the ashtray is removed from the ashtray and compared to the tray from the other ashtray, which is also removed from it's position from the ashtray. When it was deemed which tray was cleaner, it was set to one side. The other tray was then sent off to be professionally cleaned and detailed.
    Image1299.jpg

    Now, to the ashtray. We start by inserting the halogen lighting device into it's carefully sculpted mounting bracket. This is to ensure the device does not fall free from it's resting position. It is sufficiently held in by 2 heavy duty clips, which clip in when sufficiently pressed into position
    Image1300.jpg

    The ashtray can now be positioned into it's resting place
    Image1301.jpg

    We then fetch the circular fastening device, then insert it into it's carefully positioned fastening mount. To tighten the circular fastner, we pick up the special tool, then insert the special tool into the grooves on top of the circular fastning device and rotate the tool in a clockwise manner.
    Image1302.jpg

    Now, once we are sure the ashtray is sufficiently secured, we can insert the tray into the ashtray
    Image1303.jpg

    We can then close the lid over, covering the tray concealed in the ashtray
    Image1304.jpg

    Finally, we transport the special tool from the vehicle, vacate the vehicle and close the door
    Image1306.jpg

    After that gruelling and challenging task, I have a headache and thus need medication. But at least I have an ashtray that works :cool:


  • Registered Users Posts: 4,792 ✭✭✭Ded_Zebra


    Nice to get the jobs like that done dgt. Brilliant guide :D:D


  • Registered Users Posts: 5,925 ✭✭✭GvidoR


    Amazing write-up, dgt. Here, you earned this...

    a1cg94ik3xzd086cz1vm.jpg


  • Registered Users Posts: 6,845 ✭✭✭Noccy_Mondy


    You must be fierce bored.... :pac:


  • Registered Users Posts: 3,404 ✭✭✭corkgsxr


    Finally fitted the reversing sensors. The wire from front to back was just long enough. It being ment for a car. 2014-06-08 21.15.16.png

    20140608_195244.jpg


  • Advertisement
  • Registered Users Posts: 5,925 ✭✭✭GvidoR


    That's an interesting way to cover up to licence plate...

    ...or is that what the sensor looks like? :pac:


  • Registered Users Posts: 3,404 ✭✭✭corkgsxr


    GvidoR wrote: »
    That's an interesting way to cover up to licence plate...

    ...or is that what the sensor looks like? :pac:

    You try edit a photo on a phone.


  • Registered Users Posts: 6,845 ✭✭✭Noccy_Mondy


    corkgsxr wrote: »
    Finally fitted the reversing sensors. The wire from front to back was just long enough. It being ment for a car. 2014-06-08 21.15.16.png

    20140608_195244.jpg

    Nice job. I'm assuming you fitted them yourself. That yoke inside seems cool.


  • Registered Users Posts: 3,404 ✭✭✭corkgsxr


    Nice job. I'm assuming you fitted them yourself. That yoke inside seems cool.

    Yep. I think there a great system. Into reverse on it goes. Readout of 100mm intervals. Shows both corners and whatever the closest distance.

    Iv had it on 2 vehicles before. I don't see the need for more. I do alot of town parking and when your wider than the average car you just cant see anything for reference


  • Registered Users Posts: 1,363 ✭✭✭bmstuff


    Usual stuff for me...

    DSC_0014.JPG
    DSC_0018.JPG
    DSC_0020.JPG
    DSC_0023.JPG
    DSC_0027.JPG
    DSC_0025.JPG

    Mercedes C class coupe, owner's supplied kits. I am putting everything together.

    1.JPG
    3.JPG
    5.JPG
    12.JPG
    15.JPG
    20.JPG


  • Registered Users Posts: 16,930 ✭✭✭✭challengemaster


    Managed to do even less work than dgt today :D

    Installed a passenger seat occupancy sensor bypass unit. Essentially what that boils down to is I unplugged one electrical plug, and plugged another one in :pac: Common problem on E46's (maybe all BMW's eventually), the sensor just breaks eventually. It happened to be gone on the new seats I put in, so as soon as I started the car I got an airbag light on the dash.

    $_12.JPG

    The occupancy sensor itself is there so in the event of a crash, if there's no passenger, the passenger airbags won't deploy to reduce the cost of repair. How the sensor works is on a threshold basis. The car performs a sensor check when you start it. Above threshold = passenger, below = no. When the sensor breaks it's as if there's no sensor there, so it fails the check when you switch on the car = warning light. The "bypass unit" is literally a resistor and diode set up in such a way that it tells the car there's always a passenger sitting there.

    Best news of all - the light wasn't on long enough to require diagnostics use to turn it off. Back to no warning lights on the dash again, huzzah!


  • Registered Users Posts: 1,363 ✭✭✭bmstuff


    The threshold is 12kg Challengemaster and it did not need to be reset because it was fitted while the key was in the ignition.


  • Registered Users Posts: 13,657 ✭✭✭✭joujoujou
    Unregistered Users


    [...] it tells the car there's always a passenger sitting there.

    [...]

    Always? So you need to have passenger's buckle up all the time to avoid "fasten the seat belt" alarm?


  • Registered Users Posts: 16,930 ✭✭✭✭challengemaster


    joujoujou wrote: »
    Always? So you need to have passenger's buckle up all the time to avoid "fasten the seat belt" alarm?

    There is no fasten seatbelt alarm :) not even for drivers belt.

    The reason it has to be set so that it's always as if there's a passenger is so in the event of a crash the passenger airbags deploy. Remember, you're bypassing the system that tells the car if the passenger seat is occupied. If you get a bypass that tells the car the seat is always empty - you'll fix the warning light but the car will never deploy the passenger airbags even with a passenger sitting there.


  • Registered Users Posts: 1,363 ✭✭✭bmstuff


    joujoujou wrote: »
    Always? So you need to have passenger's buckle up all the time to avoid "fasten the seat belt" alarm?

    Most e46/e39.never had this enforced but it is on more recent cars such as the e60 etc.
    But this bypass should not be installed on recent cars as it will gong on a regular basis.
    It should be coded out on e60 etc.


  • Advertisement
  • Registered Users Posts: 16,930 ✭✭✭✭challengemaster


    bmstuff wrote: »
    The threshold is 12kg Challengemaster and it did not need to be reset because it was fitted while the key was in the ignition.

    Yeah, I'd read the threshold was 12kg alright. Didn't know about the key in ignition thing though! that was just by chance :D

    It was an intermittent fault with the sensor anyway, it had gone off/on a few times since installing the new seats, managed to get it to go off by placing a heavy weight on the seat too.


  • Registered Users Posts: 9,660 ✭✭✭Voodoomelon


    Not something I did, but my uncle's work. He moved to Chigaco years ago and specialises in period miniature furniture, but was recently asked to restore these Rolls Royce veneers. The finished article:

    10322429_10152460425598118_5068692601178167633_n.jpg


  • Registered Users Posts: 5,193 ✭✭✭Cleveland Hot Pocket


    Today I did something to my car, well, I stuck something to it.
    10360550_10152495989544528_3378870165437887377_n.jpg

    And on the topic of sticking things to my cars, here's m'truck with its new decal
    10450542_10203854865473244_4876178000640287037_n.jpg


  • Registered Users Posts: 15,550 ✭✭✭✭vectra


    Errm.
    Tax disc looks a bit odd :D


  • Registered Users Posts: 5,925 ✭✭✭GvidoR


    Changed oil and oil filter on the Bora. :P

    14199354099_f4771e6dbb_c.jpg


  • Registered Users Posts: 2,350 ✭✭✭Mar4ix


    vectra
    FYP
    Tax disc looks a bit old :D


  • Registered Users Posts: 1,331 ✭✭✭toyotaavensis


    In Munich now. So far I have checked the oil every day and she has been perfect. 2500 miles she hasnt missed a beat and hasnt used a drop of oil.
    I got a quiet stretch of autoban and got 120 from her.


  • Closed Accounts Posts: 12,985 ✭✭✭✭dgt


    Pulled the finger out and relocated the 156. Van is now in the garden beside the crock :pac:
    14199651838_2dddf747f0_h.jpg

    Not worthy of the project thread, or anything else really, so meh


  • Registered Users Posts: 15,550 ✭✭✭✭vectra


    Mar4ix wrote: »
    vectra
    FYP
    Tax disc looks a bit old :D

    Probably should have stuck the boards sticker a couple of inches lower :D


  • Advertisement
  • Registered Users Posts: 5,193 ✭✭✭Cleveland Hot Pocket


    vectra wrote: »
    Errm.
    Tax disc looks a bit odd :D

    I guess I'm hoping that any AGS at a checkpoint are also boards motors forum regulars :P


    (or I'm still waiting for the logbook)


Advertisement