Advertisement
If you have a new account but are having problems posting or verifying your account, please email us on hello@boards.ie for help. Thanks :)
Hello all! Please ensure that you are posting a new thread or question in the appropriate forum. The Feedback forum is overwhelmed with questions that are having to be moved elsewhere. If you need help to verify your account contact hello@boards.ie
Please note that it is not permitted to have referral links posted in your signature. Keep these links contained in the appropriate forum. Thank you.

https://www.boards.ie/discussion/2055940817/signature-rules

Today I did something to my car (volume 2)

Options
1123124126128129327

Comments

  • Registered Users Posts: 8,532 ✭✭✭JohnBoy26


    bmstuff wrote: »
    Thank you
    Never done custom parts like that before to be honest, definitely challenging but gratifying in the end when the owner has a smile on his face.
    Looking forward for more custom parts :cool:

    Looks excellent, your work is extremely tidy :)


  • Registered Users Posts: 1,331 ✭✭✭toyotaavensis


    It has just got me thinking about my phone in the car. As is I use one of these (http://www.mobilefun.co.uk/tetrax-geo-universal-car-phone-holder-dark-steel-p28827.htm#) but what you did looks a lot nicer.


  • Registered Users Posts: 1,363 ✭✭✭bmstuff


    Full car software update and iDrive Professional satnav retrofit along with coding and latest map update...

    1.JPG
    2.JPG
    3.JPG
    4.JPG
    5.JPG
    6.JPG
    7.JPG
    8.JPG
    9.JPG
    10.JPG
    11.JPG
    12.JPG
    13.JPG
    14.JPG


  • Registered Users Posts: 1,363 ✭✭✭bmstuff


    Speakers upgrade in BMW F10. No tweeters from factory so original tweeters grills retrofitted too for 100% OEM look.

    Now it is more like it.

    1.JPG
    2.JPG
    3.JPG
    4.JPG
    5.JPG
    6.JPG
    7.JPG
    8.JPG
    9.JPG
    10.JPG
    12.JPG
    13.JPG

    All back together as if nothing happened. Only difference is the extremelly more enjoyable journeys now. Video in motion coded too so passengers can watch DVD on the go.

    14.JPG


  • Registered Users Posts: 1,510 ✭✭✭TrailerBob


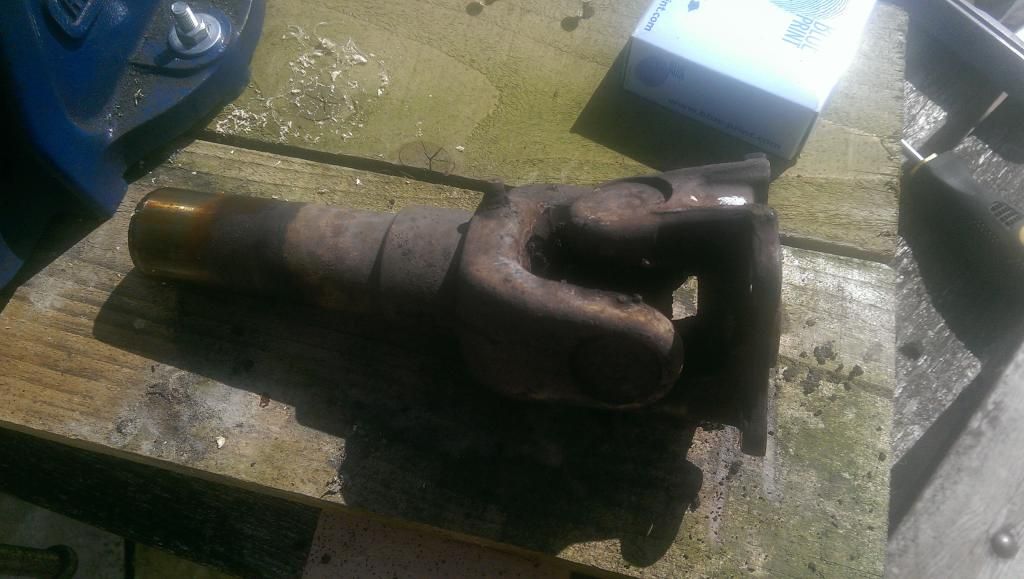
    Replaced the cross on the rear propshaft of the cruiser. Had been getting some vibration and heat in the drivetrain..

    IMAG0352_zpswwmkstlv.jpg

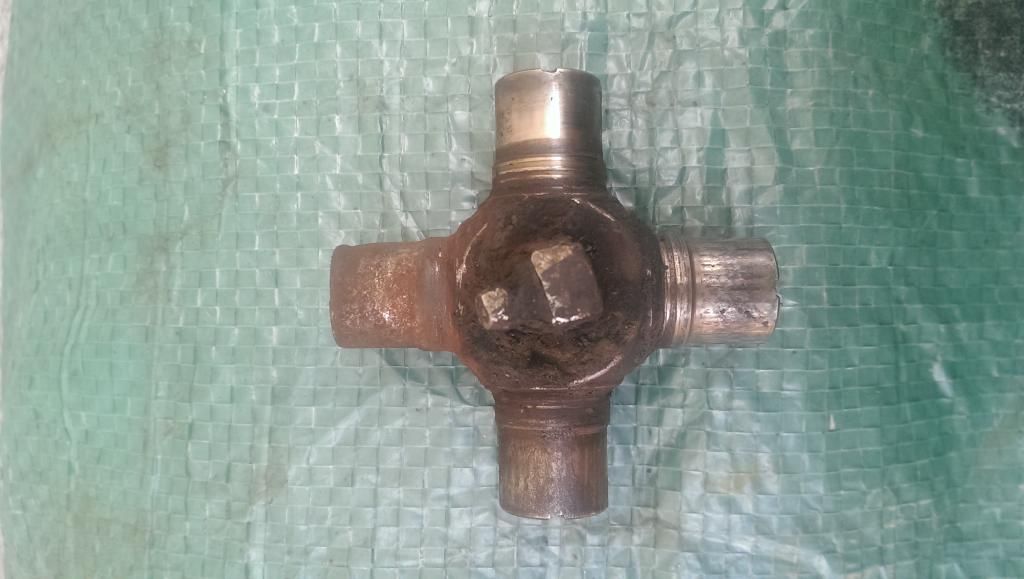
    The end on the left show the worst of the problem, seal had gone in the cap, no more rollers inside. A lot of wear!

    IMAG0355_zps1ug7ajek.jpg

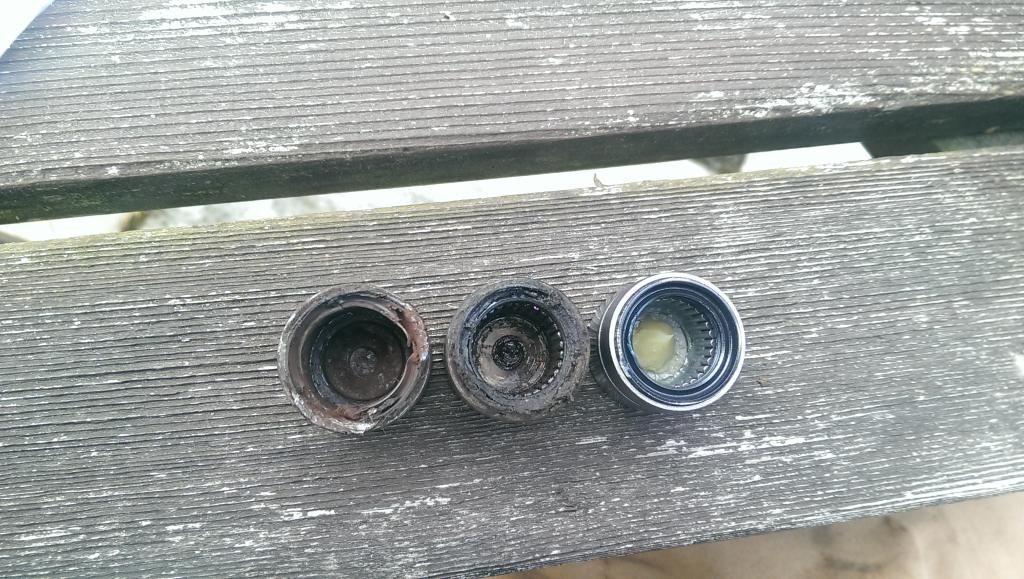
    New cap on the right, ordinary used cap in the middle, on the left the cap was on the brink of failure.. Glad that didn't happen in Italy las month..

    IMAG0356_zpsmazzrmlg.jpg

    230k miles ... Think it was due a change!


  • Advertisement
  • Closed Accounts Posts: 9,607 ✭✭✭toastedpickles


    OSI wrote: »
    €200,000 car, €50 phone, €5 ebay special phone holder. :pac:

    Making it look the business - priceless

    Money can't buy you some things, for everything else, there's bmstuff :pac:


  • Closed Accounts Posts: 9,607 ✭✭✭toastedpickles


    Its a nice touch all the same though


  • Posts: 0 [Deleted User]


    OSI wrote: »
    Gotta be honest, I'm not feeling it. I like alot of BMStuffs work, but that just doesn't look like something I'd expect to pay a professional to do for me.

    If I was in the position to own a Ferrari, I'd expect to pay people to do everything for me :pac:


  • Registered Users Posts: 8,480 ✭✭✭YbFocus


    I think it's as neat as ya like!


  • Registered Users Posts: 1,363 ✭✭✭bmstuff


    OSI wrote: »
    €200,000 car, €50 phone, €5 ebay special phone holder. :pac:

    That's my phone I paid 250 euros from Vodafone shop last year
    The phone holder is custom made you may have made missed the pictures.
    If you don't like it fair enough, but what were you expecting? Gold plated phone holder that you can attach to your balls?
    This one is perfectly placed for the owners need and he did not want to have a suction kit on the window.
    Attaching a holder to the dash was not an option either, nor the vents grills.
    Cheers


  • Advertisement
  • Registered Users Posts: 6,845 ✭✭✭Noccy_Mondy


    Few bits that needed replacing after getting the car. Some that I didn't bother with pics for are the handbrake gaiter, rear view mirror and others I can't remember at this stage.

    Needed a bit of rust proofing here
    Before
    4gj01y.jpg

    After
    vdoklf.jpg

    Radio - hate aftermarket ones in a focus, stick out badly, besides the one that was in it was just basic, no aux or anything.
    Before (bad pic off Done Deal, forgot to take my own one. You get the idea though)
    121v2go.png

    After (Think this was before it was clicked into place)
    wswglz.jpg

    Which grille? The first one came with it, but I found the second in the breakers, and that's the one currently on it.

    15qojua.jpg

    2zxp1c4.jpg


  • Registered Users Posts: 1,331 ✭✭✭toyotaavensis


    Radio and seat rollers make her look a lot better but i prefer the grill she came with.
    Well wear


  • Registered Users Posts: 1,363 ✭✭✭bmstuff


    Ferrari 430 class AB amplifier in wooden box wrapped in genuine Alcantara

    42.JPG
    43.JPG
    44.JPG
    45.JPG
    46.JPG
    47.JPG
    48.JPG
    49.JPG
    50.JPG
    51.JPG


  • Registered Users Posts: 4,974 ✭✭✭Chris_Heilong


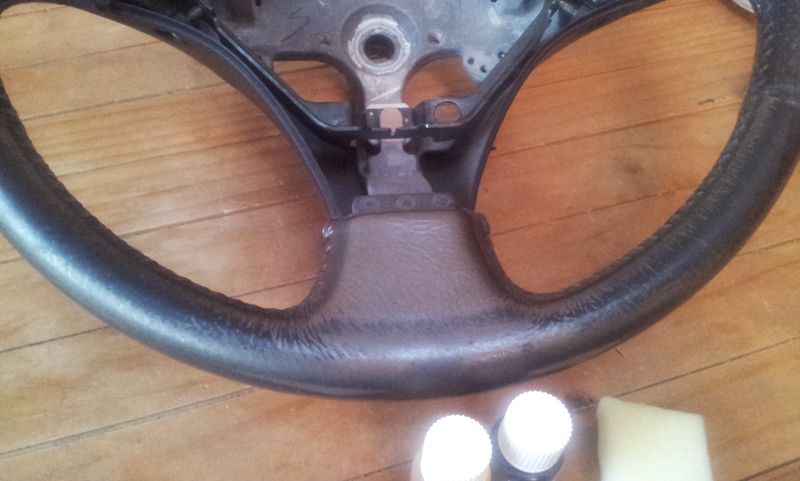
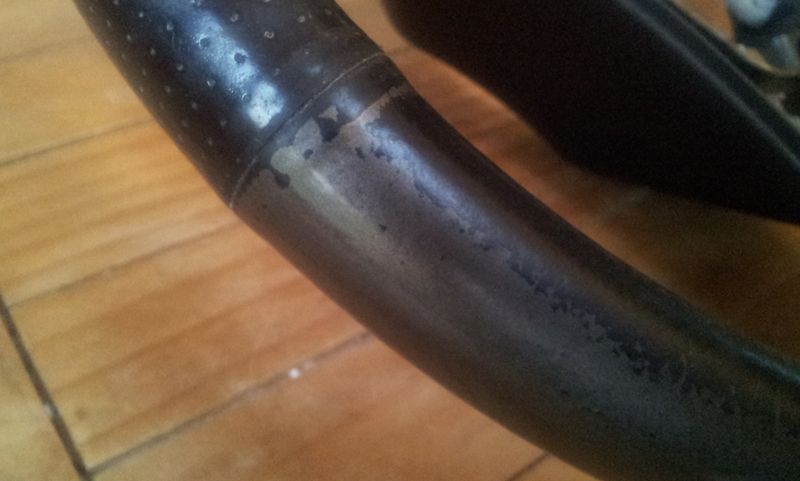
    I got a 2nd hand steering wheel I plan to install into the Chaser to replace the old 4 spoke one the car came with, it was very worn but I decided it was a job I would do myself(like so many things these days). Here is a quick guide.
    wheel1.jpg
    wheel2.jpg

    I purchased a Leather/vinyl restoration kit off an ebay shop http://www.ebay.ie/itm/171202634883?ssPageName=STRK:MEWNX:IT&_trksid=p3984.m1497.l2649, they didnt have an option for posting to the republic so I just used Parcel motel to send it to the north. You get a bottle of cleaner, a bottle of dye and 2 different sponges.
    wheel3.jpg

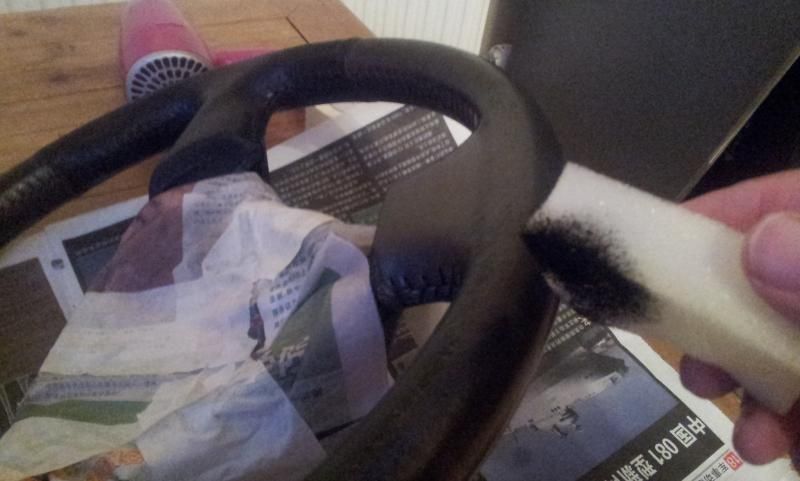
    I wrapped the parts of the wheel I didnt want to get dye on with newspaper.
    wheel4.jpg

    Then I diluted the bottle of cleaner that came with the kit into some warm water and used the large sponge, This stuff was strong enough to affect the existing dye so I wore gloves. The wheel needed to be rinsed with water afterwards.
    wheel5a.jpg

    Then I used the 2nd sponge and the dye, I lightly pressed on the sponge working on one area at a time, when the area was covered I used a hairdryer I borrowed from an MX5 driver and dried thst area.
    wheel5.jpg
    wheel6.jpg

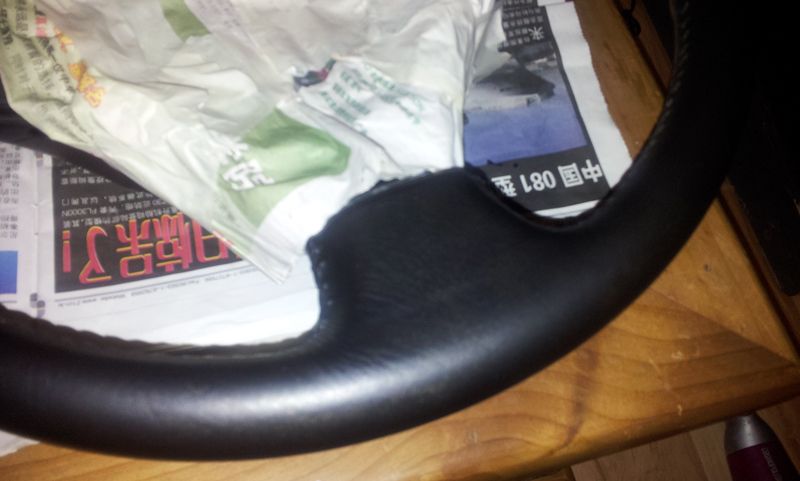
    The results after two coats was impressive.
    whee7.jpg

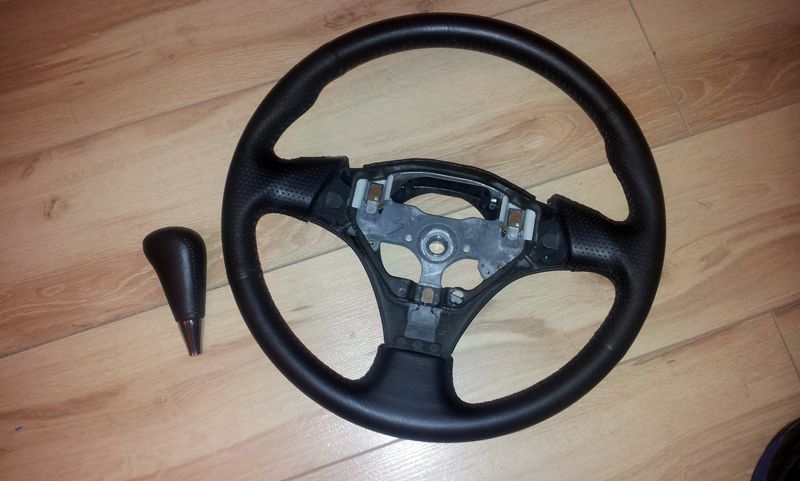
    I finished it off with 3 coats and also decided to do my shifter as it was looking a bit worn. If your wheel is really worn you may need to lightly sand it with 2000 grit.
    wheel7.jpg


  • Registered Users Posts: 1,331 ✭✭✭toyotaavensis


    Can you put up the link to where you got the dye as my steering wheel is starting to show its age at this stage.


  • Registered Users Posts: 4,974 ✭✭✭Chris_Heilong


    Can you put up the link to where you got the dye as my steering wheel is starting to show its age at this stage.

    I have amended the post, now it has the link.


  • Registered Users Posts: 8,720 ✭✭✭Hal1


    @Noccy_Mondy

    It might look better resprayed a matt black. Another must have for you're focus is the intermittent wipe. So very useful to have.

    Focus28.jpg

    It's just a plug and play job. Plenty on ebay. There were fitted to ghia models as standard.


  • Registered Users Posts: 1,331 ✭✭✭toyotaavensis


    Thanks a million. I have been wondering what to do with the wheel for a while now.


  • Registered Users Posts: 6,845 ✭✭✭Noccy_Mondy


    Ya it's on the list Hal. Thankfully I'm almost at the end of it!


  • Closed Accounts Posts: 9,607 ✭✭✭toastedpickles


    Ya it's on the list Hal. Thankfully I'm almost at the end of it!

    Well la di da mr im nearly finished already! :pac:


  • Advertisement
  • Registered Users Posts: 8,720 ✭✭✭Hal1


    Ah but you're never really finished. There's always one more addition :).


  • Registered Users Posts: 6,845 ✭✭✭Noccy_Mondy


    Well la di da mr im nearly finished already! :pac:

    That's the way it is when there is no end to one's money! :pac:

    I wish!!

    Nah just want to get it all sorted before I'm back at work. Don't really get much time to be messing around and with deliveries when I'm not at home during the day.


  • Closed Accounts Posts: 9,607 ✭✭✭toastedpickles


    Hal1 wrote: »
    Ah but you're never really finished. There's always one more addition :).

    True that, or in my case where theres about 20 :pac:


  • Registered Users Posts: 4,974 ✭✭✭Chris_Heilong


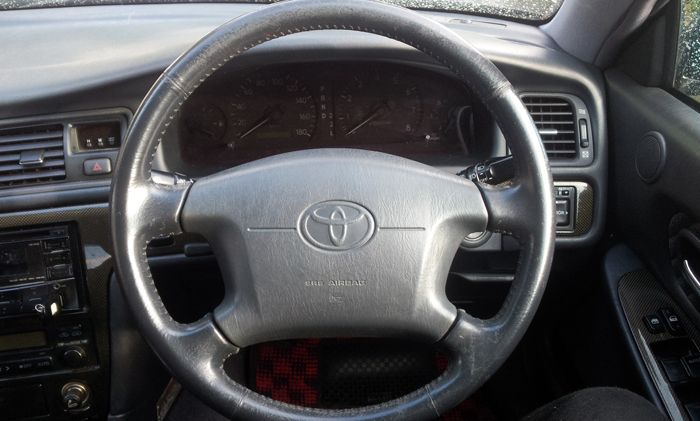
    I installed the steering wheel today, here is a quick guide for those that may have this old style Toyota wheel.
    sw01.jpg

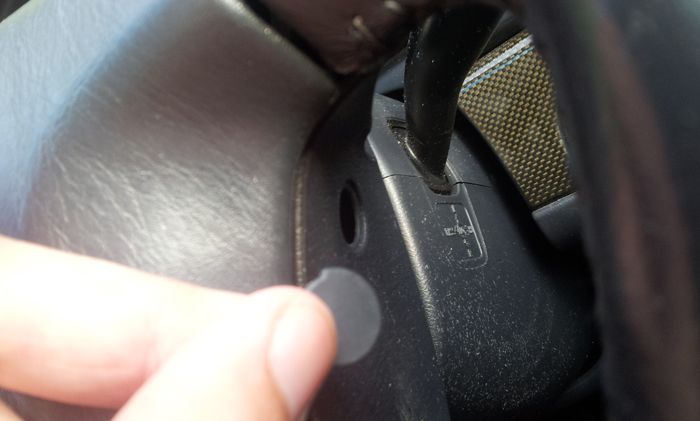
    Before you start make sure the cars wheels are completely straight, You must disconnect the battery and press on the break a few times so all the electric power is fully discharged. Now what you want to do is examine around the steering wheel for two removable nibs, they are covering the thorx screws that are holding the airbag on.
    sw02.jpg

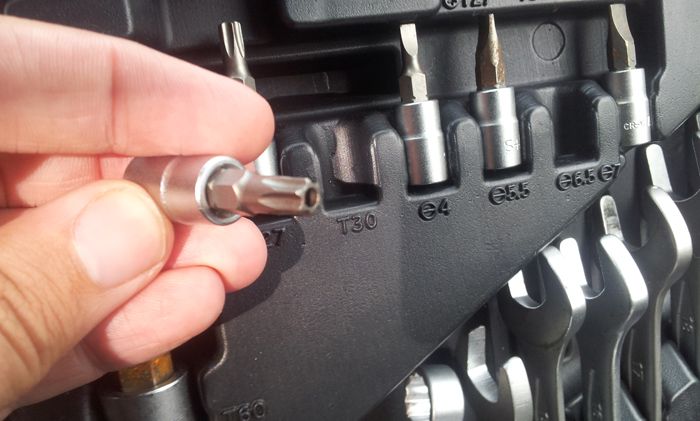
    Next take a T-30 TorX head and unscrew the screws. There are little plastic clips holding the screws inside the housing so you will need to give the screw driver plenty of play in order to get the screws far enough out.
    sw03.jpg

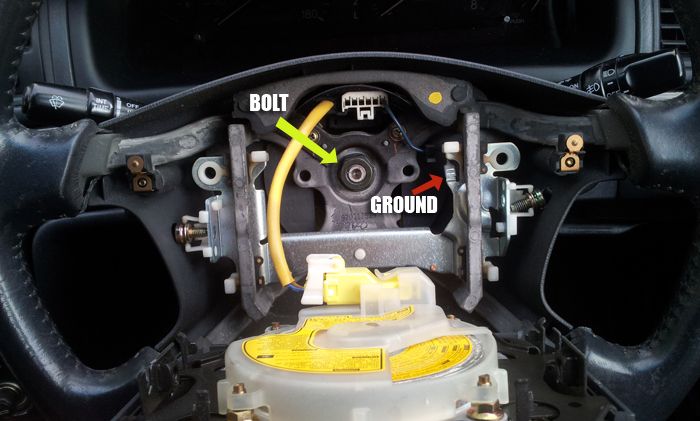
    Gently remove the airbag and move it forward, at the end of the yellow wire is a white clip, disconnect this and you can now put the airbag aside, you will need to remove a 19mm nut thats holding the steering wheel on but before that remove the ground on the right of the wheel.
    sw04.jpg

    Do not fully remove the nut, just loosen it, if you try and pull the wheel off with out the nut you will smack yourself in the face as it requires some strength to pull the wheel off.
    sw05.jpg

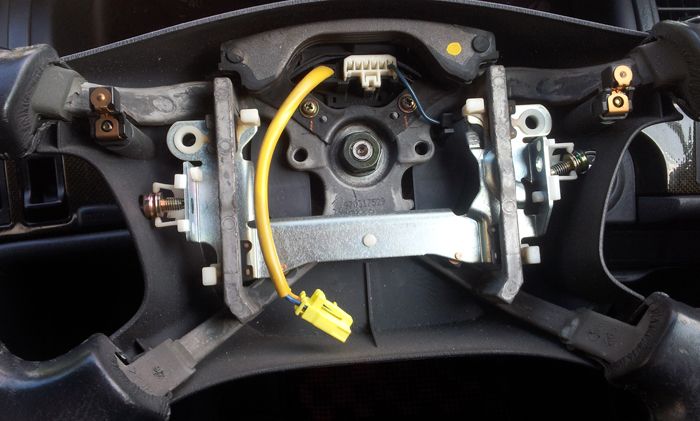
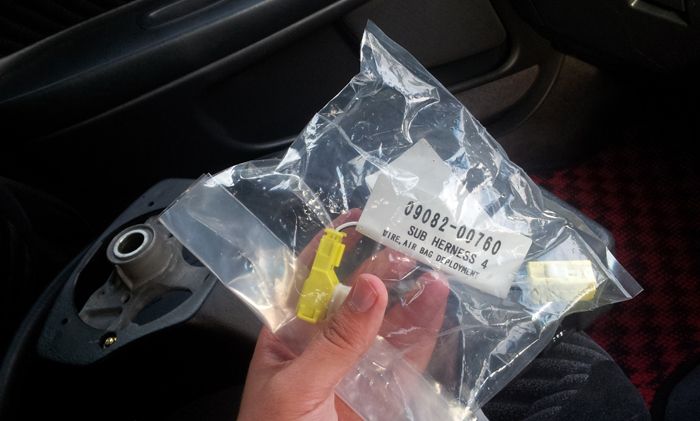
    Take the old wheel off and put the new one on. I used a newer Toyota wheel I got from a 03 Celica. At some stage Toyota Changed the airbag connector for their steering wheels but they have a converter you can get for €20 from them which plugs straight on.
    sw06.jpg

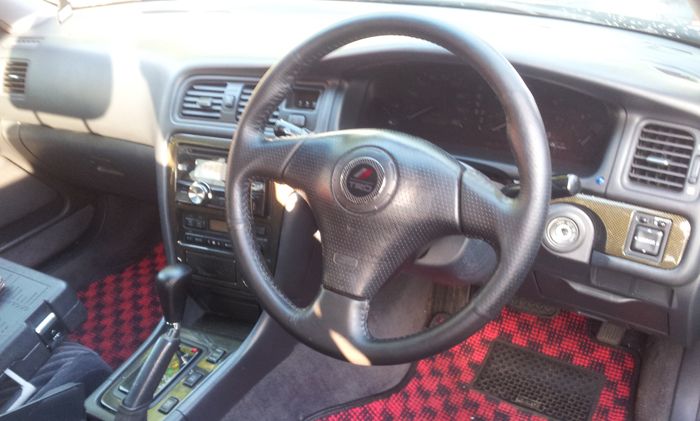
    Installing the new wheel is just the reverse of what you just done for the old one.
    sw07.jpg


  • Registered Users Posts: 3,404 ✭✭✭corkgsxr


    I'm waiting on brembo pads version 2. Hopefully here before the weekend.

    Basically there's 2 or 3 numbers that seems to fit the front. I think the ones I got might be wrong.

    They brake savage well on harder braking but. On slow speeds there's a squeak off the left which goes with any braking. But on light braking the right starts squeaking. And nothing with harder braking.

    There's bout wrong with the calipers. Copper grease on backs. There not glazed. Can't figure it. And there not fakes cos fakes wouldn't brake that good at speed.

    They've been on for a few 1000k's it's not something going to disappear with miles.

    The set coming is what the majority seem to be recommending.


  • Registered Users Posts: 13,655 ✭✭✭✭joujoujou
    Unregistered Users


    Well done, Chris! :)

    Just a hint if someone else would follow...
    [...]

    Do not fully remove the bolt, just loosen it, if you try and pull the wheel off with out the bolt you will smack yourself in the face as it requires some strength to pull the wheel off.
    [...]

    I guess you mean nut, right? :)

    Sometimes "some strength" is not enough, I experienced that myself.

    Toyota uses special tool for it, it's actually the same tool that is used to pull out belt pulleys and other small wheels. SST no. 09950-50013.

    319322.gif319323.gif

    It's even quite easy to make such a tool yourself, but it's not really necessary in this case.

    If steering wheel stuck badly it can be easily loosen if one bang his fist against it. Just keep banging for a while (going round the wheel).


  • Registered Users Posts: 5,875 ✭✭✭Foxhole Norman


    Chris that wheel completely transforms it, you did a fantastic job of the restoration too!


  • Closed Accounts Posts: 12,985 ✭✭✭✭dgt


    joujoujou wrote: »
    Well done, Chris! :)

    Just a hint if someone else would follow...

    I guess you mean nut, right? :)

    Sometimes "some strength" is not enough, I experienced that myself.

    Toyota uses special tool for it, it's actually the same tool that is used to pull out belt pulleys and other small wheels. SST no. 09950-50013.

    319322.gif319323.gif

    It's even quite easy to make such a tool yourself, but it's not really necessary in this case.

    If steering wheel stuck badly it can be easily loosen if one bang his fist against it. Just keep banging for a while (going round the wheel).

    I've used pullers to remove wheels on various Alfas over the years, it's nigh on impossible otherwise.

    Laser do the kit nice and cheap, similar to this one

    There's provisions in Chris' steering wheel pic for the pullers and all :D


  • Registered Users Posts: 4,974 ✭✭✭Chris_Heilong


    joujoujou wrote: »
    Well done, Chris! :)

    Just a hint if someone else would follow...

    I guess you mean nut, right? :)

    Yes I meant Nut, I will fix the post, thanks.


  • Advertisement
  • Registered Users Posts: 13,655 ✭✭✭✭joujoujou
    Unregistered Users


    Replaced accessory belt.

    5 minutes job at last. That was a real PITA before, but recently got this:

    319431.jpg

    nice and shiny. :D

    The problem was I had no tool to get into tiny space and relax hydraulic tensioner. :o


Advertisement