Advertisement
If you have a new account but are having problems posting or verifying your account, please email us on hello@boards.ie for help. Thanks :)
Hello all! Please ensure that you are posting a new thread or question in the appropriate forum. The Feedback forum is overwhelmed with questions that are having to be moved elsewhere. If you need help to verify your account contact hello@boards.ie
Please note that it is not permitted to have referral links posted in your signature. Keep these links contained in the appropriate forum. Thank you.

https://www.boards.ie/discussion/2055940817/signature-rules

Today I did something to my car (volume 2)

Options
1125126128130131327

Comments

  • Registered Users Posts: 8,532 ✭✭✭JohnBoy26


    Hal1 wrote: »
    Axel stands man please. :)

    Nothing wrong with blocks, although I wouldn't use a wheel for a base :)


  • Registered Users Posts: 8,532 ✭✭✭JohnBoy26


    joujoujou wrote: »
    Yup. :) Mine was exactly the same. 100% Paddy spec Terra. Just bought a set of new alloys from the web and kept them steelies for winter tyres. Now I have two terras actually - one I'm driving and another one as a donor car - currently almost totally disassembled.

    I never realized you had a set of alloys on it :)

    The terras were the base spec but they weren't terribly under specced imo. They came with most of the things you need really and they had abs too from 99 on which was a big plus.
    joujoujou wrote: »
    And that's old photo TBH. Now it has no suspension at all (actually nothing left under a car).

    That car doesn't look like it was in bad condition :)


  • Closed Accounts Posts: 9,607 ✭✭✭toastedpickles


    Today I helped change a head gasket on a 01 punto I only went to collect my engine :pac:

    This is the only picture i got

    2vlpkys.jpg

    So what was done (what I can remember)

    Cleaned the intake and exhaust valves
    Cleaned the block
    Put the valves in the block, put a coarse paste on then and ground it in
    Clean off the paste
    Put in the stem seals, old ones were rock hard
    then the springs
    Compressed them
    and put on the collets (think that's how they're spelled)
    There was more things out in at this stage, never got the name of them though, but they compressed the springs,
    Then we done the gasket with shellac sealer on both sided of it, then stuck on the valve block, more shellack on the gasket on that
    Torqued down the head bolts to 20Nm then 30 Nm then turned 90 degrees, let that settle for a bit and turn them another 90

    Had to leave after this but there you go!


  • Registered Users Posts: 8,720 ✭✭✭Hal1


    Polish and port the head. Get a few more ponies out of her.


  • Closed Accounts Posts: 9,607 ✭✭✭toastedpickles


    Hal1 wrote: »
    Polish and port the head. Get a few more ponies out of her.

    It was done all today, while thing is back to normal now, i was only helping so I'd no idea really, just going by what i was told/shown how to do it


  • Advertisement
  • Registered Users Posts: 6,845 ✭✭✭Noccy_Mondy


    Nothing major here, but got an adjustable intermittent wiper stalk for the focus, very easy to install, took about 2 mins. Should be a big help. Got an mp3 tape thing as well, very surprised with the quality! It's the small things sometimes. Sorry can't embed pics, on the phone.


  • Registered Users Posts: 13,655 ✭✭✭✭joujoujou
    Unregistered Users


    JohnBoy26 wrote: »
    [...] I wouldn't use a wheel for a base :)
    Why? Steel rim is stable and strong enough to be temporarily used for a base. And even more rims were involved. :D

    320733.jpg
    JohnBoy26 wrote: »
    I never realized you had a set of alloys on it :)
    And I still have a set. Lost loads of photos recently and I'm too lazy to go out and shoot another one. :o
    JohnBoy26 wrote: »
    The terras were the base spec but they weren't terribly under specced imo. They came with most of the things you need really and they had abs too from 99 on which was a big plus.
    No air condition, no alloys, few other ugly bits and pieces inside.

    Apart from that - well built cars. :)
    JohnBoy26 wrote: »
    That car doesn't look like it was in bad condition :)
    ...from a distance. :P

    Severely worn interior, rear underbody rusted, paintwork in horrible condition (loads of dents, scratches and handprints). But it was cheap (I'd definately pay more just for parts I needed from breakers) and I bought it deliberately as a source for spare parts.


  • Registered Users Posts: 3,793 ✭✭✭rizzee


    Hmm my rear passenger side running light/daytime light and my front passenger parking bulb/sidelight went before I went on holidays, car has been parked up just over a week now and eventually got time to go down to the auto factors and get a set.

    Changed the bulbs and the new ones arent working at all, however I tried them on the opposite side and they are working fine, so the bulbs are working it must be a connection. Any idea how this could happen or what it is? 01 Golf Mk4... Thanks.


  • Registered Users Posts: 4,373 ✭✭✭Dartz


    I learned that I should probably leave things to a trained mechanic. But I did it. I managed to replace my old and dying ignition coils with new D585 upgrades - for immediate benefit.

    Also, testing the duff coils - three showed abut 580 ohms between two terminals - while one just went open circuit. I guess, it's prop\per ****ed.

    320763.jpg

    You can see where the spark's been jumping through the insulation at the base of the coil. It's not the worst looking one.... there're hideous white stains left behind on the original mounting bracket - but it's the one that's dead. The others have some pitmarks in them on the base, aswell as the staining where it's been arcing to ground.

    Upshot is, the car didn't detonate itself apart when I started it, which is my biggest fear. Downside is, it's still running rich - but with a dead coil it might just need to relearn it's fuel trims for the new canned-Zeus fitted. They're much bigger than the stock coils, for a start....

    Either way, I did something to my car and didn't **** it up.

    (And yes, I did post it to the wrong forum)


  • Registered Users Posts: 19,854 ✭✭✭✭MetzgerMeister


    The original thinking was that those chalky stains on the bottom of the coils meant that they were FUBAR'd but after a few years, it was shown to be untrue. No harm in changing them though especially if they had been there since day 1. When I changed mine, the most unnerving part was those tiny buts and bolts. Some pain if one of them fell into the engine bay!!


  • Advertisement
  • Registered Users Posts: 3,506 ✭✭✭Interslice


    Tried to get my foglights going. I was only getting 0.12V at the connector so I gave up. Was hoping for a handy fix. Might be a relay or the switch :confused:.

    Was arsed doing electrical stuff so instead I fixed up the leaking cam cover gasket in a dirko sandwich and cleaned up the centre caps a bit.

    xljkv8.jpg

    Before
    n3uh74.jpg

    During... I sanded them back with 80grit and sprayed them with wheel silver. Should have went up through the grades of sand paper as you can still see the scratches a bit.
    2ewh0qt.jpg

    Noticed taking of the wheel that the universal CV boot has started to split and leak. It got me through the NCT but only lasted 1000 miles or so. I'll be doing it with a proper boot in a few weeks.


  • Registered Users Posts: 4,373 ✭✭✭Dartz


    The original thinking was that those chalky stains on the bottom of the coils meant that they were FUBAR'd but after a few years, it was shown to be untrue. No harm in changing them though especially if they had been there since day 1. When I changed mine, the most unnerving part was those tiny buts and bolts. Some pain if one of them fell into the engine bay!!

    Yeah. Kit I had, I...em... was only able to get two bolts into place. Big fat fingers are fun. The others were under the physical coils and I have no tool whatsoever that'll fit. It's holding well enough anyway.

    One of them i'm certain is ****ed anyway. Would be interesting to cut one open and see what it's like on the inside.


  • Registered Users Posts: 24,644 ✭✭✭✭punisher5112


    rizzee wrote: »
    Hmm my rear passenger side running light/daytime light and my front passenger parking bulb/sidelight went before I went on holidays, car has been parked up just over a week now and eventually got time to go down to the auto factors and get a set.

    Changed the bulbs and the new ones arent working at all, however I tried them on the opposite side and they are working fine, so the bulbs are working it must be a connection. Any idea how this could happen or what it is? 01 Golf Mk4... Thanks.


    Your car doesn't have DRL's unless fitted by you or someone else?

    Do you mean front 5w wedge type side light and rear red light when lights are switched on?

    Quite possible if 1 side front and rear not working would be a fuse or a loose connection.

    Sometimes the holders can get water damaged or just worn and the lamp connections won't make great contact.


  • Registered Users Posts: 613 ✭✭✭weekaizer


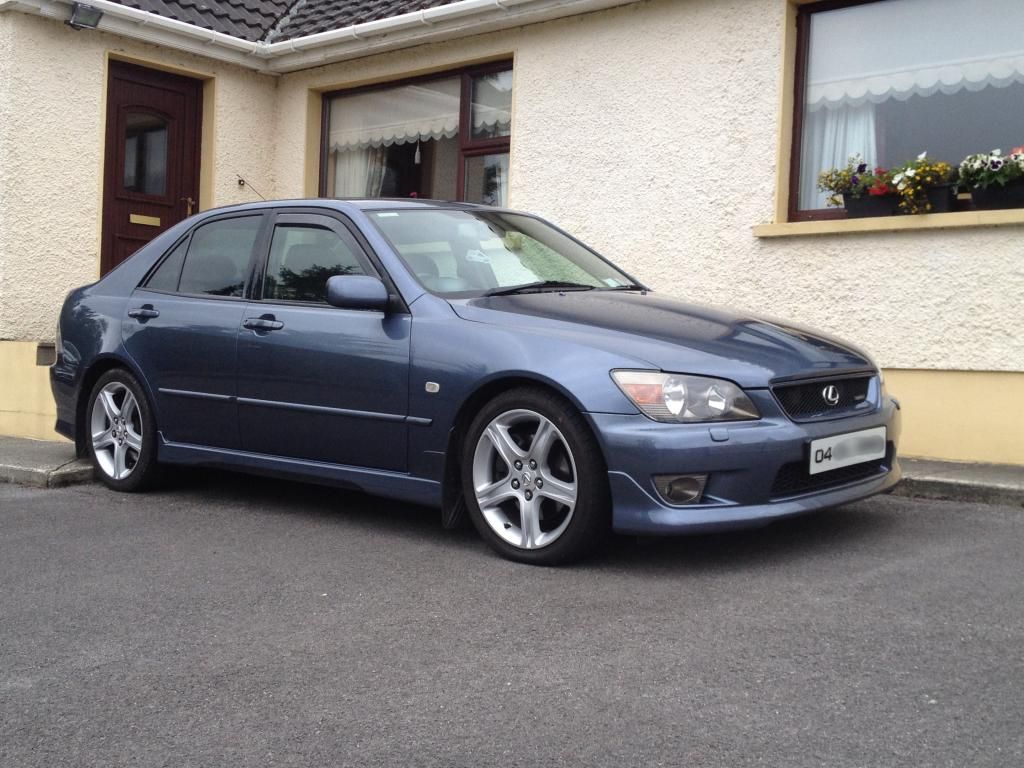
    I fitted a set of Eibach Pro-Kit springs to my 04 is200 sport.
    Handling and ride much improved, and hoping it will be even better when I get the 4 wheel alignment...
    It hasn't lowered the car majorly but very suttle drop is just what I wanted, don't like the slammed look!
    fc06b2e0-7087-4a6b-a060-d687ca4e06ca_zps2be865eb.jpg
    24622cdc-43ab-4f23-acb5-cc4ed295fcbe_zps09f80f7d.jpg


  • Registered Users Posts: 24,644 ✭✭✭✭punisher5112


    weekaizer wrote: »
    I fitted a set of Eibach Pro-Kit springs to my 04 is200 sport.
    Handling and ride much improved, and hoping it will be even better when I get the 4 wheel alignment...
    It hasn't lowered the car majorly but very suttle drop is just what I wanted, don't like the slammed look!
    fc06b2e0-7087-4a6b-a060-d687ca4e06ca_zps2be865eb.jpg
    24622cdc-43ab-4f23-acb5-cc4ed295fcbe_zps09f80f7d.jpg


    Nice motor.


  • Registered Users Posts: 13,655 ✭✭✭✭joujoujou
    Unregistered Users


    I shot a few photos.

    And I really (REALLY) have to look after it tomorrow.

    Doesn't look good.

    321048.jpg

    321049.jpg


  • Registered Users Posts: 1,363 ✭✭✭bmstuff


    2001 Saab 93 double radio installation.
    Challenging enough as the radio would not fit, but after some adjustments made, it turned out good.

    1.JPG
    2.JPG
    3.JPG
    4.JPG
    5.JPG
    6.JPG
    7.JPG


  • Closed Accounts Posts: 9,607 ✭✭✭toastedpickles


    Did you have to marry the radio to the car? Mine has to have that done it seems :o


  • Registered Users Posts: 1,363 ✭✭✭bmstuff


    Did you have to marry the radio to the car? Mine has to have that done it seems :o

    Hello, what do you mean?
    Radio works fine, even the retractable antenna works fine when the radio goes on and off.


  • Closed Accounts Posts: 9,607 ✭✭✭toastedpickles


    bmstuff wrote: »
    Hello, what do you mean?
    Radio works fine, even the retractable antenna works fine when the radio goes on and off.

    Like with mine if you change the radio, even with another saab radio it won't accept it or work unless it's programmed in with a diagnostic kit, just wondering did you have to do the same on that, but it seems not!


  • Advertisement
  • Registered Users Posts: 1,363 ✭✭✭bmstuff


    Like with mine if you change the radio, even with another saab radio it won't accept it or work unless it's programmed in with a diagnostic kit, just wondering did you have to do the same on that, but it seems not!

    Ok I see
    Not at all indeed, it worked straight.


  • Closed Accounts Posts: 9,607 ✭✭✭toastedpickles


    bmstuff wrote: »
    Ok I see
    Not at all indeed, it worked straight.

    Well that's me informed!


  • Registered Users Posts: 14,309 ✭✭✭✭wotzgoingon


    Like with mine if you change the radio, even with another saab radio it won't accept it or work unless it's programmed in with a diagnostic kit, just wondering did you have to do the same on that, but it seems not!

    Your car is a better spec one anyway. More high tech stuff going on.


  • Registered Users Posts: 13,655 ✭✭✭✭joujoujou
    Unregistered Users


    Fuel tank replaced.

    Old one:

    321263.jpg

    New (well, not so new alright):

    321265.jpg

    Plastic tanks were in corollas made in UK, steel ones in Japanese corollas.

    Fuel pumps are different, IMO it's safer and easier just to modify Japanese pump to put it on UK tank.

    Japs pump on Japs tank:

    321264.jpg

    Japs pump on UK tank:

    321266.jpg

    Long story short - diameter changed from 139 to 136 mm (angle grinder), seals cut (two rings from clear PVC) and glued (windscreen adhesive) to block unwanted holes.


  • Registered Users Posts: 5,925 ✭✭✭GvidoR


  • Posts: 0 [Deleted User]


    GvidoR wrote: »

    I cringed until the very end because I thought you had no Axel stand underneath. Phew!


  • Registered Users Posts: 8,480 ✭✭✭YbFocus


    We all know which is your wa☆king arm now :D


  • Registered Users Posts: 5,925 ✭✭✭GvidoR


    Ah, should've used the hydraulic jack. :P


  • Registered Users Posts: 23,694 ✭✭✭✭L-M


    I cringed until the very end because I thought you had no Axel stand underneath. Phew!

    I was the very same myself, jesus I wouldn't trust those jacks at all at all. They're absolutely brutal.

    Took me 9 hours to service a Bora once, you were lucky with 2 mins ;)


  • Advertisement
  • Registered Users Posts: 5,925 ✭✭✭GvidoR


    Took me 9 hours to service a Bora once, you were lucky with 2 mins ;)

    The magic of video editing made it seem like it was 2 minutes, it was about 20 in real life. :P

    Here's how my interior has changed.

    The day I bought it:

    14221410057_790c459df7_c.jpg

    Now:

    15197438752_3a0f63bc21_c.jpg

    (still not finished btw)


Advertisement