Advertisement
If you have a new account but are having problems posting or verifying your account, please email us on hello@boards.ie for help. Thanks :)
Hello all! Please ensure that you are posting a new thread or question in the appropriate forum. The Feedback forum is overwhelmed with questions that are having to be moved elsewhere. If you need help to verify your account contact hello@boards.ie
Please note that it is not permitted to have referral links posted in your signature. Keep these links contained in the appropriate forum. Thank you.

https://www.boards.ie/discussion/2055940817/signature-rules

Today I did something to my car (volume 2)

Options
1245246248250251327

Comments

  • Registered Users Posts: 1,305 ✭✭✭Harcrid


    Latest version is V14 I believe. Updating is just a matter of downloading the latest maps, burn to to a DVD (needs to be Dual Layer due to the size) and insert it into the RNS510. It will ask you if you want to copy the maps to the HDD which is always better than running it directly from the DVD.


  • Registered Users Posts: 9,997 ✭✭✭dodzy


    In the absence of a VCDS, you're sort of shooting blind but removing the EPB motor on the driver side rear and applying 12V did show that the motor was working so...onto the harness. Unplugged from the motor and peeled back the protective grommet to reveal this:

    409775.JPG

    Cut away the bad cable and got out the soldering iron and a bit of flex..

    409778.JPG

    Removed the rear boot access panel and cut into the cables that run inside the car to check for integrity on the remainder of the cable run. Metered out OK so taped it up

    409777.JPG

    Threw on a block connector and taped everything up to test

    409776.JPG

    Power on, and cycle the EPB 3 times. Error cleared on dash. All good and functioning correctly. Just need to get a decent piece of heat-shrink to finish the job properly. Thanks Halfords :)

    409779.JPG


  • Registered Users Posts: 14,309 ✭✭✭✭wotzgoingon


    Well I had a issue with my BMW e39 not starting. After tonnes of head ache it turns out to be a bad starter. The battery was flat so I hooked up a charger to the cars battery to charge it with out disconnecting the terminals and prior to that the car used to start first time every time so I assumed I fried some electronics. I hooked up the car to INPA to read any faults but there was none. I checked the EWS 3 module was getting power when I turned the key which it was and it was also sending power out so it was not EWS related then I turned my eye to the starter to see if it was getting power when key was turned on which it was and then I hit the starter with a screw driver and she started right up.

    I drove down the road to a local bog to bring the dog for a walk and the car wouldn't start so I hit it again and started straight away so deffo bad starter. I ordered a new one so I will fit it when it arrives. The starter is in such a difficult place that I have to strip out the air filter, Air mass sensor and all piping, throttle body, cabin filter and piping on the passenger side and then the intake manifold. So should be fun......not.

    The car failed the NCT recently on frayed flexible brake line so I changed that out sometime at the weekend. The back drivers side door would not open from the inside or outside but I managed to pull the door lining off and gain access. The cause of the problem was a cut rear outer door handle lock cable Wire, so I purchased a new one and fitted it. Problem solved.

    I also failed by having a airbag light on which I fixed so it is all ready for the NCT re-test once I get the new starter.


  • Registered Users Posts: 3,668 ✭✭✭eringobragh


    NCT time...

    MR2 cancer bar no2 [failed last year on other side] got one for free from a lad on MR2 forums


    Checked it the other side and sure enough it was rotten ..€48 from Toyota :P 2 coats of hammerite and 2 coats of Dynax UC wax

    UG5TFmE.jpg

    lp5o2jt.jpg

    MtqZkHf.jpg


    Pre NCT brake hose check -

    All sound as per usual

    i9uS8jA.jpg

    taped up and greased

    b1o4Kow.jpg


  • Closed Accounts Posts: 2,881 ✭✭✭shietpilot


    What's the purpose of greasing the brake pipes?


  • Advertisement
  • Registered Users Posts: 19,854 ✭✭✭✭MetzgerMeister


    shietpilot wrote: »
    What's the purpose of greasing the brake pipes?

    It stops the brakes from squeaking.


    :pac:


  • Registered Users Posts: 3,668 ✭✭✭eringobragh


    shietpilot wrote: »
    What's the purpose of greasing the brake pipes?

    Failed for having the tiniest bit of surface rust on the unions on a previous car - it just wiped off with a light sand but they insisted the hose needed changing :mad:

    I wanted to hammerite them but read on another thread somewhere they started playing silly beggars with some lad because of that..so worst comes to worst I wipe the grease off, zero corrosion on them for the record ;)

    NCT fail stats

    https://www.ncts.ie/1127

    The main failure items for 2016 were:

    1 : Tyres *
    2 : Front Suspension.
    3 : Brake Line / Hoses
    4 : Headlamp Aim.
    5 : Stop Lamps.

    * In previous years tyres were recorded under three separate headings (condition, thread and specification) but they are now all being grouped under the one heading. The overall failure rate has remained constant when compared to previous years.


  • Registered Users Posts: 22,281 ✭✭✭✭Esel


    shietpilot wrote: »
    What's the purpose of greasing the brake pipes?

    And what's a cancer bar? Typo?

    Not your ornery onager


  • Registered Users Posts: 3,668 ✭✭✭eringobragh


    Esel wrote: »
    And what's a cancer bar? Typo?

    ...aka a strut bar - affectionately known as a cancer bar in the MR2 community due to them rotting to the core- hence the 2 coats of hammerite and wax :P

    They serve no function per se - apparently they stiffen the chassis

    https://www.google.ie/search?q=mr2+cancer+bars&oq=mr2+cancer+bars

    She passed the NCT an hour ago BTW :cool:

    YqNkoNj.jpg


  • Registered Users Posts: 73,454 ✭✭✭✭colm_mcm


    It looks sorta smug!


  • Advertisement
  • Registered Users Posts: 3,381 ✭✭✭vintagevrs


    I had a worn bushing on my front control arm on the e30 that failed the NCT. So I bought new ones (m3 ones I'll have ye know:) ) that increase the caster and are apparently the go to replacement when they need changed. The centre of the bushing is offset rather than in the middle. Whilst I was at it I decided to replace the control arms, think the old ones were fine once I got them out but no harm when I was in there.

    Thing now is these new shiny bits make the older stuff look tired. It's enjoyable though refreshing all this stuff. Hopefully make the front end a bit sharper too.

    IMG_20170223_WA0002.jpg


  • Registered Users Posts: 2,704 ✭✭✭Cheensbo


    Been preparing the st206 Toyota Curren (3sge powered) track car, to date i have minimal photos so you'll have to bare with me :o

    First, the car came with no passenger seat, I think half the fun of going on track is having a passenger with you to enjoy it, so I got a seat from a celica and put it in along with a standard seat belt. Eventually I will put in another bucket seat but budget has dictated a standard seat for now.

    0xy.jpg


    Next on the list was fluids: oil & filter change with 10w40 semi synth & larger filter from a 3sgte.

    Changed coolant with genuine Toyota red coolant to make sure she stays nice and cool.
    0xJ.jpg

    Tyres! - purchased some track biased - kumho exsta xs ku36 tyres in 215 45 r17 size, got them off oponeo for feck all - 82 a corner delivered, they might be crap but they're better than the BCT S500 ditchfinders that the previous owner had on it :/ (he complained about how the car was shíte and did nothing but understeer :rolleyes:)

    0xz.jpg
    0xv.jpg

    Brakes, the front calipers weren't great - sliders were fine, I removed all sliders, cleaned off and put a small rub of copper grease on each, but the pistons weren't retracting too well, they probably would have been fine but i couldnt rest with the chance of them being sticky so I bought a second hand set in much better condition and whacked them on with a fluid flush and change to dot 5.1.

    Happy days, the new ones are yellow, to go with the plastidip orange bodywork :D


    0xn.jpg


  • Registered Users Posts: 4,172 ✭✭✭Top Dog


    Cheensbo wrote: »
    Been preparing the st206 Toyota Curren (3sge powered) track car, to date i have minimal photos so you'll have to bare with me :o ]
    Methinks a project thread is called for :)


  • Registered Users Posts: 2,016 ✭✭✭Slideways


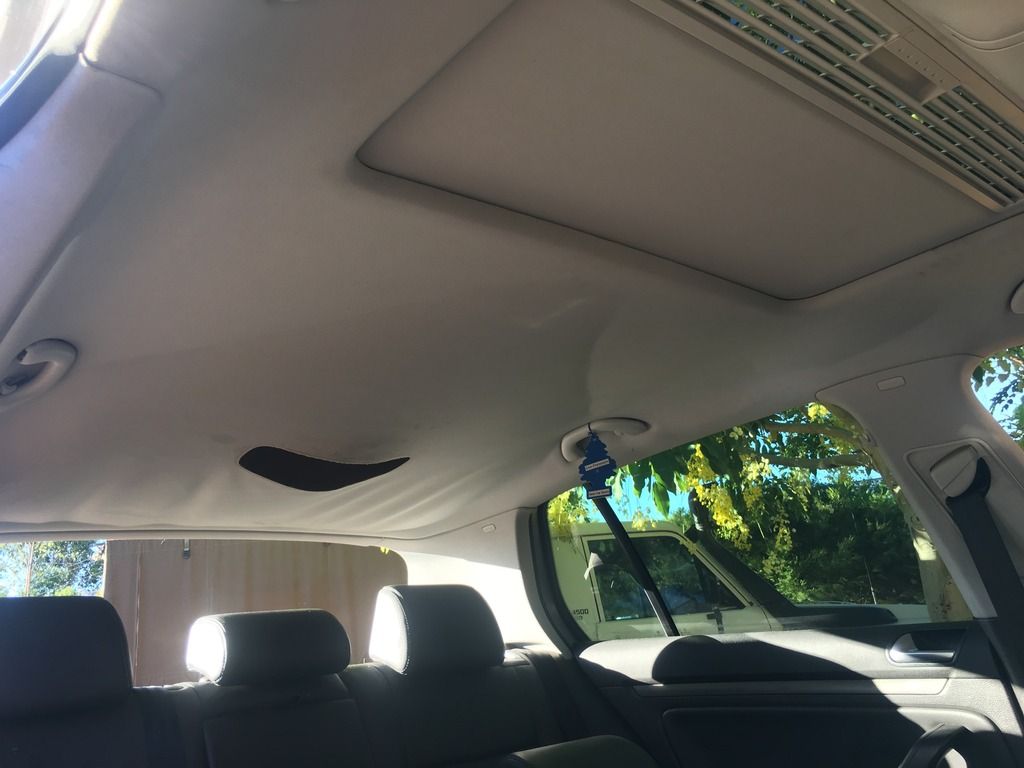
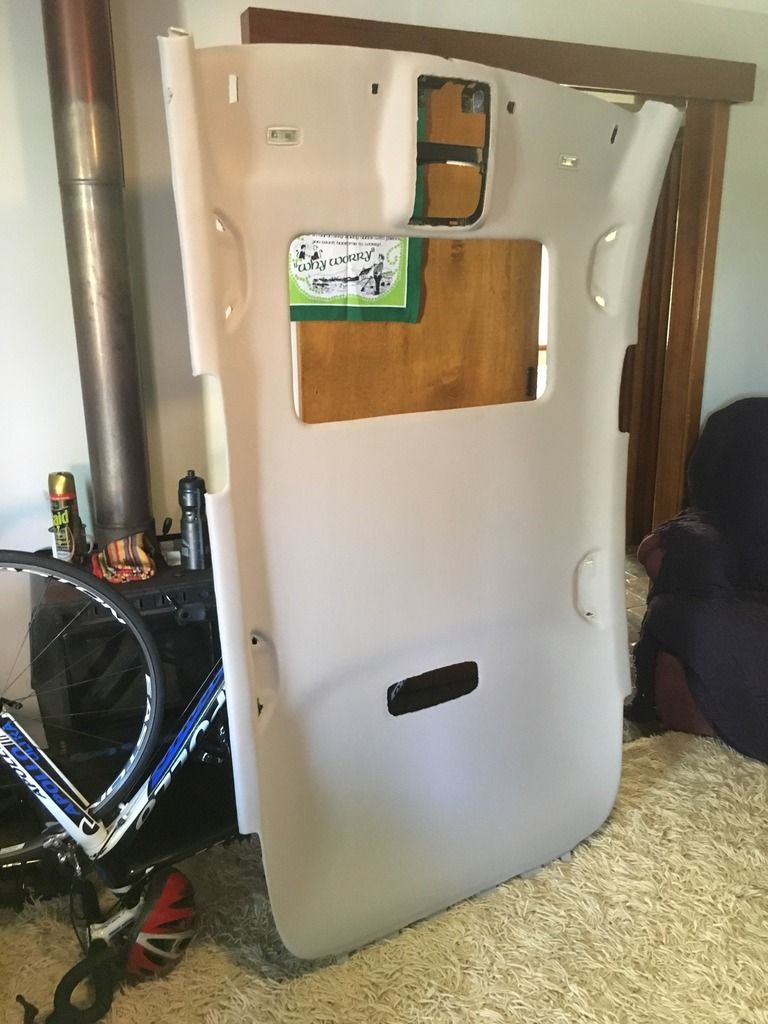
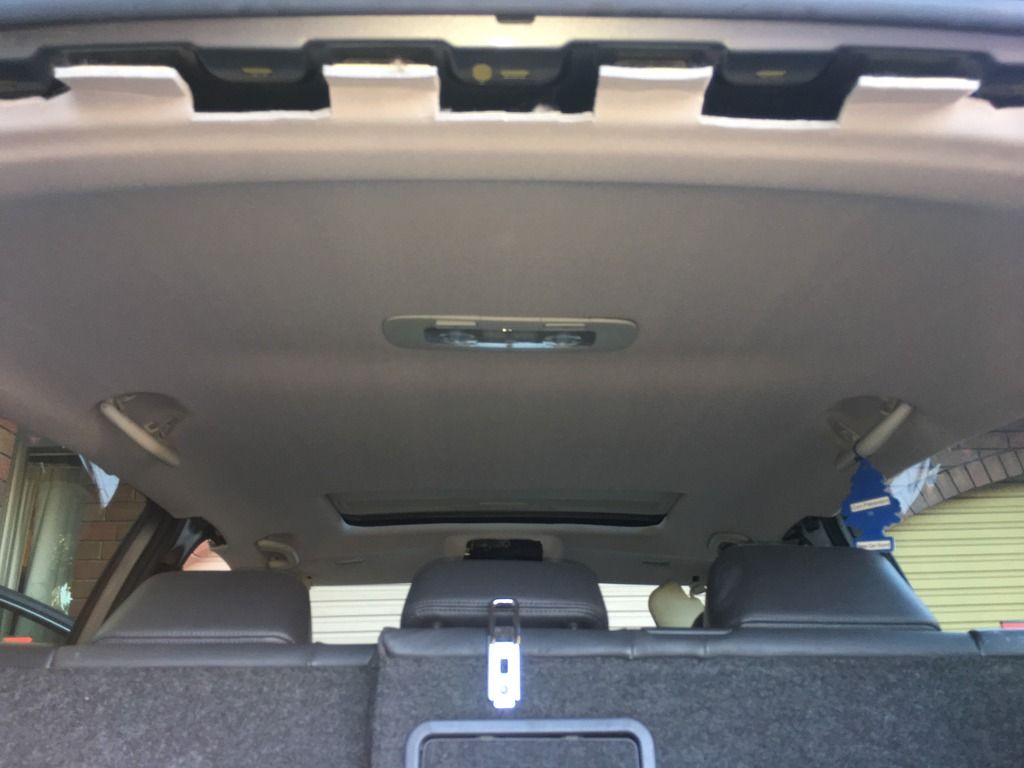
    So the Golf roof lining dropped in the hot weather we had here recently. Got various quotes all in or around $650
    Some even saying the sunroof had to come out.

    D23FDB3B-4B76-4768-A273-EACEFA5C2091.jpg

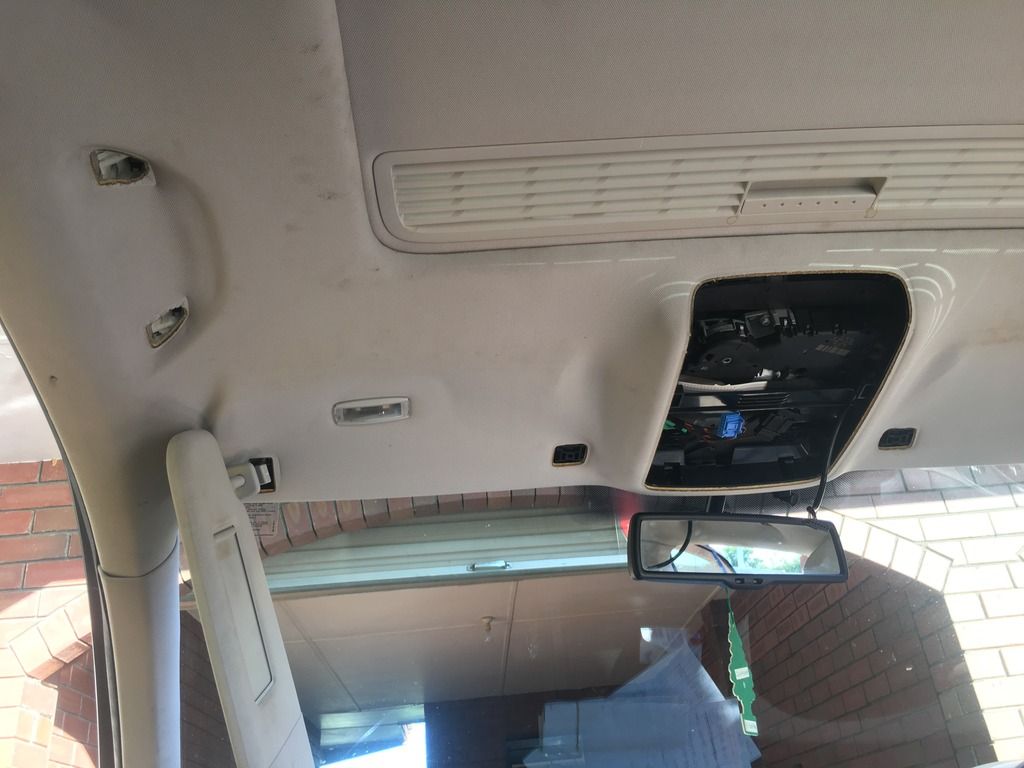
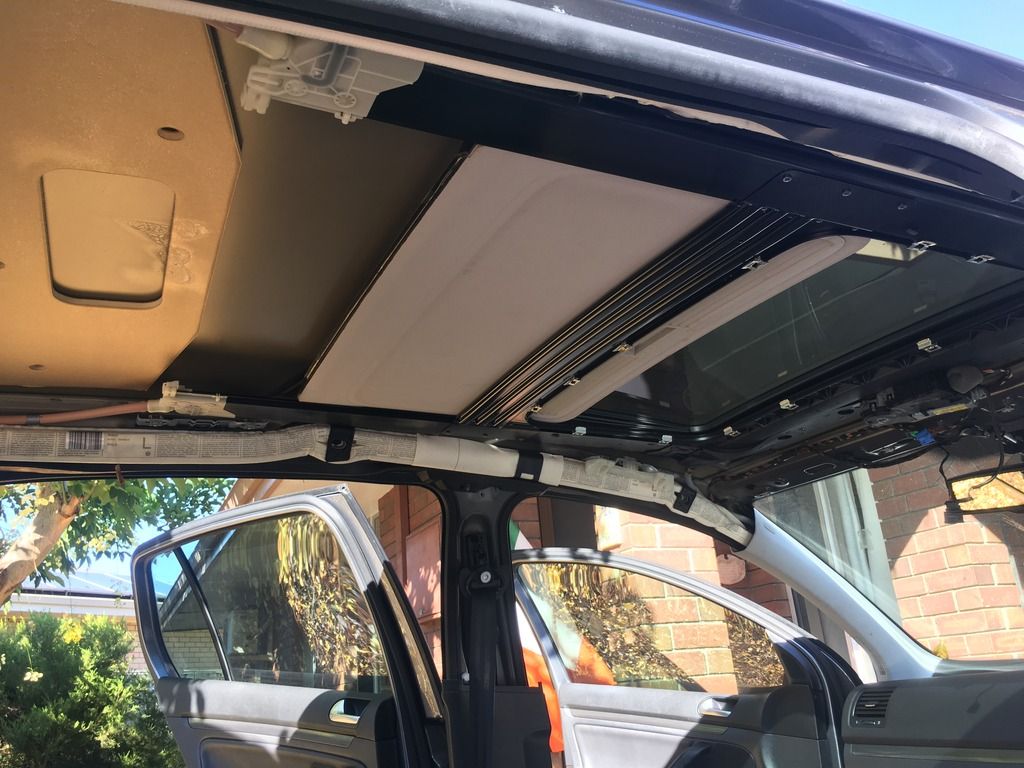
    There's lots of info on the net so got my torx out and started ripping.

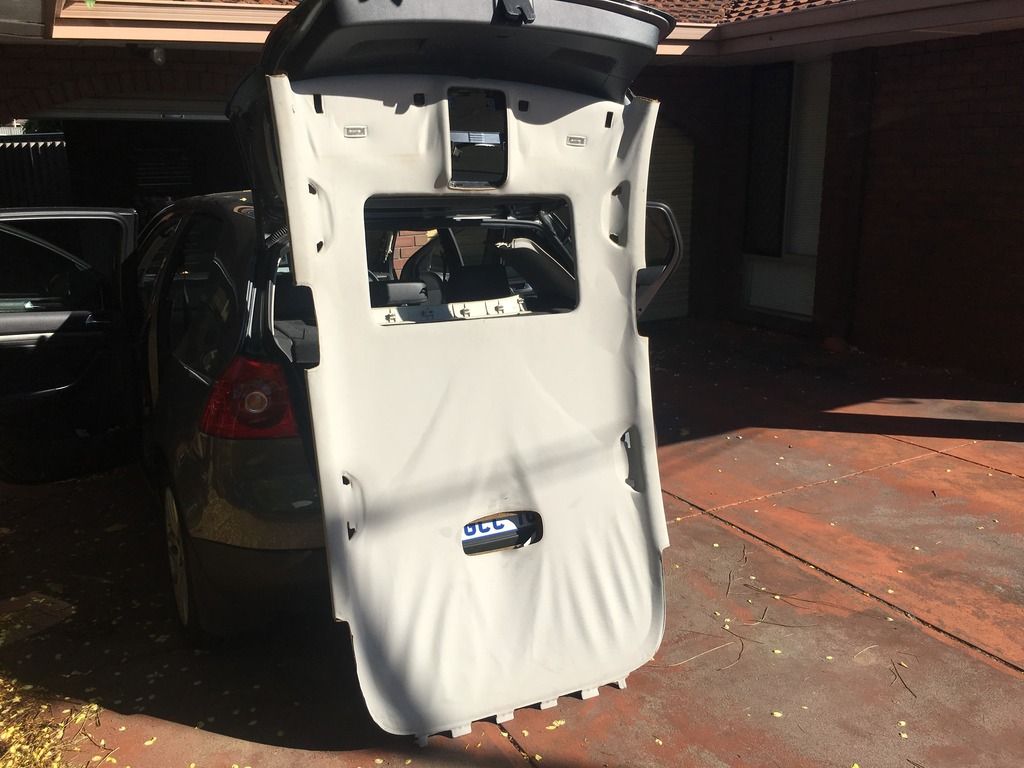
    It's a bit of a **** of a job but it's out now. Off to get recovered. I did price a new one. $900 :pac:

    E4826E68-7D02-4EE1-BC22-EA95B3E788D1.jpg

    37B64199-91BC-4AEE-9349-5D1AA2B92D45.jpg

    AB08D75A-F024-40AA-8CEA-9FE1B46058A0.jpg

    I'll update once I get the headliner back and in place. Fingers crossed that goes smoothly!!


  • Registered Users Posts: 2,016 ✭✭✭Slideways


    Not everything is slow in WA..

    68BEFF6F-3A37-473C-B010-84CEB181C224.jpg

    Pretty tidy job. Just straightened the old "oh Jesus" handle clips and refitted the whole thing.

    0F254603-BB1F-40DB-8326-C3593E4CB3B2.jpg


  • Registered Users Posts: 1,763 ✭✭✭Muckie


    Fitted a temp gauge to in the "Red Rocket!"

    thumbnail_IMG_2643_zpswqvodv03.jpg

    Present for Xmas from China, finally got around to fitting it.

    thumbnail_IMG_2649_zpscbnnvrdg.jpg


  • Registered Users Posts: 2,016 ✭✭✭Slideways


    Finally got all the clips and panels back in after replacing the headliner.

    What a fiddley bastard of a job. TBH, anyone who does this as their day job deserves the money the charge...


  • Registered Users Posts: 4,373 ✭✭✭Dartz


    Spent some time adjsting and tweaking then readjusting these.....

    Spot the new bit

    W8LojdLl.jpg


    Far too much more than I'll ever use. But cool


  • Registered Users Posts: 4,792 ✭✭✭Ded_Zebra


    I put the 156 V6 through an NCT last week. Failed on one top arm bushing, a broken reflector in the back bumper and headlight alignment. Changed out the two top arms, reflector, wound the headlights down and passed the retest :D I had all the parts that I had in stock too which was extra cost effective :)

    Took feck all pictures but here's the few of changing the top arms I did take;

    IMG_5620_zps8tj1hccx.jpg

    IMG_5621_zpsn3gkmj3s.jpg

    IMG_5622_zpsjbbbrtzm.jpg


  • Registered Users Posts: 4,864 ✭✭✭fancy pigeon


    Mercedes and rust... What, now there's a surprise! :D

    *Spoiler alert: there have been some pics taken from snapchat... Don't get upset by a bit of text! :)

    So, situation is on Thurs night, while stopped at a junction turning right, the front right spring carrier gave way. The result is a car that can't be driven at the local chadwicks

    32300215024_e01ee6940e_h.jpg

    Daylight reveals it's slightly lower than normal
    32763331220_4d16c1e1a9_b.jpg

    And the culprit
    32330296213_6ef19357f5_b.jpg

    Without going into too much detail, as there isn't any... The whole area was cleared and cleaned up
    32989334792_69935cd09c_b.jpg

    You can see where it split

    Out with an XUD injector pump pulley
    32989334152_c224ea1f2e_b.jpg

    Test fitting...
    32330294153_4fa2959052_b.jpg

    Then the new cap...
    32330292603_25547957e3_b.jpg

    Fit and weld the whole lot. I changed the lower arm too as the old one was about to fail near the balljoint
    32300110244_d2c2d387aa_b.jpg

    Reassemble everything and go for a test drive :)
    32330384503_3d221b3d4b_b.jpg

    Not too long to do, I had my normal day job to do also (remotely from my kitchen table of course) and generally took my time as I didn't need the car.

    It's better than before (there was gratuitous bump steer beforehand), it will need to be tracked and reinspected at the weekend, I can go trigger happy with the schutz gun and zinc 182 subsequently.

    Overall, pleased with the results so far :cool:


  • Advertisement
  • Registered Users Posts: 7,106 ✭✭✭dar83


    I saw a Merc taxi at the airport on Saturday evening with an elderly gentleman driver and the stance on it was exactly how your initial pictures above were.

    To say he had to crawl over the speed bumps at the pedestrian walkway was an understatement and they're not even harsh! :P


  • Registered Users Posts: 5,875 ✭✭✭Foxhole Norman


    Repaired my Alternator that was faulty in my 525 and has since been in my Touring, new regulator later and no more battery light!

    IMG_20170305_152157_zps6qffeami.jpg

    New yoke

    IMG_20170305_152434_zpsfyetnoei.jpg

    IMG_20170305_152908_zpsbtw9gucw.jpg

    All good

    IMG_20170305_161354_zpsa7je4frq.jpg

    Ignore the slight mould :pac:


  • Registered Users Posts: 24,644 ✭✭✭✭punisher5112


    Fix offside front light and nearside rear.


  • Registered Users Posts: 5,875 ✭✭✭Foxhole Norman


    Fix offside front light and nearside rear.

    There's nothing wrong with the front lights annoyingly! Rear boot has wiring issues so hence those lights :P


  • Registered Users Posts: 6,210 ✭✭✭Ubbquittious


    DPF finally removed. Now I'll have to wait for new one


  • Registered Users Posts: 2,350 ✭✭✭Mar4ix


    Fitted and programmed cruise control on my audi a3 :) Working perfect.

    IMG-4e1706737bff4d3f0273aa2022cd7b84-V.jpg


  • Registered Users Posts: 5,875 ✭✭✭Foxhole Norman


    Replaced both Pre-Cat Oxygen sensors with OE Bosch units, bank 2 had masses of oil from previous rocker leak and both were due a change at 152k miles.

    IMG_20170306_191928_zpsf2mzmoiw.jpg

    IMG_20170306_191932_zps74wtuxcp.jpg

    IMG_20170306_192044_zpsodxqgw0h.jpg

    IMG_20170306_192104_zpsdlfx5yor.jpg

    Pain in the ass to do Bank 2 due to how tight it is there but got there eventually even in the dark!


  • Registered Users Posts: 6,210 ✭✭✭Ubbquittious


    Bonnets and engine mounts are overrated
    chainblock.jpg


  • Registered Users Posts: 6,210 ✭✭✭Ubbquittious


    I have precious little to show for myself today, had to get a triple square 10mm socket to remove the aux belt pulley.

    The actual lock pin would not go in at all despite a load of wiggling the biggest that would fit is a drill bit that I believe is 1mm to small. The one on the left also wouldn't go in all the way although the cam is locked solid. I'll have another go off swapping out the dril bit for the proper lock pin. Aux belt tensioner seems to be in the way of the belt so that has to come out as well. Water pump seems to be leaking a bit

    tibby.jpg


  • Advertisement
  • Registered Users Posts: 6,210 ✭✭✭Ubbquittious


    030.jpg

    Took off the pulley for a second to see would that help. It did a small bit

    111.jpg

    Shiny stuff finally going in. Replaced the dreaded studs since the tibby kit had new ones anyway. Brand new DPF also arrived from BM catalysts costing nearly 400 quids. John Gormley would be proud. Until he saw what I was doing with the waste oil


Advertisement