Advertisement
If you have a new account but are having problems posting or verifying your account, please email us on hello@boards.ie for help. Thanks :)
Hello all! Please ensure that you are posting a new thread or question in the appropriate forum. The Feedback forum is overwhelmed with questions that are having to be moved elsewhere. If you need help to verify your account contact hello@boards.ie
Please note that it is not permitted to have referral links posted in your signature. Keep these links contained in the appropriate forum. Thank you.

https://www.boards.ie/discussion/2055940817/signature-rules

Today I did something to my car (volume 2)

Options
1249250252254255327

Comments

  • Registered Users Posts: 6,845 ✭✭✭Noccy_Mondy


    Where did you get them done?


  • Registered Users Posts: 619 ✭✭✭mondeoman2


    Where did you get them done?

    Collins Engineering In Bray:)


  • Registered Users Posts: 407 ✭✭coolhandspan


    hi all, anyone know a good company/guy that can remove a snapped glow plug? have one sheared off in cylinder head. audi a3 2.0 tdi 2009


  • Registered Users Posts: 73,454 ✭✭✭✭colm_mcm


    So the drivers seat base of the Civic was gone a bit manly after 10'years of use. It wasn't great when I bought it all those years ago, but tonight was the night to sort it.

    IMG_1126.jpg
    IMG_1129.jpg

    So, unbolt the seat from the floor, then undo the airbag/seatbelt wiring from the seat and unplug the seat.
    Then there's a load of clips and straps holding the seat cushion to the seat base, fiddly.

    Then to undo the material from the bars embedded in the foam, there's more plastic clips.

    Rub in some vanish oxi gold and detergent and bung it in the wash.

    I've also stuck it on to dry for 20 mins. It's nearly ready to come out. Haven't seen it yet, but I've done loads of seats this way so should be fine. Don't know how the velour/suede kinda finish will cope though.

    Time will tell.


  • Registered Users Posts: 73,454 ✭✭✭✭colm_mcm


    I'd call that a win.
    IMG_1130.jpg

    Came out spotless, wrinkles should go once it's on the cushion again.


  • Advertisement
  • Registered Users Posts: 73,454 ✭✭✭✭colm_mcm


    These are the little clip yokes that hold the seat material to the cushion, that's what stops it getting wrinkley

    IMG_1133.jpg

    Here it is all finished.
    IMG_2155.jpg

    IMG_2154.jpg

    Funny material. Looks spotless in real life, looks strange on camera depending on the light and what way you've just rubbed it
    IMG_2157.jpg


  • Registered Users Posts: 24,644 ✭✭✭✭punisher5112


    mondeoman2 wrote: »
    Collins Engineering In Bray:)

    How much look real well. Something I need doing and also need some panels sprayed and isopon on wing.(spelt wrong I'm sure)


  • Registered Users Posts: 619 ✭✭✭mondeoman2


    How much look real well. Something I need doing and also need some panels sprayed and isopon on wing.(spelt wrong I'm sure)

    €530 to refurb all 4 wheels and fix 2 buckles

    18" wheels.


  • Registered Users Posts: 4,373 ✭✭✭Dartz


    Amazing the difference a basic service makes to a car. Fresh oil, new filters and a clean of the MAF and it's just that bit happier, peppier and smoother.

    The brakes are in rag order, but the caliper bolts are ****ed beyond my ability to undo them. Needs a breaker bar, which I'll have to buy. Or pay a mechanic to do.


  • Registered Users Posts: 14,309 ✭✭✭✭wotzgoingon


    Find a hollow steel bar to slip over ratchet.


  • Advertisement
  • Registered Users Posts: 4,373 ✭✭✭Dartz


    Ah yeah. Unfortunately. Everything these days is ****ing Qualpex. ;P

    I'll have to dig something stiff up during the week. And then I amn't sure the ratchet will be up for it.

    But those ****ers have been in there since the factory built it.


  • Registered Users Posts: 8,720 ✭✭✭Hal1


    Yikes, so basically they are seized. I have removed some impossible bolts in the past. On the verge of quitting and submitting defeat by handing over the job to my local mechanic.

    The way I've avoided this is by soaking the bolts / nuts in a lot of wd40 the previous night, then about an hour before starting the job.

    Failing that I use my blow torch and the big stubborn 1/2" breaker bar. I think I paid €35 from halfords for it. If you don't have one it definitely makes the job a bit easier.


  • Closed Accounts Posts: 26,658 ✭✭✭✭OldMrBrennan83


    This post has been deleted.


  • Registered Users Posts: 4,373 ✭✭✭Dartz


    I'll have another go next weekend. Blast 'em all saturday. Pop them on Sunday. I have an impact driver but no socket that'll work with it. (Bought it to get the safety screws out of the disks and it was beautiful

    And Lithium grease on everything as it goes back together just makes taking stuff apart again so much easier.


  • Registered Users Posts: 19,854 ✭✭✭✭MetzgerMeister


    Dartz wrote: »
    I'll have to dig something stiff up during the week.

    Da fuk :confused:


  • Registered Users Posts: 5,875 ✭✭✭Foxhole Norman


    Replaced my Timing Chain Tensioner and Front Brake Pads this evening. Tensioner wasn't too bad to be fair but said I'd do it as there was no history of it being done and I changed the pads because even though they were new, they were squealing mad even with copious amounts of grease, some cheap ****e was on the front. New Bosch ones in now that I had lying around after ordering them by mistake ages ago and squealing is already gone!

    The tensioner was an easy change, remove the Airbox/CAI and MAF and then underneath the driver side rocker you'll see a 19mm bolt protruding from the head, this is the tensioner, one crack and it'll twist out easy. Screw new one in and tighten and replace the Airbox/CAI.

    Tensioners:

    IMG_20170510_210536_zpsh5gwtrzx.jpg

    Removed:

    IMG_20170510_210602_zps5nks3pjp.jpg

    Replaced:

    IMG_20170510_211738_zpsacifa3jj.jpg

    Back together:

    IMG_20170510_213655_zpsfoinzauq.jpg

    Plenty of meat still left on these rubbish yokes.

    IMG_20170510_214711_zpszc6m3xou.jpg


  • Registered Users Posts: 9,660 ✭✭✭Voodoomelon


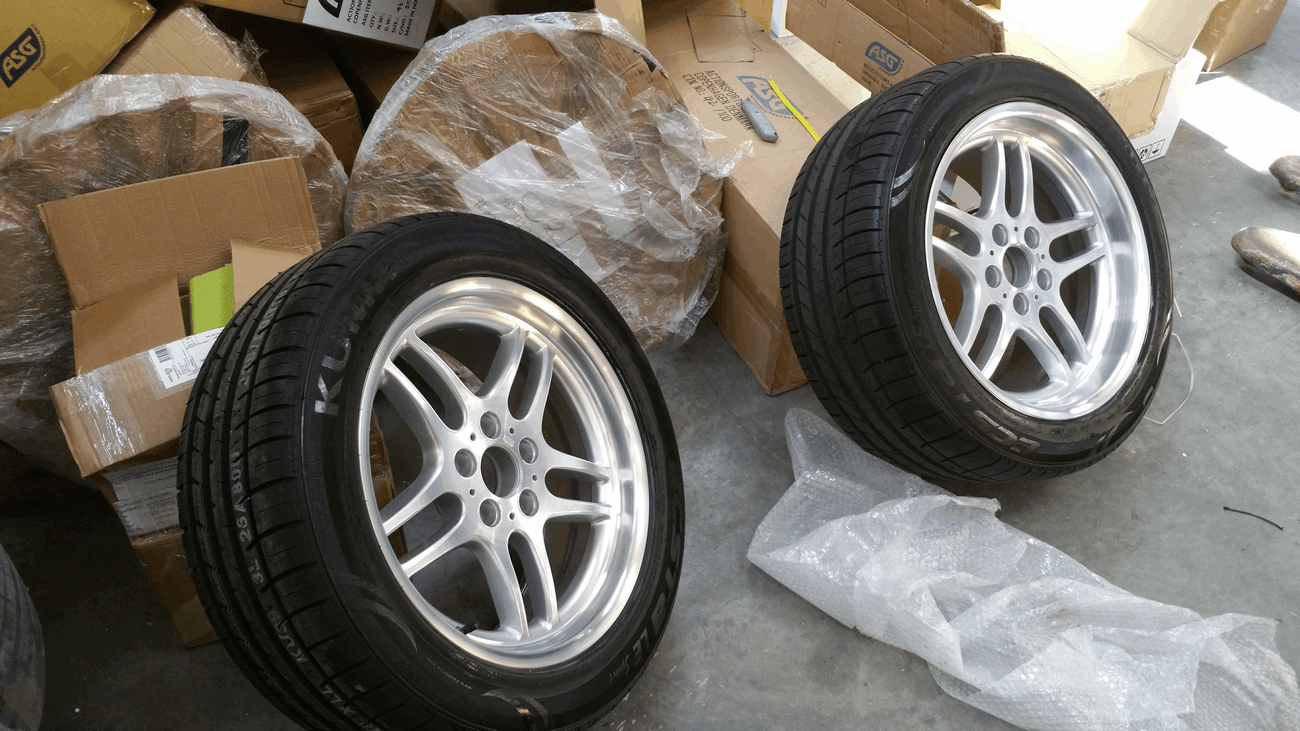
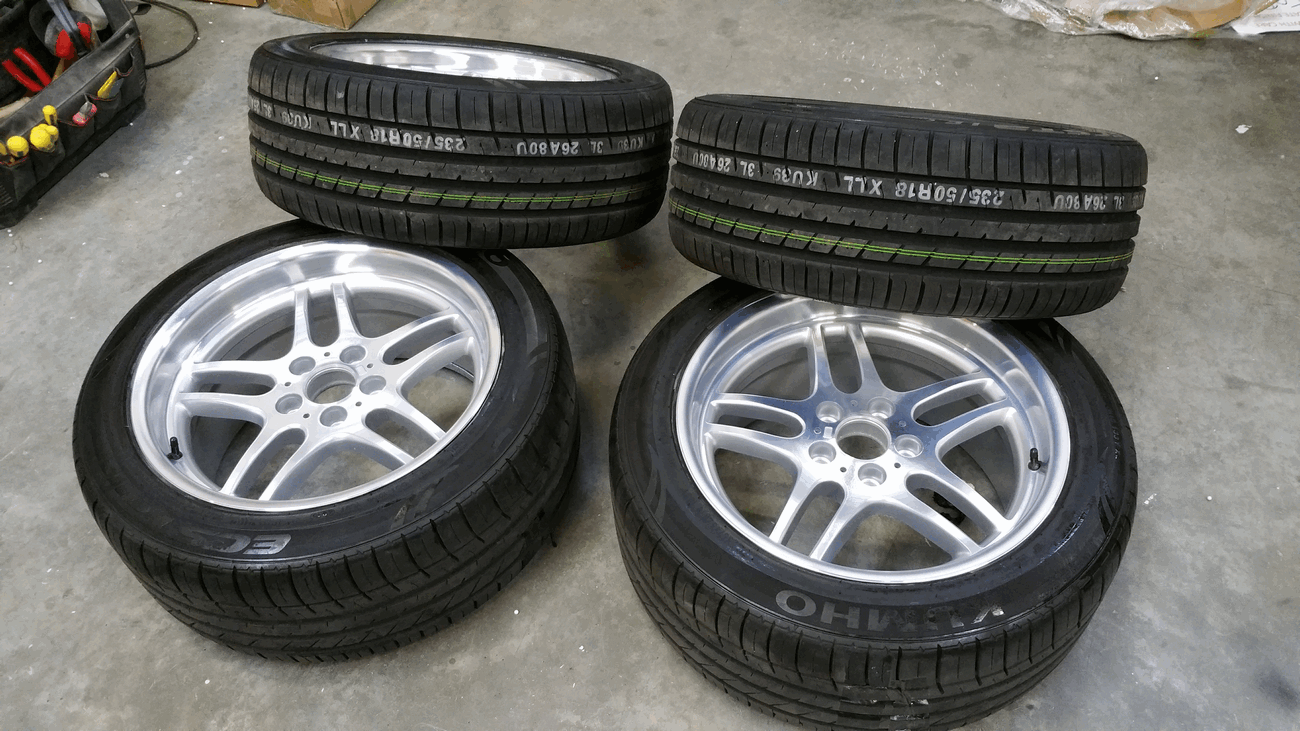
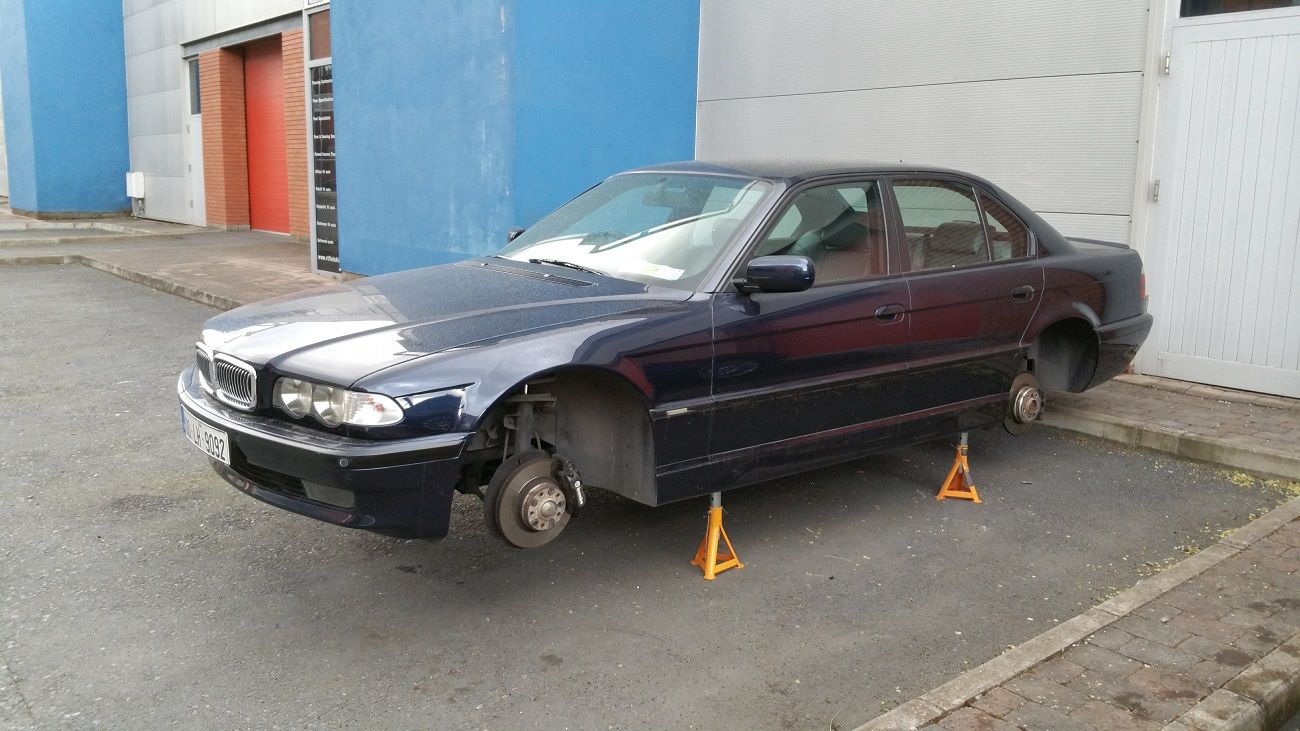
    The first step of my E38 728i refurb is complete, plan is to do it up to showroom condition and sell into the UK.

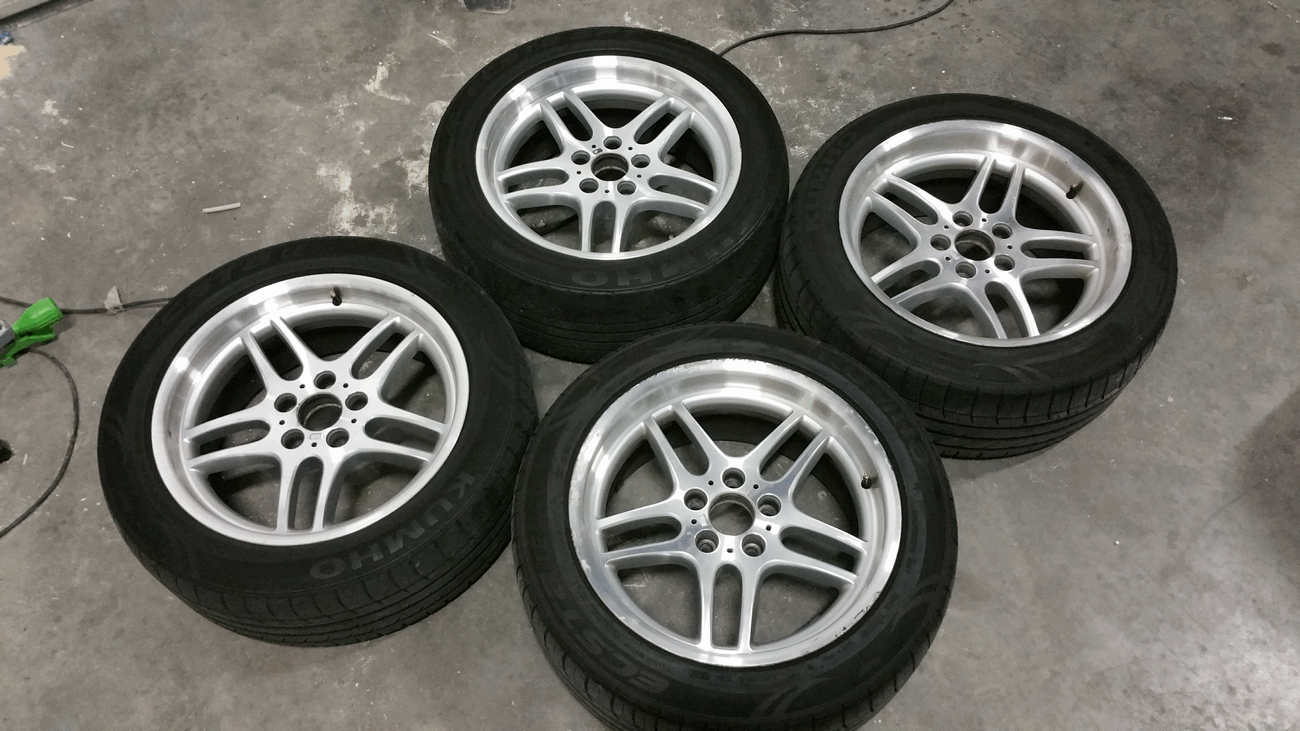
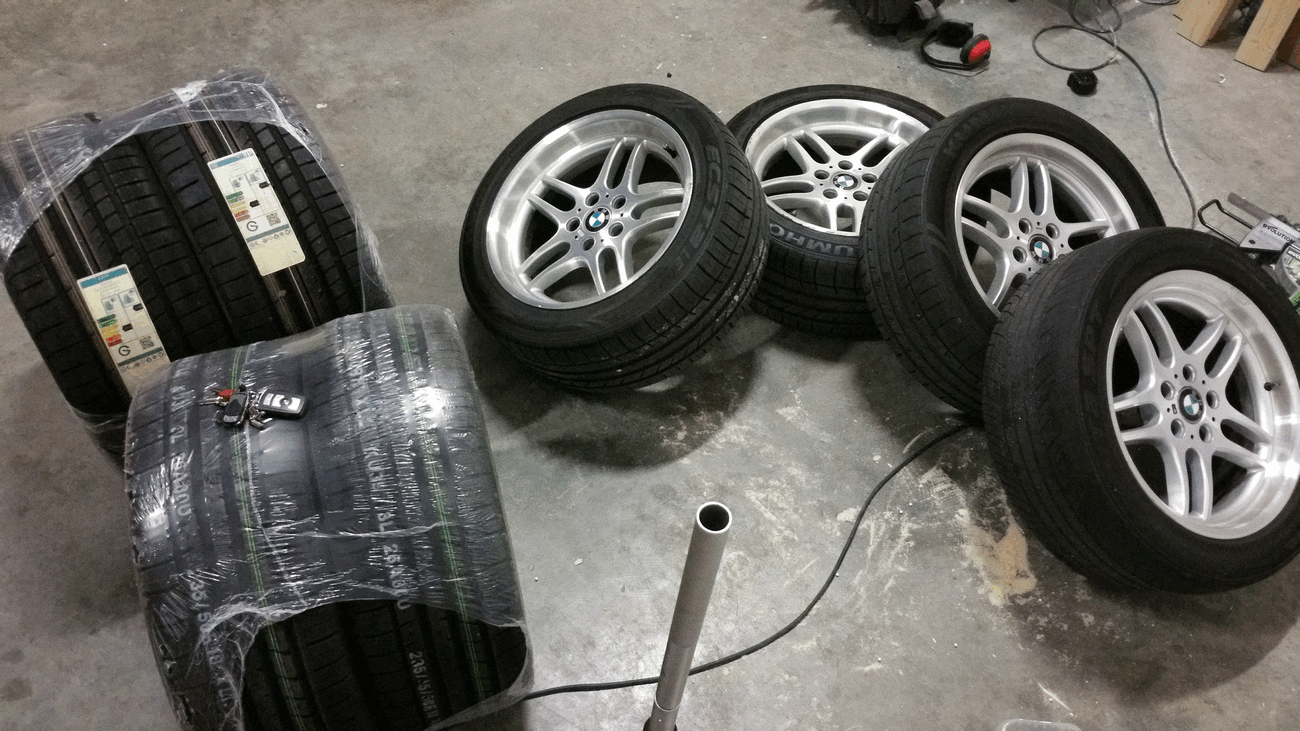
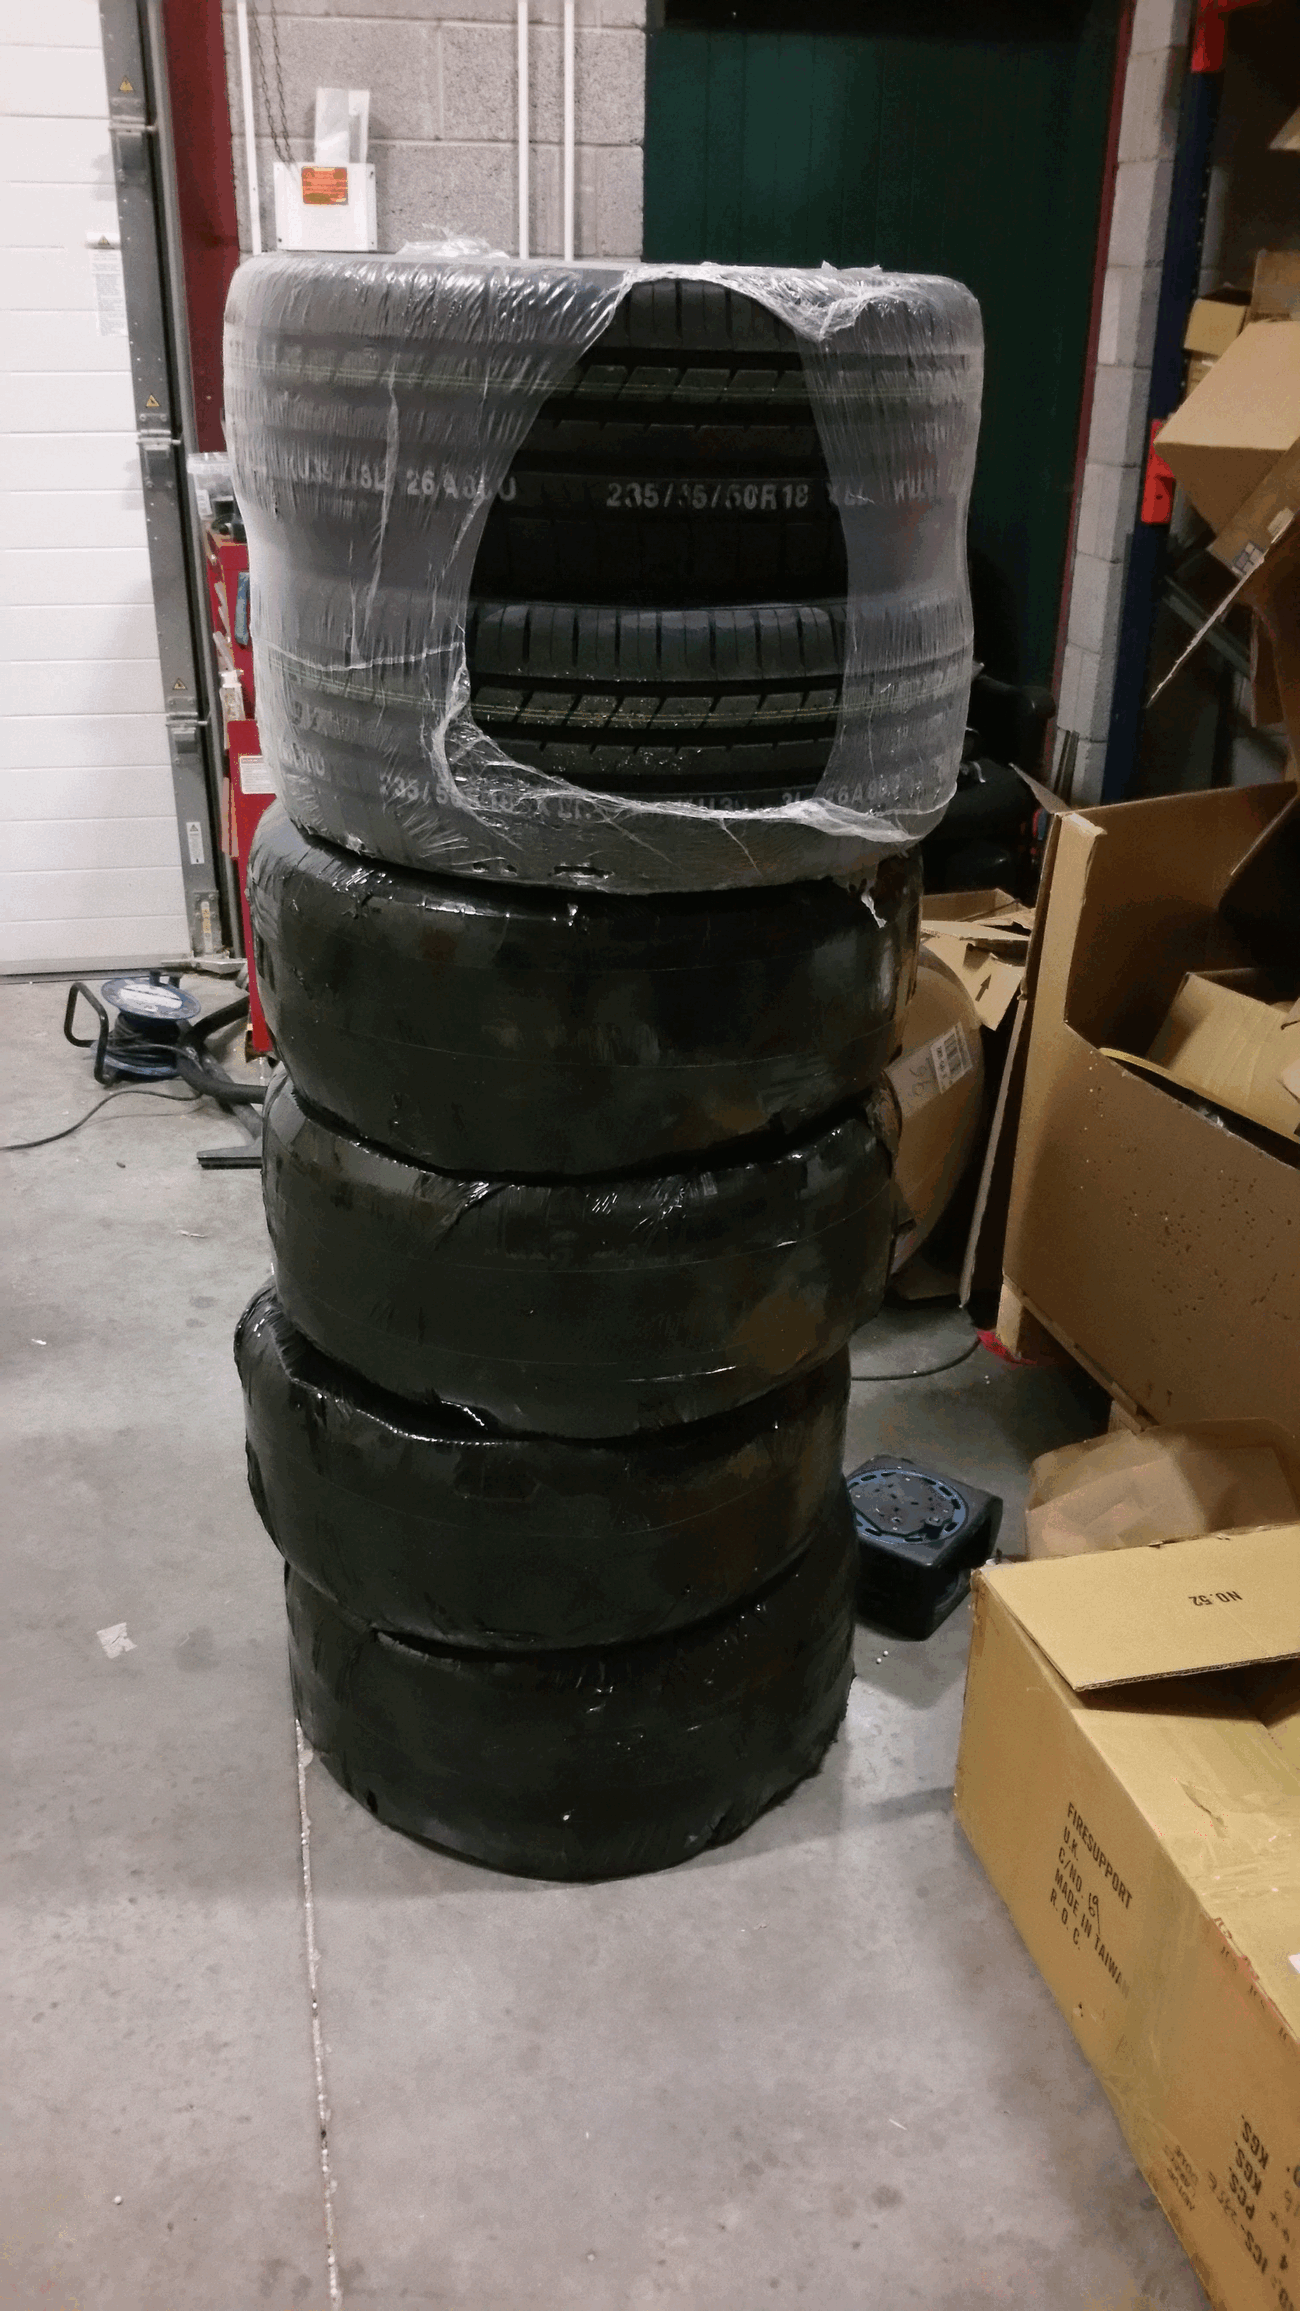
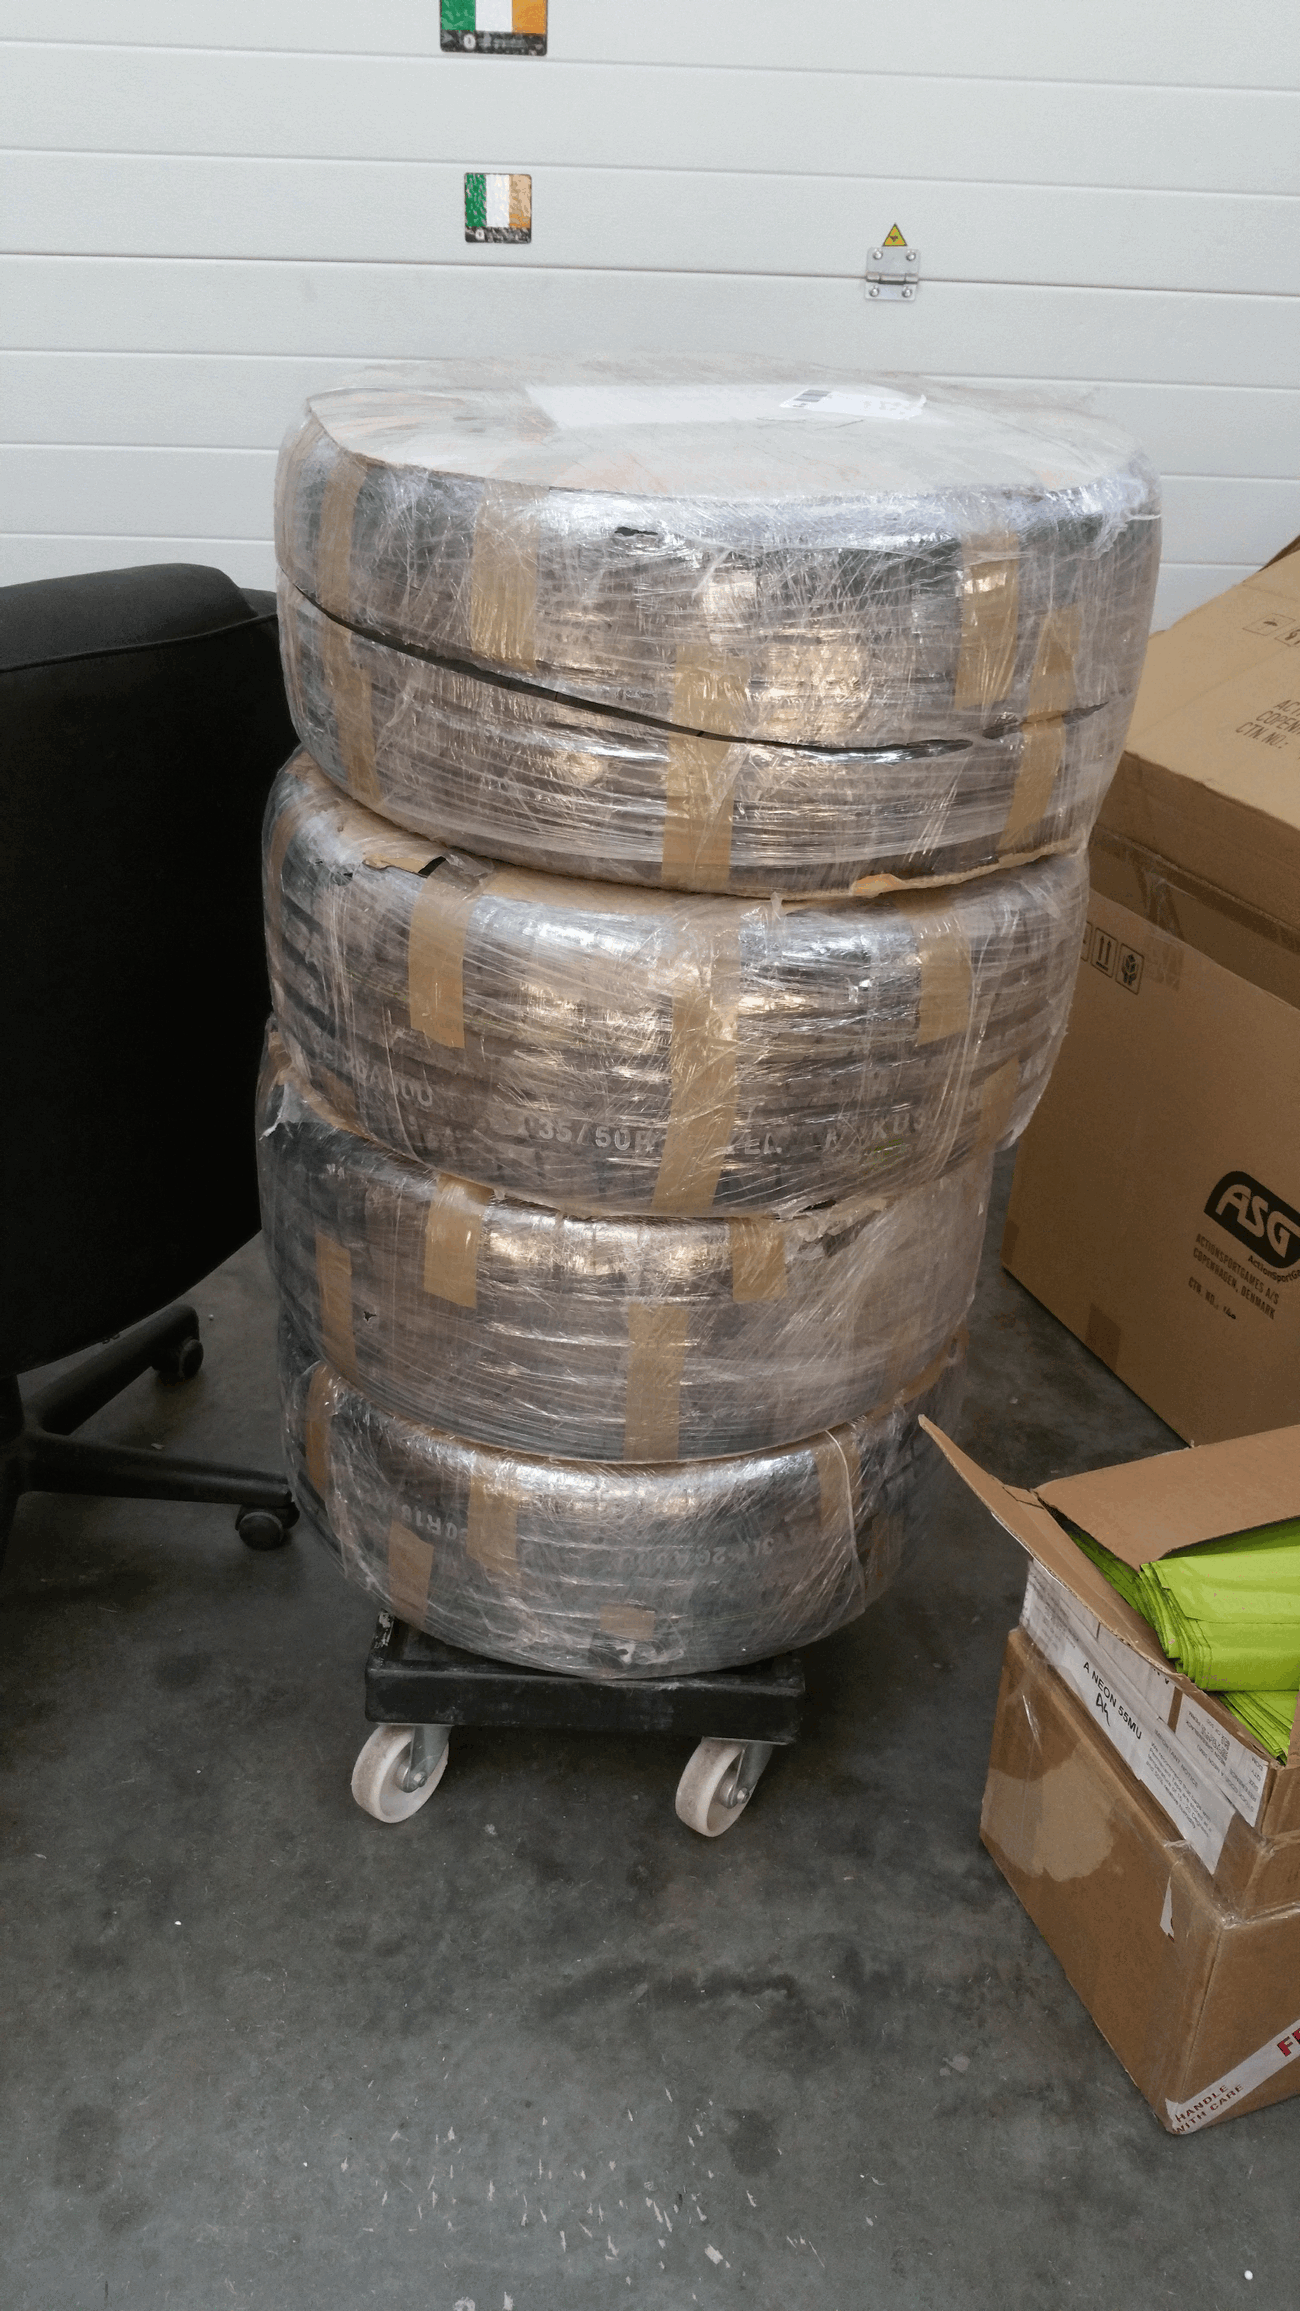
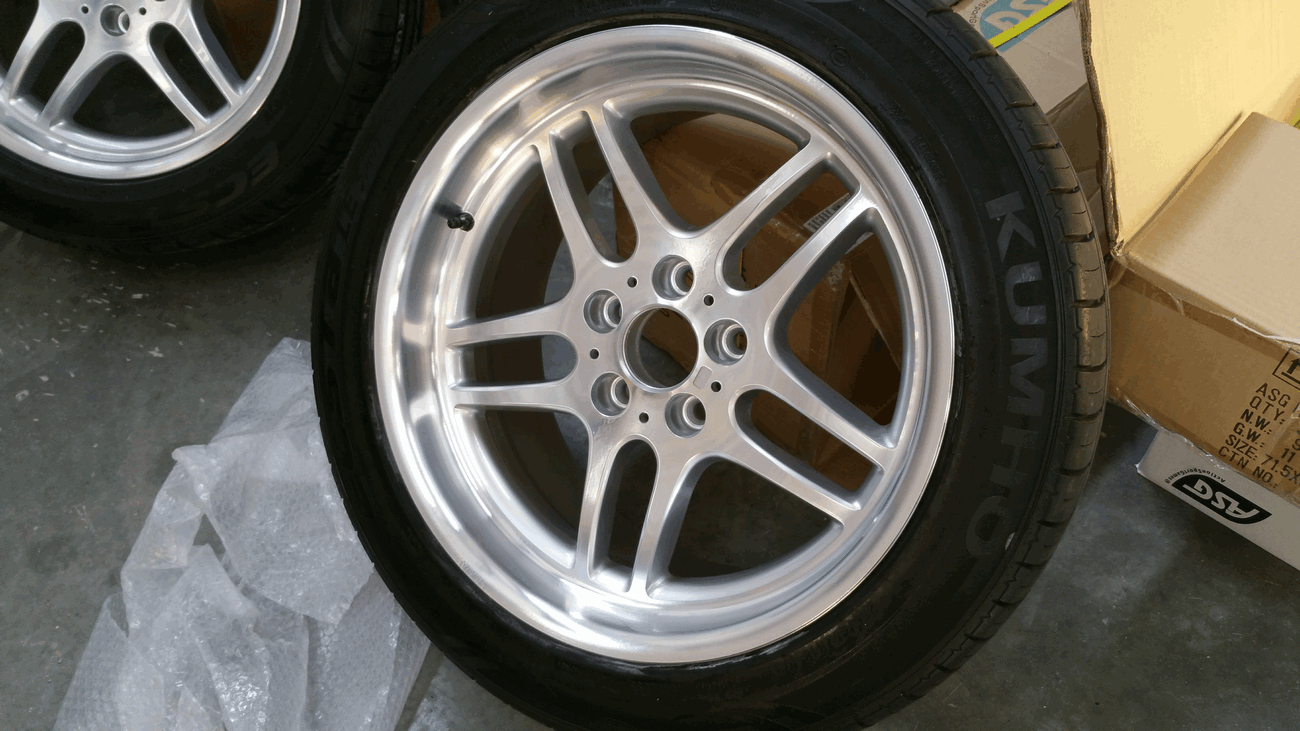
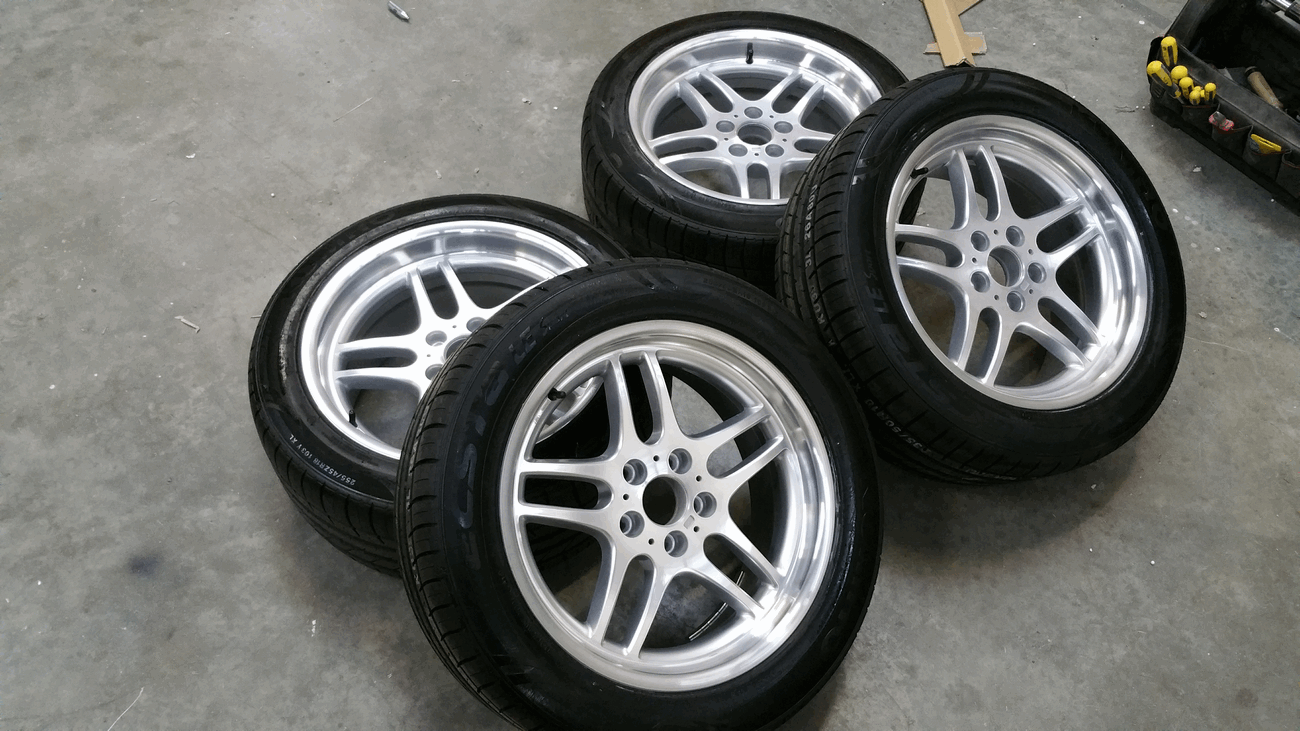
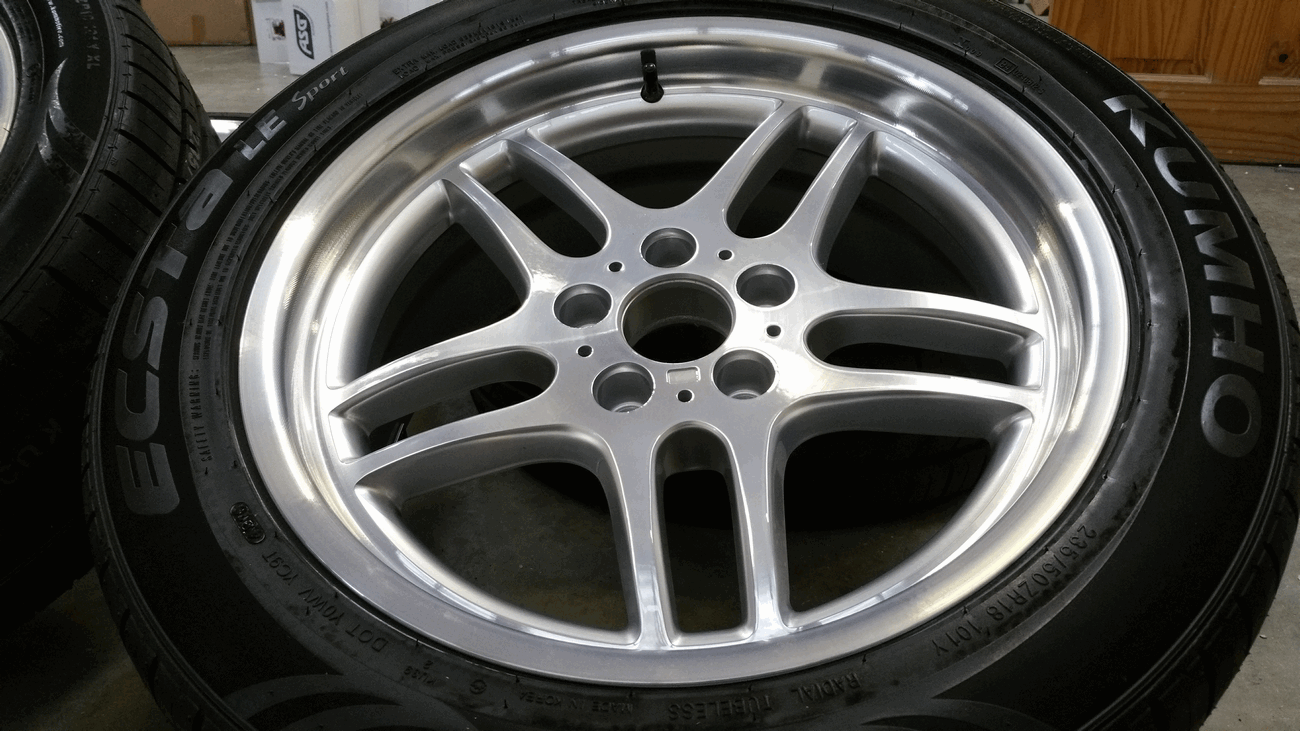
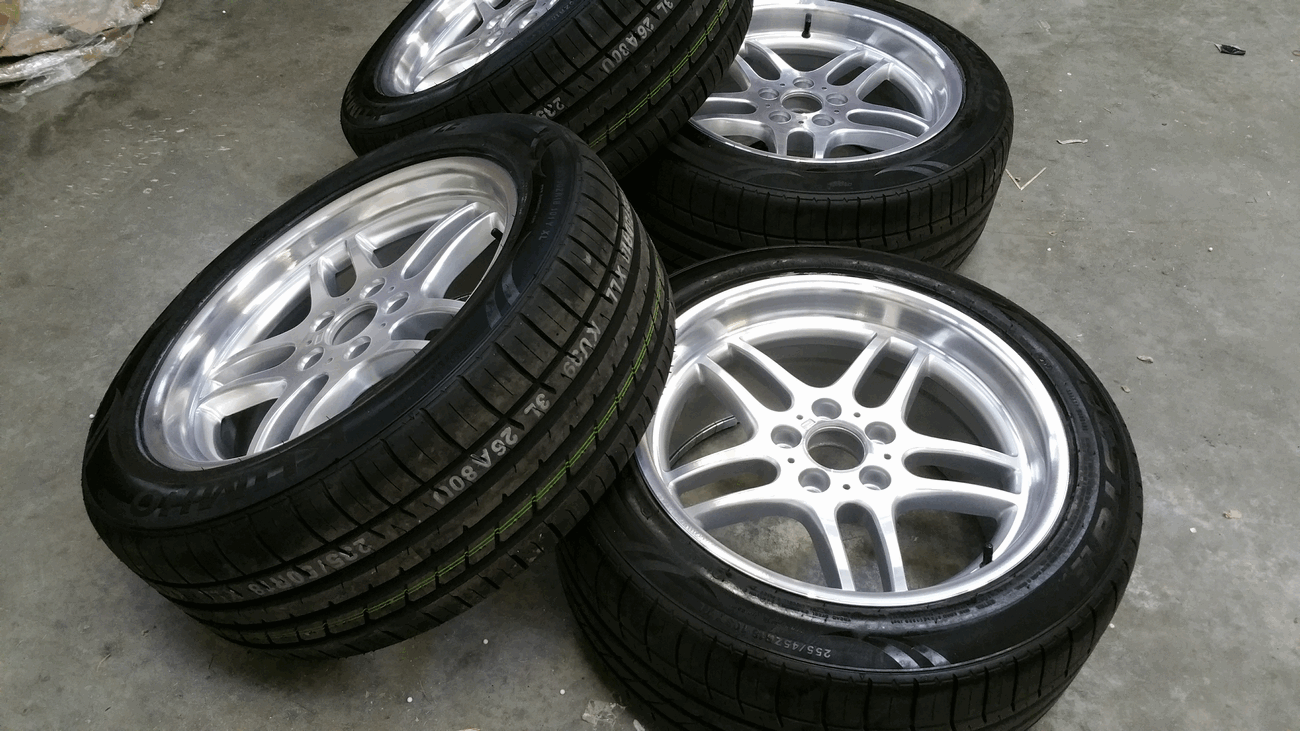
    I packed up the 18" M-Parallels with new rubber and sent them off to TJ in Donegal Powdercoating for complete refurb, including stripping, powdercoating, diamond cutting and then clearcoat.

    The previous owner had bad luck with white worm after a series of bad tyre fitters and some kerb rash. Before:

    1_zpslhfyow4z.gif~original

    New set of Kumhos to go with them:

    2_zpsq8ouufye.gif~original

    3_zpspplcuqxt.gif~original

    Just arrived back:

    4_zpsjfjevu0d.gif~original

    5_zpshgmphcvp.gif~original

    6_zps4lxkxwr1.gif~original

    7_zpsbjyixakg.gif~original

    8_zpsudx6twey.gif~original

    9_zpsudt8cyje.gif~original

    10_zpsz88zyuvz.gif~original

    20170426_185549_zpspfqwijjo.jpg~original

    Next step is a new master cylinder to fix some spongy brakes and a new radiator cowl to undo a botched repair job by a monkey mechanic.


  • Registered Users Posts: 5,875 ✭✭✭Foxhole Norman


    I'm so happy you bought that E38 back :cool:


  • Registered Users Posts: 9,660 ✭✭✭Voodoomelon


    Feels good to have it back. My worry is when I have it perfect, i'll want to keep it forever. :/


  • Registered Users Posts: 5,875 ✭✭✭Foxhole Norman


    Feels good to have it back. My worry is when I have it perfect, i'll want to keep it forever. :/

    And why not, possibly the coolest 7 they made!


  • Advertisement
  • Registered Users Posts: 24,644 ✭✭✭✭punisher5112


    Tinted windows and its a real mob boss car ;-)


  • Registered Users Posts: 81,220 ✭✭✭✭biko


    Found this site which has lots of info and service schedules
    https://teon.co/manuals


  • Posts: 7,499 ✭✭✭ [Deleted User]


    5 hours last night looking for a rattle in the back of my mk5 gti.
    Was convinced it was a stone on top of the heatshield above the exhaust so has to drop that to get the stones off.
    No change in the rattle.
    Got the missus to drive me around (i was in the boot) and narrowed it down ,
    turns out it was some sort of thermostat/resistor pack for the rear demister inside the had lid needed tighting .
    It was worth the hassle.


  • Closed Accounts Posts: 2,881 ✭✭✭shietpilot


    Wishbone polybushings finally arrived for the E36 :cool:
    noMUP4K.jpg?1

    They were a lot tighter in the lollipop brackets than I imagined so I struggled to get them in. In the end I decided to use the car as a press and push them through :D
    tc57DbS.jpg?1

    Bushings in the brackets
    5OrIJKG.jpg?1

    JqFYy9X.jpg?1

    Bushings and new wishbones in. She's ready for the NCT retest next Tuesday :P
    dX3ZxJu.jpg?1

    Steering and corner turn in feels very solid now but not harsh at all. The only downside I have noticed so far is that the wishbones use the bushings as a pivot point so the bushings tend to creek a bit but only when going fast over speed bumps when the suspension compresses a lot. Maybe the noise will go away after a few miles :)


  • Registered Users Posts: 12,347 ✭✭✭✭blade1


    ^^^^^^^^^^^^^
    Do polybushes not need to be lubed to stop creaking?


  • Moderators, Science, Health & Environment Moderators, Society & Culture Moderators Posts: 60,159 Mod ✭✭✭✭Wibbs


    shietpilot wrote: »
    They were a lot tighter in the lollipop brackets than I imagined so I struggled to get them in. In the end I decided to use the car as a press and push them through :D
    tc57DbS.jpg?1
    Now that Sir is my kinda thinking outa the box engineering. Defo using that idea in the future. I'll claim it as my own idea of course... :D
    The only downside I have noticed so far is that the wishbones use the bushings as a pivot point so the bushings tend to creek a bit but only when going fast over speed bumps when the suspension compresses a lot. Maybe the noise will go away after a few miles :)
    Poly bushes can be a bugger for squeaks and creaks. It depends on the bush location. Lubing them up with silicone grease helps a lot, but the sound comes back after a while. Also tightening them up with the suspension preloaded makes a difference. Goes for rubber bushings too. There's a brief description of the how here. Basically you have to try and get the wheel/suspension at the normal ride height and load, before you finally tighten everything up to spec. Easier if your car has a normal ride height, if it's lower than a snakes naughty bits, then judicious use of axle stands and a trolly jack come into play. Unless you have access to the type of ramp like the NCT guys use. As well as helping with squeaks and creaks it also helps the bushes last a lot longer.

    Rejoice in the awareness of feeling stupid, for that’s how you end up learning new things. If you’re not aware you’re stupid, you probably are.


  • Closed Accounts Posts: 2,881 ✭✭✭shietpilot


    blade1 wrote: »
    ^^^^^^^^^^^^^
    Do polybushes not need to be lubed to stop creaking?

    Yes, they come with grease which I've used and even added extra of my own. It's just the fact that the wishbones pivot there that makes them creak. They are a very tight fit and don't flex when rotated unlike OEM rubber bushings (which is the reason they fall apart so easily because they don't have much resistance to rotation and rip apart) so that causes a lot of friction.


  • Closed Accounts Posts: 2,881 ✭✭✭shietpilot


    Wibbs wrote: »
    Poly bushes can be a bugger for squeaks and creaks. It depends on the bush location. Lubing them up with silicone grease helps a lot, but the sound comes back after a while. Also tightening them up with the suspension preloaded makes a difference. Goes for rubber bushings too. There's a brief description of the how here. Basically you have to try and get the wheel/suspension at the normal ride height and load, before you finally tighten everything up to spec. Easier if your car has a normal ride height, if it's lower than a snakes naughty bits, then judicious use of axle stands and a trolly jack come into play. Unless you have access to the type of ramp like the NCT guys use. As well as helping with squeaks and creaks it also helps the bushes last a lot longer.

    Interesting but I don't think that will work on the front suspension of the E36 :D

    kR5JQ5B.png

    The wishbone rotates about inside the bushing as the suspension travels up and down. I've greased them up twice now and it will probably happen until the bushing wears down a bit and I can fit more grease, because right now they are very tight on the wishbone.


  • Registered Users Posts: 12,347 ✭✭✭✭blade1


    Just to touch on what Wibbs said.
    My last few cars have had sports suspension so for access I would drive up onto concrete blocks when tightening new arms or whatever.


  • Advertisement
  • Moderators, Science, Health & Environment Moderators, Society & Culture Moderators Posts: 60,159 Mod ✭✭✭✭Wibbs


    Ahh right. Duh. Cotcha SP. So lots of lube then(missus!). I've used polybushes in the past on cars, but I'm not really a fan TBH. I suppose it very much depends on the car? So older, more "classic" buses then I'd be all for them alright and they can really tighten things up compared to the original often made from marshmallow original spec ones. I've driven a 71 Lotus Elan on polys and I defy any modern car to keep up in the twisties with that pocket rocket.

    Kinda like yourself I'm currently building up the full set of my rear bushes(eBay auctions, cos I'm a cheap bastid. And patient). I've already fired in the main RTA bushes and went OEM. My yoke being a 90's Honda had a very trick setup which introduced toe in under hard braking which stabilises the back end of car and relies on the stock bushes to do this. Polys would stop that and I don't have near enough the driving talent to compensate(it can oversteer as it is, to the point where you're tempted to look under the car for a propshaft going to the rear).

    Also went OEM with the drop links and anti roll bar bushings. Got them from the UK so avoided the Paddy Tax(tm). I've a set of Hardrace adjustable camber and toe in arms en route. They're still rubber and were much cheaper than Honda(or spurious) and since I'm running coilovers that sit the car an inch plus in old money lower than standard, I want to be able to align the bits and bobs so I'm not turning my car into a mobile tyre wear indicator. Coming soon the front suspension... The damn thing has more bushes than the Botanical Gardens.

    I'll take pics this time.. :o Though audio of my cursing, and crying, and my mates pissing themselves laughing at my shortcomings would be more amusing.

    In the spirit of the thread, kinda... A fortnight ago I did my usual oil regular change, but a week before that I took a pic of the existing oil.

    417191.jpg

    That's after just under a year. My current driving circumstances means lots of very short trips, with a few blasts into to the upper rev band every so often. So not good and the engine's got a smidgen under a 100,000 miles/160,000 Kms under it's belt*. And it looks like new bloody oil. :eek: The engine runs noticeably quieter too. I can't recommend Millar's synthetic Nanodrive enough, at least in my case. YMMV.

    Also changed the gearbox oil. Long overdue. Readied up a Heath Robinson funnel to fill it. Replaced the brake and clutch fluid too. Loooooong overdue. It was still Japanese... :o Noticed no diff with the brakes, but the 'box is way smoother. Went Honda OEM MTF there. Power steering fluid next.


    *To be fair I seem to have ended up with an extremely tight engine for the B18c breed. Normally they're like two strokes for using oil. It's not as revvy as most I've tried though.

    Rejoice in the awareness of feeling stupid, for that’s how you end up learning new things. If you’re not aware you’re stupid, you probably are.


Advertisement