Advertisement
If you have a new account but are having problems posting or verifying your account, please email us on hello@boards.ie for help. Thanks :)
Hello all! Please ensure that you are posting a new thread or question in the appropriate forum. The Feedback forum is overwhelmed with questions that are having to be moved elsewhere. If you need help to verify your account contact hello@boards.ie
Please note that it is not permitted to have referral links posted in your signature. Keep these links contained in the appropriate forum. Thank you.

https://www.boards.ie/discussion/2055940817/signature-rules

Today I did something to my car (volume 2)

Options
14243454748327

Comments

  • Moderators Posts: 12,374 ✭✭✭✭Black_Knight


    C-c-c-c-combo breaker! :eek: :mad:

    IMAG0914.jpg


  • Registered Users Posts: 6,845 ✭✭✭Noccy_Mondy


    Few shnaps from awhile ago,
    The footwell lights I was talking about.
    2rzylxd.jpg

    2u6fthc.jpg

    2daj02h.jpg

    These should probably be in the detailing thread, but sure...
    2m5j5w2.jpg

    2rppk0n.jpg

    i3ba83.jpg


  • Registered Users Posts: 1,363 ✭✭✭bmstuff


    A short video of HK's Logic 7 sound in the E66....

    Beautiful 7 bud, well done.


  • Registered Users Posts: 336 ✭✭bazery


    YbFocus wrote: »
    I can't take a picture or I have something set wrong, this is as good as i can do.
    One old bulb to see the difference..

    https://us.v-cdn.net/6034073/uploads/attachments/279499/286876.jpg

    It's not what they look like at all :(

    You'll see them in person at some stage anyway!

    Looks good, what bulb did you get? I keep trying and failing with leds


  • Registered Users Posts: 8,480 ✭✭✭YbFocus


    bazery wrote: »
    Looks good, what bulb did you get? I keep trying and failing with leds

    Hey man,

    Done a good bit of research before I bought them, for the e60 you need the light to shine forward to light the halo properly so you must get ones where all leds shine directly forward.

    I got 4smd t10 501's. Not mad bright just nice in my opinion, I'll link them later as I'm on the phone.


  • Advertisement
  • Closed Accounts Posts: 9,607 ✭✭✭toastedpickles


    Not so much a what i done to my car but more a "what has been done and will be done" post, that build thread would be very useful right about now :rolleyes:

    Anywho! As some of you may know, or don't the sludge issue is fairly serious on these cars, so I'm taking every preventative measure possible to make sure this won't happen, I had intended on replacing the pvc system which would be the first step along with a sump drop buuuut it appears someone got there before me :)

    rk547b.jpg

    the little white writing indicates that its a pvc#6 update kit, which is what saab recommended to be installed, so with a bit of luck the sumps been dropped and cleaned anyways, but I'm planning on doing that for my own peace of mind

    Next on the list, it needs new bonnet lifters as the ones on it are shot and cant hold the bonnet up for more than a minute, so today i improvised! Cianryan will be proud

    xm1wgh.jpg

    It needs a new throttle body as ive mentioned, a cat for the exhaust, indicator lens, wheels and headlights aligned, oil change and a service and then it's ready to go, so hopefully by the end of feburary I'll have 90% of that done and parts ready to go onto it, the plan is to keep everything as OEM as possible, right down to the oil filters

    So there you have it!


  • Registered Users Posts: 1,363 ✭✭✭bmstuff


    BMW e90 iDrive Business to Professional upgrade

    1.JPG
    2.JPG
    3.JPG
    4.JPG
    5.JPG
    6.JPG
    7.JPG
    8.JPG
    9.JPG
    10.JPG


  • Registered Users Posts: 1,363 ✭✭✭bmstuff


    BMW F01 Paddles Shift Retrofit

    4.JPG
    5.JPG
    6.JPG
    7.JPG
    8.JPG
    9.JPG
    10.JPG


  • Registered Users Posts: 15,550 ✭✭✭✭vectra


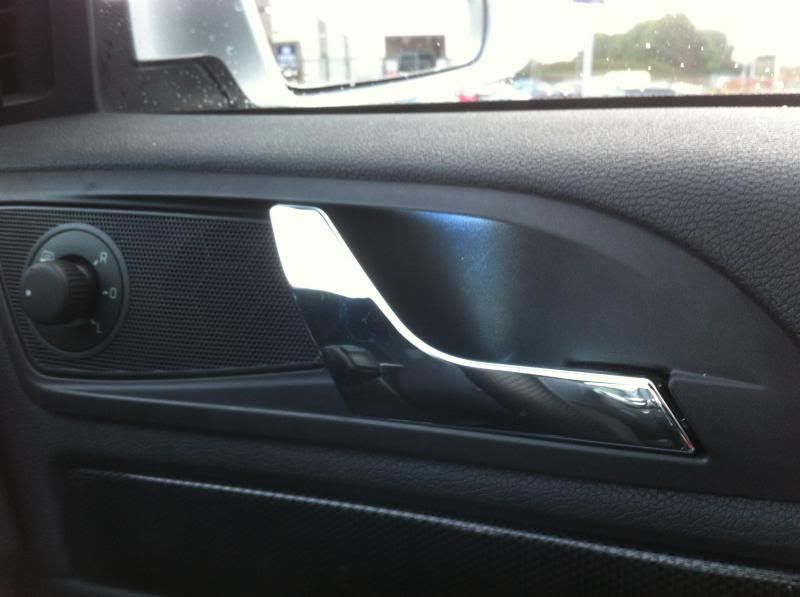
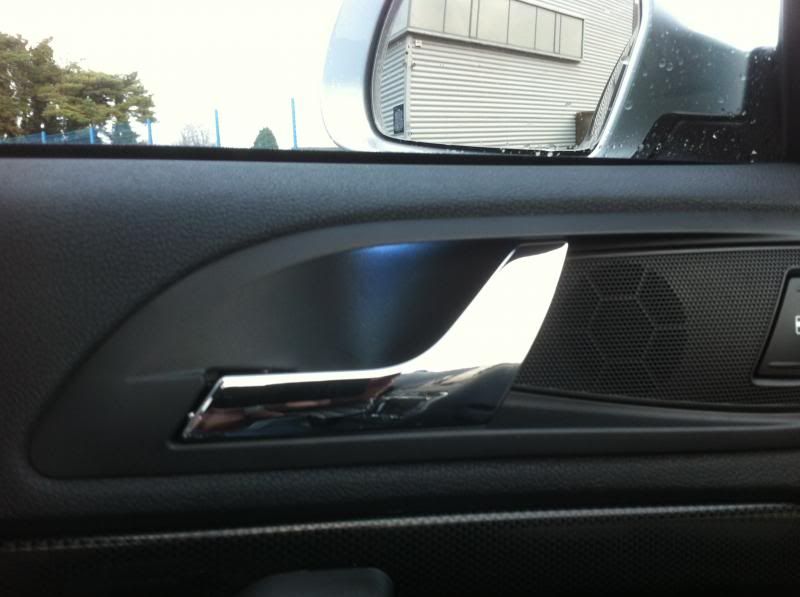
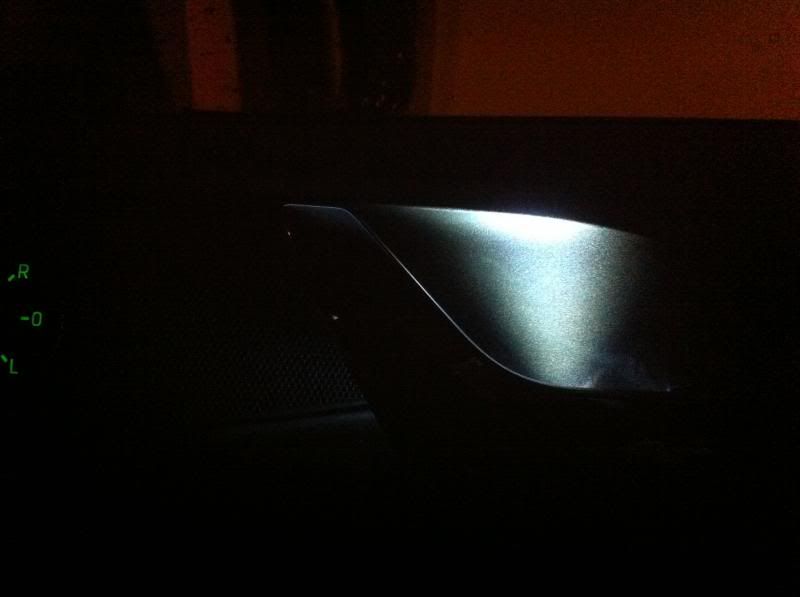
    Fitted Door handle illumitation to my car today
    Looks nice in daylight but I feel it is just too bright in the dark. I need to dim the dash lights almost fully to have them at a non distracting level.
    I think I may rewire them to the footwell lights as they dim when driving.
    Or else try to sort resistors to dim them.

    IMG_0497_zpsf57fd870.jpg

    IMG_0498_zps60c47a01.jpg

    IMG_0501_zps9fcfedbe.jpg


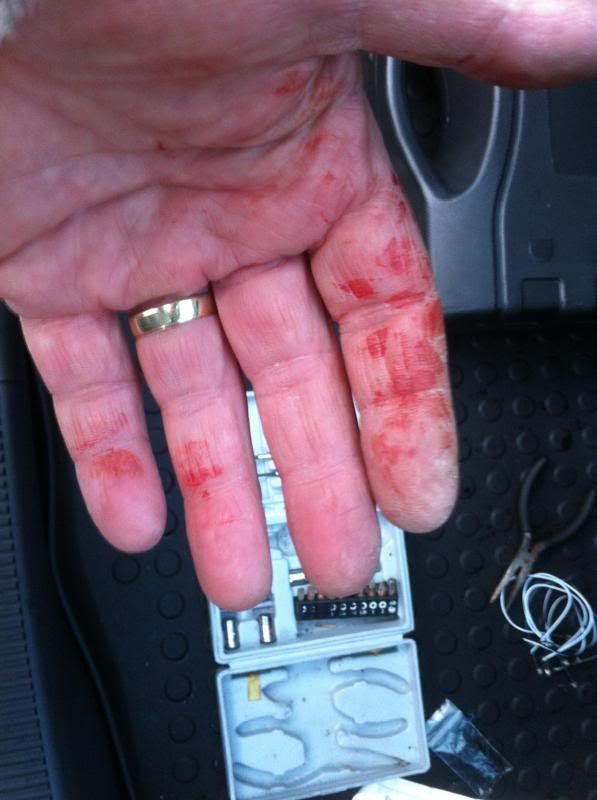
    And of course the inevitable happens LOL

    IMG_0496_zps65da7163.jpg


  • Registered Users Posts: 2,350 ✭✭✭Mar4ix


    vectra wrote: »
    And of course the inevitable happens LOL

    IMG_0496_zps65da7163.jpg


    I have same problem ..

    it is a reason, why i am calling all cars which i am working on as bloody car ... always loosing blood :pac:


  • Advertisement
  • Moderators Posts: 12,374 ✭✭✭✭Black_Knight


    vectra wrote: »
    And of course the inevitable happens LOL

    IMG_0496_zps65da7163.jpg

    I hate when yer putting lights in the car and ya end up married. ;)


  • Registered Users Posts: 19,854 ✭✭✭✭MetzgerMeister


    The filter housing cap seems to be levitating there...nice :D


  • Closed Accounts Posts: 866 ✭✭✭renofan


    So going down to the Parents New Year's eve in the Wife's Focus II I got the sweet smell of coolant in the car. When I got there I had a look around and found the driver's footwell pretty soaked in coolant.

    Focus1_zps1f0a2625.jpg

    So I lifted the carpet and took some trim away and found coolant dripping from the heater matrix pipe where it joins from the bulkhead. (There is a clip missing that I took off that clamps the pipes together.)

    FocusPipe_zps3dc597ce.jpg

    So thanks to user ford jedi on here he pointed me to MCS Ford Auto Factors in Dublin and I had new rubber o-rings and some spare clips.

    First I'd to drain the coolant and then separated the joint. Note I unclipped the hoses the other side of the bulkhead as I thought I'd need to do that to pull the pipes back a bit through the bulkhead, as I was not going to the trouble of taking out the matrix. This I didn't need to do as I could have pulled the pipe back enough. Anyways lesson learned if there is a next time!

    Focus2_zpsd1d2ba8c.jpg

    Joint separated

    Focus6_zps81885452.jpg

    Old O-ring

    Focus3_zpsebc54484.jpg

    Focus4_zps50ca0c39.jpg

    New O-ring

    Focus5_zps10e9c80e.jpg

    Google image of clip that goes around the joint. Its a good job I'd got some spares as the old one was brittle and snapped when I tried to put it back on.

    Focus_zps835e5755.jpg

    The old O-ring was on the pipe that goes from the matrix so I put the new one on this as I presumed it must be right, (Haynes manual had no mention of position), but could not get the pipes to close together. I eventually figured out that these is a lip inside the pipe from the bulkhead that the O-ring sits into.

    Then the problem was I couldn't get the pipes to join as the rubber O-ring was grabbing the pipe being inserted so put some vaseline on the insert and it slid together perfectly! :)

    Not a job I'd like to do too often as the pipes are behind the centre dash up and you had to work around the clutch pedal but it's done. From start, (drain coolant), to finish, (refill coolant and let car run for 20 mins), took about 2 and a half hours as it was my first time doing it but next time I'd easily knock an hour off it.

    All in all it cost €19.40 for 3 O-rings and 2 clips. Coolant was fine so saved it and reused. I now have a spare clip and 2 O-rings so a cheap fix. Glad I caught it in time as the wife couldn't smell the coolant at all and the expansion tank was not far from empty.


  • Registered Users Posts: 3,404 ✭✭✭corkgsxr


    Good job but unless you've changed the coolant lately I wouldn't have reused


  • Closed Accounts Posts: 866 ✭✭✭renofan


    corkgsxr wrote: »
    Good job but unless you've changed the coolant lately I wouldn't have reused

    There was a new timing belt and water pump put on the car in June '10 and fresh coolant put in. (So the fella that did it told me!). Tis Ford spec pink coolant so will last another while. I couldn't believe how little coolant the car takes compared to my Laguna. Anyways it's simple to do a coolant change and all the internals are clean.


  • Registered Users Posts: 7,294 ✭✭✭Supergurrier


    Well i didn't do much really but drive around listening to my new exhaust system.

    I did however mock out how my rear diffuser will look when on. Was going to fit it but ran out of daylight and it was promised to rain tonight so no shed and low temperatures made it a no go.

    Diffusser and stuff im gonna be using to bond it.
    tqgq.jpg

    Rear of car as it stands (Lol twin dustbin lids)
    hea6.jpg

    What it should look like when done (i think it makes the exhaust tips look less stupidly huge looking personally)
    dh7n.jpg
    nlep.jpg

    Now i just need the rain to feck off for a couple of days.


  • Registered Users Posts: 4,384 ✭✭✭pred racer


    Looks great SG!


  • Registered Users Posts: 3,668 ✭✭✭eringobragh


    :( Dirty day so no photos but swapped the front passenger caliper with one off my donor mr2 due to one of the pistons sticking - lubbed up the sliders with red brake grease and bleed-ed the brakes - last genius put a non standard bleed valve (7mm instead of 8mm) so swapped that over as well.

    So plan now is to strip and rebuild the old caliper and the other side (kit covers 2 calipers.

    This tool couldn't have come in at a better time :D :

    https://www.aldi.ie/en/specialbuys/thursday-9th-january/products-detail-page/ps/p/4-piece-pick-and-hook-set/


    W2_PD_Thursday_UL31.jpg


  • Registered Users Posts: 5,193 ✭✭✭Cleveland Hot Pocket


    Didn't take photos as it was done mostly by torchlight but finally got around to changing the oil and filters in the truck today.
    Great fun and another chance to admire the beast from a different angle!


  • Registered Users Posts: 19,854 ✭✭✭✭MetzgerMeister


    Today I changed the plugs:

    9yik.jpg

    9v82.jpg

    As you can see, they were fairly manky but dry.

    Then I steam cleaned the engine:

    gqfy.jpg

    And applied a coat of 303 Aerospace Protectant:

    fgw8.jpg

    Then I drilled the holes in the pedals for these which will be fitted on Monday as I'm still waiting on the screws from BMW:

    x93l.jpg


  • Advertisement
  • Registered Users Posts: 15,550 ✭✭✭✭vectra


    Nice clean engine bay, MM


  • Registered Users Posts: 7,294 ✭✭✭Supergurrier


    I waxed the car with Collinite and ended up with only half it buffed out :P

    A job for the morning


  • Closed Accounts Posts: 9,607 ✭✭✭toastedpickles


    I waxed the car with Collinite and ended up with only half it buffed out :P

    A job for the morning

    Must resist drawing smiley faces :pac:

    I've been doing odd little bits here and there with both mine, nothing worthy of here though


  • Registered Users Posts: 16,930 ✭✭✭✭challengemaster


    Then I drilled the holes in the pedals for these which will be fitted on Monday as I'm still waiting on the screws from BMW:

    x93l.jpg

    Knowing you, that must have killed you :D They'll look the bidness though!


  • Registered Users Posts: 19,854 ✭✭✭✭MetzgerMeister


    Knowing you, that must have killed you :D They'll look the bidness though!

    Nah, the only thing that I was nervous about was drilling into the accelerator module and I'm hoping to jaysus the holes are in the right places because it was an awkward job to do. It'd be easier if I was left handed. The clutch and accelerator are plastic but the brake is steel. I did get a full set of HSS drill bits so got through it fine.

    This is the kind of thing where if the hole is off by a mm, the pedals won't fit :(


  • Registered Users Posts: 3,506 ✭✭✭Interslice


    vectra wrote: »
    Nice clean engine bay, MM


    Looks brand new. A very unassuming engine bay too. No big Bi-Turbo logo, the likes you get on an audi.

    Never seen a 12 point fitting on plugs before either.


    Topped up my coolant today, that was it :).


  • Registered Users Posts: 19,854 ✭✭✭✭MetzgerMeister


    Interslice wrote: »
    Never seen a 12 point fitting on plugs before either..

    Neither did I until I got the plugs from the dealer. I also had to get a special socket along with a 3/8 ratchet and extension bar just to do the plugs! It got expensive because now if I buy a ratchet or anything like that, it has to be Teng Tools. They look very out of place beside my Lidl ratchet set :pac:


  • Registered Users Posts: 15,550 ✭✭✭✭vectra


    Then I steam cleaned the engine:


    Does the steam cleaner make the job much easier?
    Often thought of getting one.


  • Registered Users Posts: 19,854 ✭✭✭✭MetzgerMeister


    vectra wrote: »
    Does the steam cleaner make the job much easier?
    Often thought of getting one.

    It saves the hassle of using the pressure washer on a job like this, granted i had to use the pressure washer when I first got the car but this is perfect for maintaining the level of cleanliness without having to dry everything each time.

    It has a small scrub brush that attaches to the tip so you can scrub while blasting steam on whatever it is you're cleaning and you don't have suds going everywhere. I just spray a bit of Megs APC or degreaser on the worst affect parts (usually along the sides where water and dirt can sit and build up) and then wipe with a microfibre.

    There's no real pressure in that steam cleaner i.e. it won't move dirt by its own force which is fine because I wouldn't use the brush it comes with on the paint! It's grand on plastics and painted bits around the engine bay, door jambs etc.

    It's also useful for cleaning leather. It came with a cotton bonnet so you attach a different head and wrap the bonnet around it, blast the steam through it and rub all the crap out of the leather. While it's still warm you apply your conditioner. The being warm factor helps the leather absorb the cream.


  • Advertisement
  • Registered Users Posts: 23,157 ✭✭✭✭Alanstrainor


    I never posted my new stereo install. Looks well in the cabin, which can't be said for most after market radios in an e46!

    288449.JPG


Advertisement