Advertisement
If you have a new account but are having problems posting or verifying your account, please email us on hello@boards.ie for help. Thanks :)
Hello all! Please ensure that you are posting a new thread or question in the appropriate forum. The Feedback forum is overwhelmed with questions that are having to be moved elsewhere. If you need help to verify your account contact hello@boards.ie
Please note that it is not permitted to have referral links posted in your signature. Keep these links contained in the appropriate forum. Thank you.

https://www.boards.ie/discussion/2055940817/signature-rules

Today I did something to my car (volume 2)

Options
17475777980327

Comments

  • Registered Users Posts: 1,353 ✭✭✭jprboy


    @ conzy

    Lovely car.
    Shouldn't your new plates show "Corcaigh", though, and not "Cill Chainnigh"?


  • Closed Accounts Posts: 9,607 ✭✭✭toastedpickles


    Changed the boot lights to led's after working in the dark for about 6 hours the other night in dgts, my cars boot became a workbench so i figure it'd be a good place to start


    nl8j61.jpg

    Also discovered I have footwell lights that don't work, so once i get some leds, I'm changing them too and the rest


  • Registered Users Posts: 1,899 ✭✭✭Paddy@CIRL


    I wasn't expecting to make this update for another couple of weeks, but ahead of schedule my new lights, built by Lightwerkz (NJ, USA), arrived this morning. Seeing as I'm off to the UK this weekend, I wanted to get them installed straight away so as to enjoy them on the trip over.

    E90LightwerkzInstallPMcG-1_zpse4043307.jpg

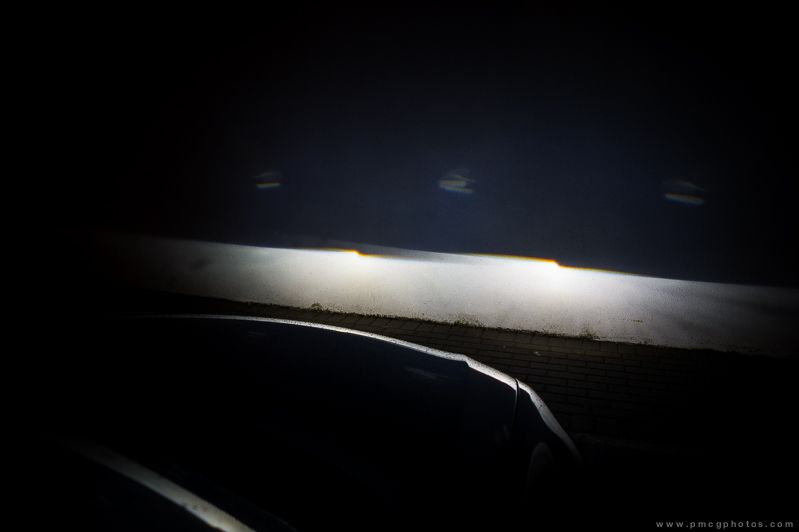
    I was never really a big lighting enthusiast (I'm still not) but over the last twelve months I started getting a better appreciation for what good looked like. The above is the pattern and cut-off of my two year old Umnitza head headlights with a Wideview 6000k HID system.

    E90LightwerkzInstallPMcG-5_zps40af8a6d.jpg

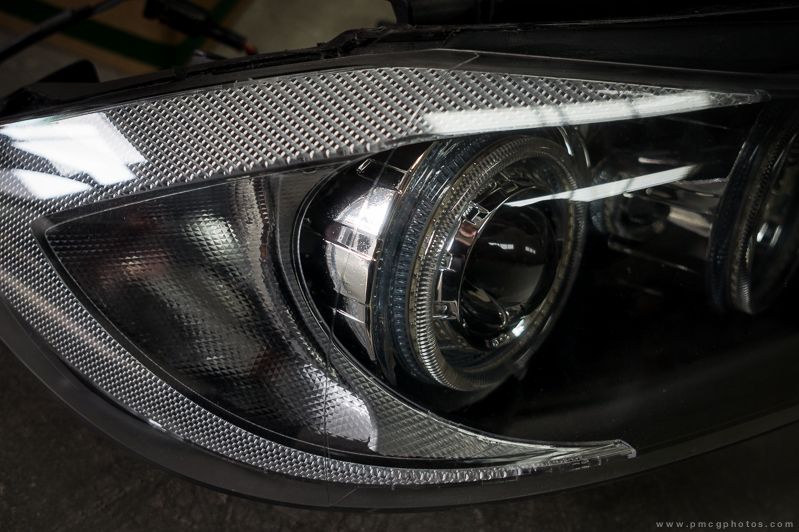
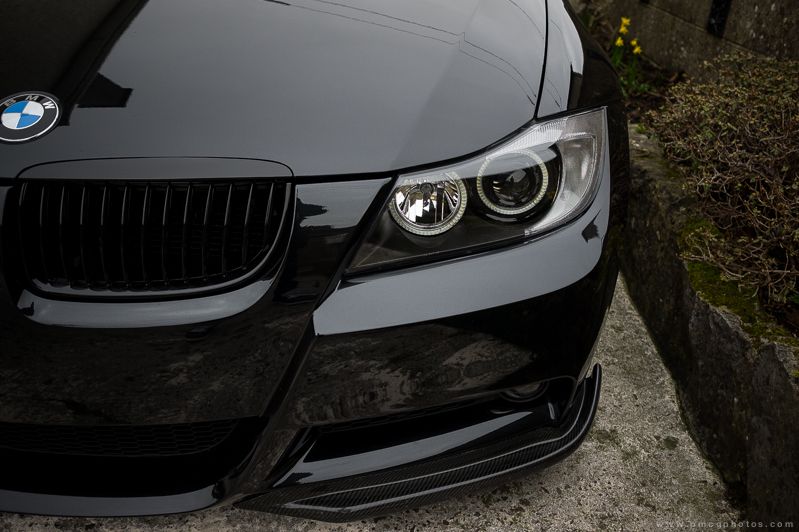
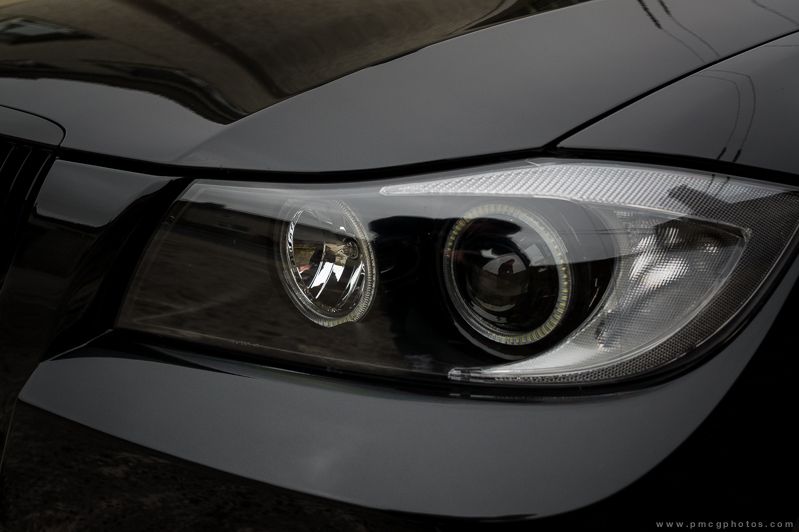
    I'm a bit of an anti-chrome person, so was never a big fan of the chrome inserts. Also, the LED angel eye rings are bonded to the old (blue) rings. It works fine, but could be a bit tidier.

    E90LightwerkzInstallPMcG-6_zpsc346c04d.jpg

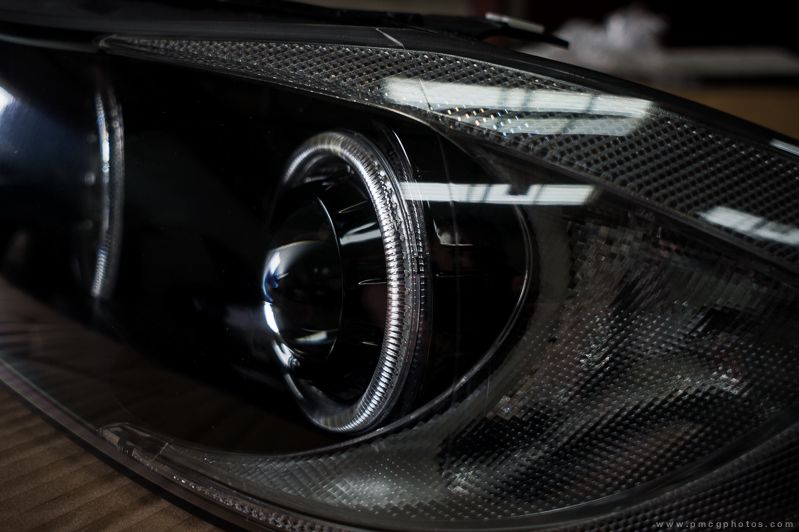
    Like this. All the chrome was painted gloss black to contrast with the matt black inner-housing. The LED rings are the same as what I was running, but they're installed in a much cleaner manner. The big changes are what you can't see. The stock Depo projectors have been dumped and replaced with Morimoto H1 Mini Bixenon items with clear lenses, all of which have been installed so cleanly, you would never know the headlights were split apart. All the necessary wiring has been taken care of too, ensuring a simple plug and play install (including the bixenon functionality). The dipped xenon bulbs are Morimoto xb35 5000K.

    E90LightwerkzInstallPMcG-2_zps58ba4f8c.jpg

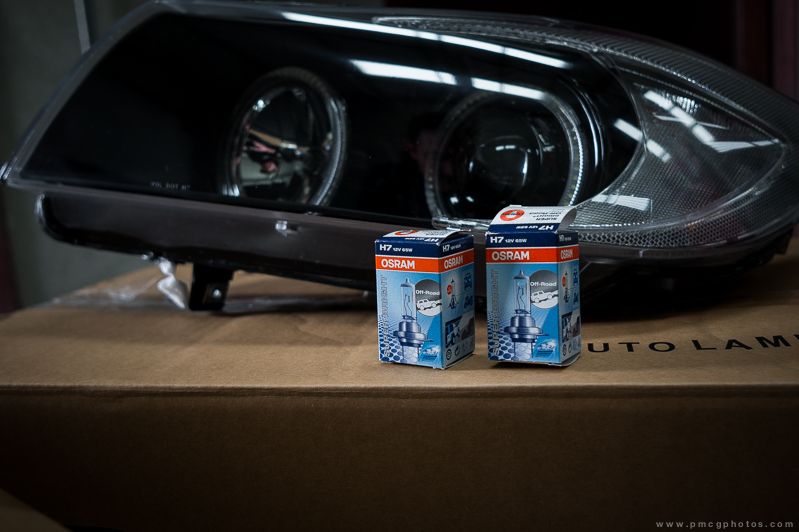
    I always though the Phillips H7 head bulbs left a lot to be desired, so I'm trying out these 65w Osram Rallyes. Technically, they're for off-road use only but as I'm only using them for heads, I won't be bothering anyone else with them.

    E90LightwerkzInstallPMcG-4_zpsaa2cb022.jpg

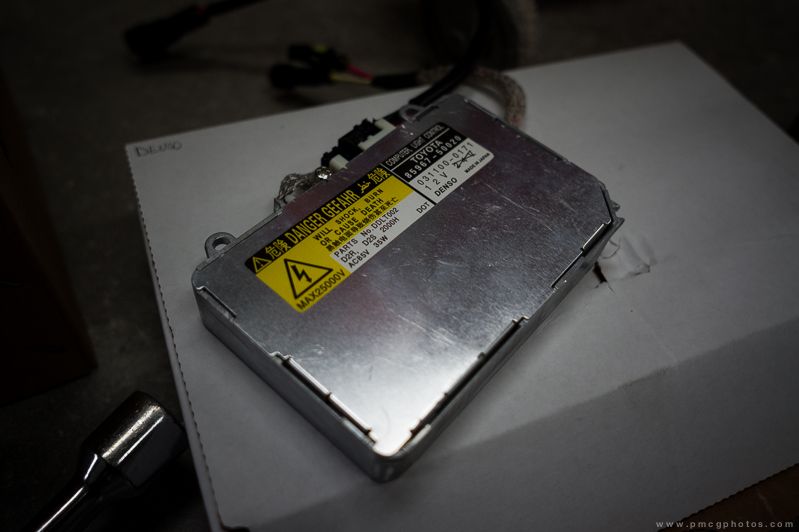
    The ballasts for the xenon bulbs are OEM Denso units, which ensure an instant-on setup.

    E90LightwerkzInstallPMcG-3_zpsc791a8a5.jpg

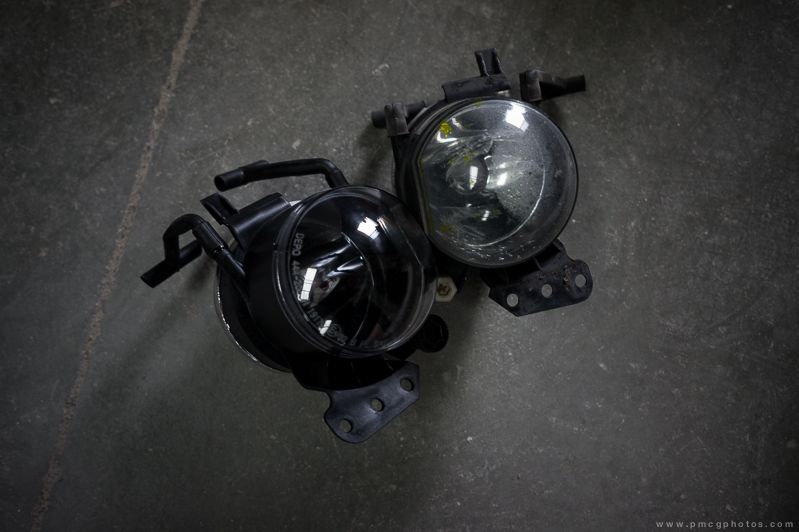
    With the bumper off the car to install the lights, I took the opportunity to fit new fog lights which I've had for a couple of months, sat in the garage. I also fitted the rest of the gloss black grills.


    E90LightwerkzInstallPMcG-7_zpsf8026354.jpg

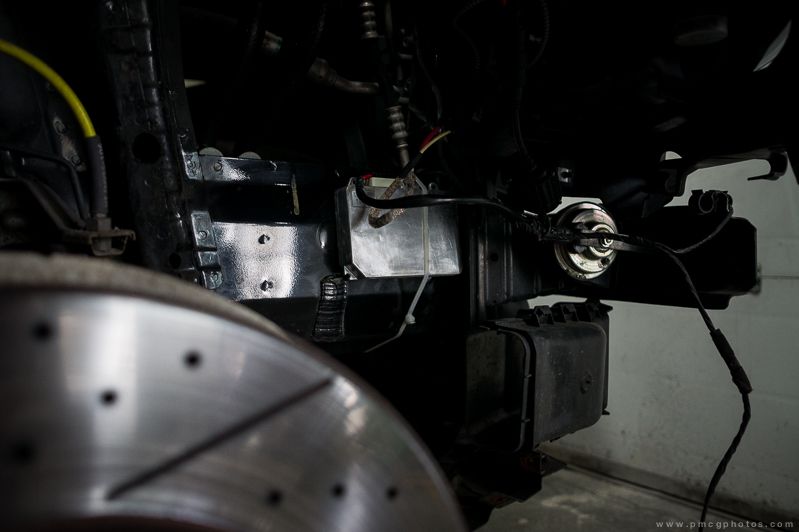
    We were able to hide the ballasts quite neatly beneath the lights on the chassis leg. There is adhesive backing on the ballasts themselves, but the cable tie is for extra security. This is all covered by the inner plastic arch.

    E90LightwerkzInstallPMcG-8_zpse5a29fc8.jpg

    I headed straight to a friend who aligned everything for me, and remarked that they were the clearest beams he had ever seen. Always a good sign :)

    E90LightwerkzInstallPMcG-9_zpsfdd85d77.jpg

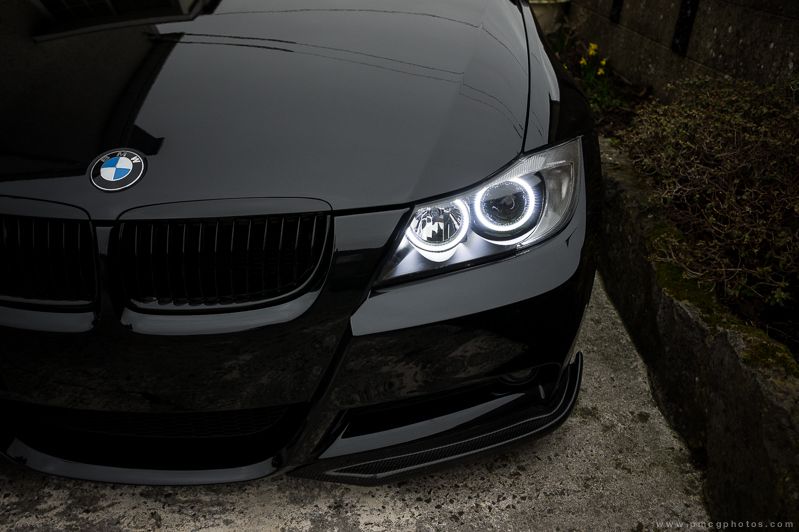
    The white rings, even when switched off, still give a cool appearance IMO against the black.

    E90LightwerkzInstallPMcG-10_zps6bc30f6c.jpg

    They look even better when switched on.

    E90LightwerkzInstallPMcG-11_zps6efaaaa6.jpg

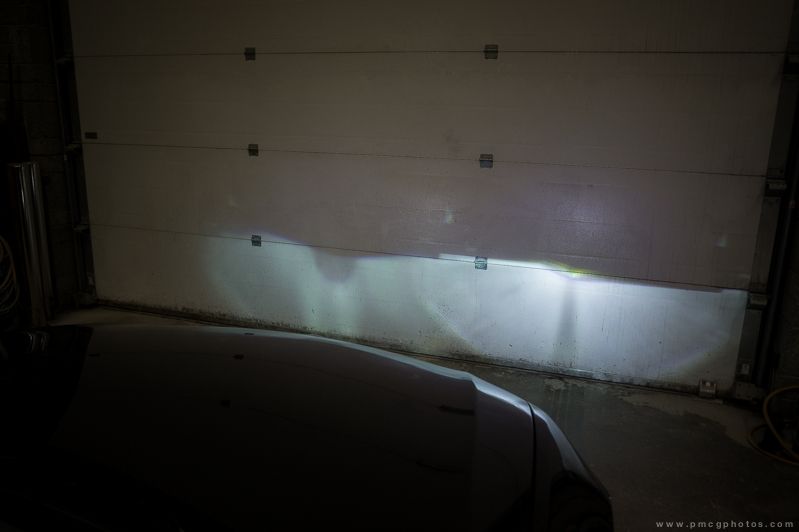
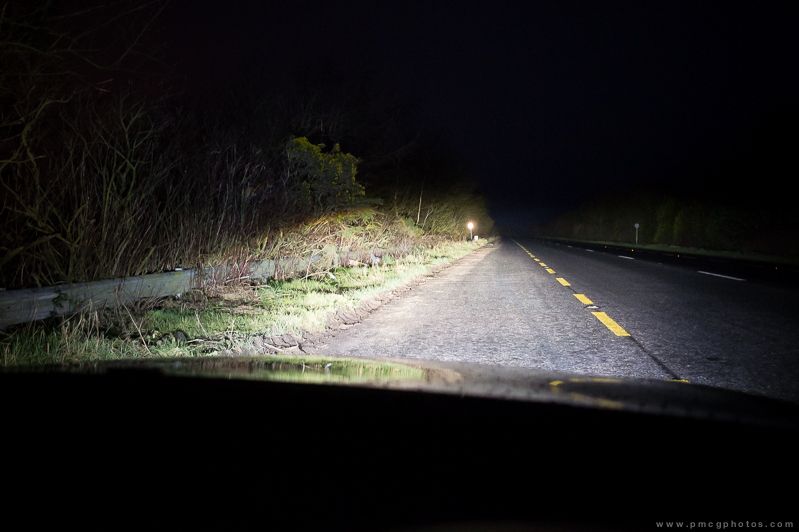
    However, the main reason for this upgrade was to further improve the vehicle's lighting at night. You can already see how much cleaner the cut-off us and how there are no dark spots or shadows in the pattern.

    E90LightwerkzInstallPMcG-12_zpse45da72d.jpg

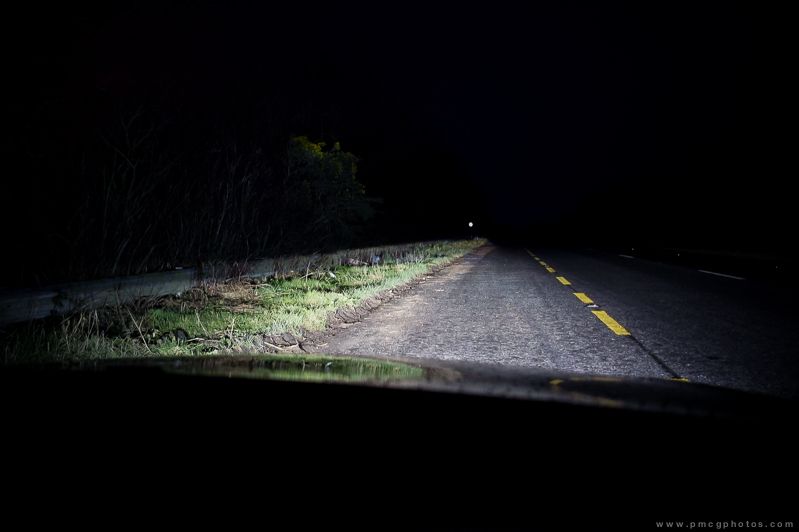
    It's pretty difficult to capture just how much of an improvement they make, but it's quite a significant upgrade on the previous setup.

    E90LightwerkzInstallPMcG-13_zps116cf3f7.jpg

    With bixenon functionality, it essentially means each bulb acts as a headlight bulb when required. The outside xenon bulbs have a shutter inside the projector which opens once the high beams are switched on, with the inside halogen bulbs coming on at the same time. Needless to say, it gets very bright rather instantly.

    After all the hardship I endured with Umnitza, it's even sweeter now to have an even better setup than when I first set out to upgrade the lights. Next up is getting the funds together to retrofit a headlamp washing system, as I want to keep everything legit. That'll have to wait until I get back from the UK...

    A big thanks to Davy Pickard for fitting the lights for me at a moments notice too. Only one of two people who I'll leave near the car's exterior. Even the simplest of jobs are treated with the same level of detail and consideration as the more complicated ones.

    Again, thanks for reading :)


  • Registered Users Posts: 11,865 ✭✭✭✭MuppetCheck


    Excellent write up Paddy, the look fantastic. Proper lighting is one of the best upgrades you can do to any car.


  • Registered Users Posts: 8,480 ✭✭✭YbFocus


    Wow paddy, just wow.

    The detail you run to on that car is truely amazing, still think it's one of the nicest on the planet :)


  • Advertisement
  • Registered Users Posts: 9,660 ✭✭✭Voodoomelon


    Great job Paddy, they look great.
    Bi-xenon is an essential spec for me now. Full beams are incredible, there's no going back once you experience it. I love the colossal goldfish bowl effect of light projected onto trees and other backdrops as the car moves along.


  • Registered Users Posts: 73,454 ✭✭✭✭colm_mcm


    GvidoR wrote: »
    I used it on the boot. There's pics on page 151.

    On the wipers I used cheap matt black paint from a petrol station.

    That boot looks great in fairness.


  • Closed Accounts Posts: 12,985 ✭✭✭✭dgt


    dgt wrote: »
    Looks like I'll be taking the evening off and trying to get some shims ground down. What a nasty job! :(

    Well that went arseways. Had to abandon my work and diagnose a fluid leak at the rear of the Daily van, sort said leak (caliper), bleed it and test it all in under an hour at 10 last night.

    Still haven't got to start on the shims yet. Need to test the tolerances first, from what I've read they're tight as a bulls arse (0.15mm on inlet valves, 0.30mm exhaust) but there's a possibility they're in thousands of an inch :rolleyes:

    So I need to open up the rocker cover and check one of the other engines.... Need time for that :(


  • Registered Users Posts: 7,294 ✭✭✭Supergurrier


    Well did this yesterday but thought i would post it anyway.

    Two coats of Primer 3 of paint 3 of clearcoat on grilles/fog surrounds/bottom lip below lower grille and sidebadges, with a new black ford logo (prefer the old blue one and will change in afew weeks and some ST vinyl decals on sidebadges.

    12975509594_094ae12c57_b.jpg
    12975094565_3d24870f97_b.jpg
    12975503324_6e973b1563_b.jpg
    12975098015_ddf7bdbdd5_b.jpg
    12975215143_ecdf3b83a9_b.jpg

    All fun and games until 6 this morning when i was putting all the bits back together in the drizzle :(

    Oh well im happy with the result anyway :)


  • Registered Users Posts: 19,854 ✭✭✭✭MetzgerMeister


    Nice job SG, I'm a big fan of that kind of thing! Are you going to do the plastic parts on the wing mirrors? If you are, you might want to try some Gtechniq first. I can bring to the meet if ya want.


  • Advertisement
  • Registered Users Posts: 8,480 ✭✭✭YbFocus


    Beautiful work sg :)

    Very wrc looking with the rear Black now :)


  • Registered Users Posts: 7,106 ✭✭✭dar83


    Just copying me at this stage! :pac:

    Thought from what you said earlier you sprayed the rear ST badge, glad to see it intact! Was trying to visualise that and couldn't without thinking t would look rubbish, haha.


  • Registered Users Posts: 7,106 ✭✭✭dar83


    Nice job SG, I'm a big fan of that kind of thing! Are you going to do the plastic parts on the wing mirrors? If you are, you might want to try some Gtechniq first. I can bring to the meet if ya want.

    The plastic on the wing mirrors is already black... ;)


  • Registered Users Posts: 19,854 ✭✭✭✭MetzgerMeister


    dar83 wrote: »
    The plastic on the wing mirrors is already black... ;)

    I know but it's not as shiny now as the grilles etc. are. They were kind of dark grey beforehand werent they?


  • Registered Users Posts: 7,294 ✭✭✭Supergurrier


    RS vents and RS spoiler next hopefully (refuse to put an RS spoiler on though w/o first sourcing some facelift rear light clusters in a scrapyard or online.)


  • Registered Users Posts: 8,480 ✭✭✭YbFocus


    RS vents and RS spoiler next hopefully (refuse to put an RS spoiler on though w/o first sourcing some facelift rear light clusters in a scrapyard or online.)

    Oh they would finish it :)


  • Registered Users Posts: 7,106 ✭✭✭dar83


    I know but it's not as shiny now as the grilles etc. are. They were kind of dark grey beforehand werent they?

    Ah I remember the first hing you said to me about my car... :D


  • Registered Users Posts: 9,660 ✭✭✭Voodoomelon


    Have decided to kill all the chrome on the car; hasn't sat right with me since I bought it. Chrome going over the roofline, front and rear bumper will be body coloured. Chrome window surrounds will be a satin black. Going for a quote tomorrow.

    DSC_2235.JPG

    I think it looks much cleaner in Sport guise (same colour):

    bmw-750li-sport.04.JPG

    bmw-750li-sport.14.JPG


  • Closed Accounts Posts: 2,880 ✭✭✭Kaiser D


    Every time I see your E66 I just go all gooey...


  • Registered Users Posts: 11,224 ✭✭✭✭Marty McFly


    Been thinking of putting the E90 lip spoiler on the back of mine but can't decide whether or not to go for it, what peoples opinions of it be leave it as is or go for it?


  • Advertisement
  • Registered Users Posts: 19,854 ✭✭✭✭MetzgerMeister


    I have the proper OEM E92 M3 lip spoiler on mine, really finishes off the boot very well.

    If you like how the E90 one looks then go for it. IT DOES NOT MATTER what other people think!


  • Registered Users Posts: 11,224 ✭✭✭✭Marty McFly


    I have the proper OEM E92 M3 lip spoiler on mine, really finishes off the boot very well.

    If you like how the E90 one looks then go for it. IT DOES NOT MATTER what other people think!

    Oh I know that I'm just being indecisive and can't make up my mind :o.


  • Registered Users Posts: 19,854 ✭✭✭✭MetzgerMeister


    Oh I know that I'm just being indecisive and can't make up my mind :o.

    Go for it!! It's one of those nice subtle things that you will always like and you'll wonder why you didn't get it sooner!


  • Registered Users Posts: 3,506 ✭✭✭Interslice


    DSC_2235.JPG


    It's a plug in hybrid :eek:


  • Registered Users Posts: 1,363 ✭✭✭bmstuff


    BMW 750i final pictures for those who followed...

    Original idea did not work out, subs in the rear deck, so I decided to make a custom rack with custom made enclosures for the mid bass drivers.

    23.JPG

    Wood glue

    24.JPG

    Trying out the mid bass speaker enclosure

    25.JPG
    26.JPG
    27.JPG

    A bit of foam to help reducing vibrations

    28.JPG

    The amp with 2 fans on each side.

    29.JPG

    The full rack assembled and ready to go in

    30.JPG

    Sound deadening to replace the factory one damaged in the process (No choice)

    31.JPG

    Rack mounted and wiring going in

    32.JPG

    Taping into the original rear deck speakers wires.

    33.JPG

    Everything bolted.

    34.JPG

    Final result. Still plenty of room in the trunk

    35.JPG
    36.JPG


  • Registered Users Posts: 9,660 ✭✭✭Voodoomelon


    €350 to get the chrome on my car colour coded, a little more than I thought it would be! Might be cheaper to just factory parts for around the windows and get the strips across the roof sprayed.


  • Registered Users Posts: 5,925 ✭✭✭GvidoR


    €350 to get the chrome on my car colour coded, a little more than I thought it would be! Might be cheaper to just factory parts for around the windows and get the strips across the roof sprayed.

    €350 is way too much. You get a whole car for that.

    What colour that car of yours?


  • Registered Users Posts: 9,660 ✭✭✭Voodoomelon


    Tis Monaco blue. I trust these guys to give a fair price, it'll be very labour intensive to ensure the surfaces are properly prepped. Even then he said he can't fully guarantee the longevity of the finish over the chrome. Metal no problem, chrome is tricky.


  • Registered Users Posts: 6,845 ✭✭✭Noccy_Mondy


    €350 to get the chrome on my car colour coded, a little more than I thought it would be! Might be cheaper to just factory parts for around the windows and get the strips across the roof sprayed.

    Buy the cheap chrome strips off flea bay. About €14 for a strip 2.5m by 3.5cm. I'm going to give it a try anyway, and if it looks crap them i'll take it off. A lot here don't like it and say it looks tacky, but sure, for €14.....


  • Advertisement
  • Registered Users Posts: 14,721 ✭✭✭✭CianRyan


    GvidoR wrote: »
    €350 is way too much. You get a whole car for that.

    What colour that car of yours?

    Not a whole 740i!
    You wouldn't even get a front wing for that.


Advertisement