Advertisement
If you have a new account but are having problems posting or verifying your account, please email us on hello@boards.ie for help. Thanks :)
Hello all! Please ensure that you are posting a new thread or question in the appropriate forum. The Feedback forum is overwhelmed with questions that are having to be moved elsewhere. If you need help to verify your account contact hello@boards.ie
Please note that it is not permitted to have referral links posted in your signature. Keep these links contained in the appropriate forum. Thank you.

https://www.boards.ie/discussion/2055940817/signature-rules

Today I did something to my car (volume 2)

Options
18081838586327

Comments

  • Registered Users Posts: 5,925 ✭✭✭GvidoR


    In Murrica, CHP's GMC is probably considered medium-size. :P


  • Registered Users Posts: 15,550 ✭✭✭✭vectra


    I

    I adjusted my handbrake today, I know have a functioning handbrake! Great success!


    Which way did you turn the adjusters?
    and did you adjust the cable as well?
    Need to look at my sons one.


  • Registered Users Posts: 23,157 ✭✭✭✭Alanstrainor


    vectra wrote: »
    Which way did you turn the adjusters?
    and did you adjust the cable as well?
    Need to look at my sons one.

    If you're looking at the drivers side adjuster, I turned it towards the front of the car. And I only turned it very little until there was resistance in the wheel.


  • Registered Users Posts: 3,404 ✭✭✭corkgsxr


    Iv always hated angle tightening. Seems so vague to me. Like I bet ya if you checked the torque of them they'd all be different


  • Registered Users Posts: 1,893 ✭✭✭rex-x


    corkgsxr wrote: »
    Iv always hated angle tightening. Seems so vague to me. Like I bet ya if you checked the torque of them they'd all be different

    Thats the point of it :D They are stretch bolts so using a torque wrench wouldnt work on them, angle tightening is the only accurate way


  • Advertisement
  • Registered Users Posts: 15,550 ✭✭✭✭vectra


    If you're looking at the drivers side adjuster, I turned it towards the front of the car. And I only turned it very little until there was resistance in the wheel.

    So basically turn from the outside to the centre?


  • Closed Accounts Posts: 3,354 ✭✭✭Sobanek


    You were in Newbridge and you didn't tell me? I feel offended :P Wanted to see the truck in person for a long time now :D


  • Registered Users Posts: 23,157 ✭✭✭✭Alanstrainor


    vectra wrote: »
    So basically turn from the outside to the centre?

    Yeah I guess. I was cheeky and did this with the wheel on. I had inspected it about 6 months ago and know that itll need replacing soon. Just want to get through the nct.

    As you look at it on the drivers side, it will be in an almost horizontal direction so you can just turn it ->.

    As I said, don't go nuts, mine needed very little to get it done. It went from not holding the car at all to holding it on a steep hill with little adjustment on both sides.


  • Registered Users Posts: 15,550 ✭✭✭✭vectra


    Handy to be able to do it with the wheel on.


  • Registered Users Posts: 9,660 ✭✭✭Voodoomelon


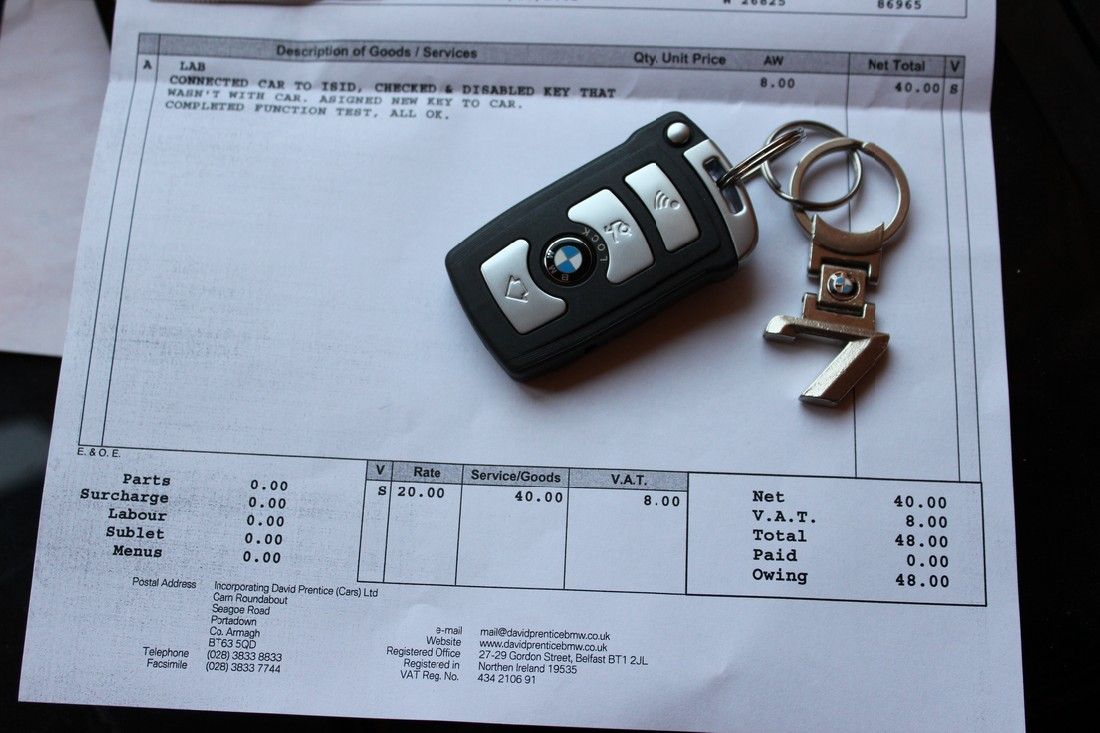
    I admitted defeat today and went to a BMW dealer for the first time ever for a service item. Some things you just can't really get around, I needed my new key programmed to have Comfort Access enabled.

    IMG_22631_zps15eb9228.jpg

    Not the worst price in the end, but a bit annoyed (some might say why?) that they kept me there for the guts of 45 minutes after they said it had been programmed, me wondering why it was taking so long. Turns out they were cleaning the car? I cleaned the whole thing 3 hours before.

    No doubt I've new swirls to deal with now, hate when garages do that. At least ask first.


  • Advertisement
  • Closed Accounts Posts: 9,607 ✭✭✭toastedpickles


    So on monday I got to servicing the car, only for it to p1ss rain halfways through :(

    Anyways! Pictures! and more of a somewhat detailed instructional guide I'll be sticking up in the service thread along with my own, yaddayadda

    25yyvdw.jpg

    In the lovely box was the service kit (5l fully synth saab oil, saab air, fuel, oil and pollen filter) so I got stuck in, Oil change first, about an hour previous in portlaoise i tossed in some engine flush and drove home

    So the change the oil, jack up the car, take the right wheel off, this will make sense in a minute,and put that to one side

    1dzkop.jpg

    Get under the car and undo the undertray

    2j9mye.jpg

    Now go to the right hand side and undo the nut in the wheel arch, 8mm socket does the trick for all this :)

    wt64cy.jpg

    So with a bit of persuasion this comes out, put it to one side, drain the oil, you'l either have a nut or a hex bit, so 13mm for the nut or a t40 bit for the other, undo the sump nut and drain the oil!

    nygt5d.jpg

    After this I went at the air filter, again on the right of the car behind the bumper

    153qv4n.jpg

    Undo the 4 screws and persuade the filter to come out, a bit of twisting and such is needed here, the new one and old :o

    2hfoxsj.jpg

    So fit that into the housing first and then put the lid back on and screw it back on

    After this plug back up the sump, I use ptfe tape just to make sure the plug stays where its supposed to

    21aakd2.jpg

    Don't forget your copper ring!

    wa6efd.jpg

    More in the following post!


  • Closed Accounts Posts: 9,607 ✭✭✭toastedpickles


    After this remove the oil filter, I had mine tight enough that i can take it off with my hand so its a case of just using a bit of strength, you might need a removal tool though ;) Get it off and you'l see this, and make sure have something under it to catch the oil

    33u4qc8.jpg

    Get some oil and run it around the new rubber seal on the new filter

    szgbh4.jpg

    Put it back on and tighten by hand, job done!

    This was the oil I drained out, golden brown colour so that's a good sign

    24zy87c.jpg

    A far cry from this

    35bb5t0.jpg

    So make a funnel for the oil and fill her up! 4.5l does the trick nicely :)

    2093ujp.jpg

    After this do the sparkplugs

    Undo the nuts holding in the coilpack, t30 bit for this

    34fdtnt.jpg

    After this disconnect the di cartridge at the side, a thin screwdriver does wonders for this so get the red piece :D

    2h5lgu9.jpg

    Undo this until the plug comes out, remove the cartridge and take the coilpack out, and place it upside down, always do this!

    fe1dw7.jpg

    Now onto the sparkplugs! :D

    A 16mm sparkplug socket is needed here and a good long extension bar, like so

    2cenbkx.jpg

    The old and new sparkplugs

    2ege6m9.jpg

    And the new ones in!

    264on6b.jpg

    Put the coilpack back on and reconnect the di cartridge

    Moooooore posts coming!


  • Registered Users Posts: 1,366 ✭✭✭king_of_inismac


    Great write up^

    Not sure I'd be putting that tape on the sump plug though. It shouldn't leak and don't like the idea of excess take going around the engine for 10k miles.

    maybe I'm wrong?


  • Closed Accounts Posts: 9,607 ✭✭✭toastedpickles


    Great write up^

    Not sure I'd be putting that tape on the sump plug though. It shouldn't leak and don't like the idea of excess take going around the engine for 10k miles.

    maybe I'm wrong?

    Thanks :)

    Good point but when i took it out, it was still there, so it doesn't seem to be a problem, but you've given me something to think about at the same time


  • Registered Users Posts: 265 ✭✭GE90


    I wouldn't be a fan of the tape either. They are parallel threads all the sealing is done by the copper ring.


  • Closed Accounts Posts: 9,607 ✭✭✭toastedpickles


    Do the pollen filter they said....its easy they said :rolleyes:

    So easy it gets its own post :mad:

    Anyways, to business

    If there's footwell lights which in mine there is, pry them out with a flat head screwdriver and place the whole light to one side, your left with this

    nqedky.jpg

    Then undo the bottom covering, 4 screws T20 bit

    10o3921.jpg

    Remove the bottom carpet piece at the centre console, pop out the rivet things, I'd advise to get more of these before doing this

    90nd5g.jpg

    35d5geq.jpg

    After the bottom piece is out remove the top screws holding the glovebox and take it out, before taking it the whole way out disconnect the air cooling, if its there, and the light

    71ihqe.jpg

    You're left with this

    o7jes2.jpg

    Now onto the filter housing, I won't lie, this is a utter pig of a job to do :(
    Get a 6mm socket and begin unscrewing the screws, there's one up at the back which is a total pig to get at :( but with a bit of patience you can get it

    1zv615d.jpg
    The old and new :pac:

    juflf9.jpg

    Slot it into the housing and do the above in reverse

    2iwami1.jpg

    Job done!


  • Registered Users Posts: 443 ✭✭maceocc2


    Full work out for you TP, I'm sure the Saab will thank you with more smiles per gallon :D

    I think we need a separate before V after filter thread though.


  • Closed Accounts Posts: 9,607 ✭✭✭toastedpickles


    maceocc2 wrote: »
    Full work out for you TP, I'm sure the Saab will thank you with more smiles per gallon :D

    I think we need a separate before V after filter thread though.

    It's an entirely different car now, plus with the amount of swearing i did I could have filled about 50 swear jars :pac:


  • Registered Users Posts: 3,404 ✭✭✭corkgsxr


    Great write up^

    Not sure I'd be putting that tape on the sump plug though. It shouldn't leak and don't like the idea of excess take going around the engine for 10k miles.

    maybe I'm wrong?

    Put on that loose it gets pushed back the threads. If it don't its too little. The copper rings seal and iv never needed any more.


  • Registered Users Posts: 3,404 ✭✭✭corkgsxr


    20140319_184046.jpg

    Trafic rolled over 170k miles. You honestly wouldn't know it. Not like the bosses hiace. Same year same miles and its a heap


  • Advertisement
  • Closed Accounts Posts: 5,042 ✭✭✭Bpmull


    corkgsxr wrote: »
    20140319_184046.jpg

    Trafic rolled over 170k miles. You honestly wouldn't know it. Not like the bosses hiace. Same year same miles and its a heap

    Would that not be kms thought yours was 08.


  • Registered Users Posts: 3,404 ✭✭✭corkgsxr


    Bpmull wrote: »
    Would that not be kms thought yours was 08.

    Bought In the north. When I bought it I presumed it was in klms. And nothing gave it away In the cab. It was only later when the figures were wrong for mpg I checked with the gps. It must have spent alot of time up and do the country cos theres no wear on anything but there not new either.


  • Registered Users Posts: 265 ✭✭GE90


    corkgsxr wrote: »
    Put on that loose it gets pushed back the threads. If it don't its too little. The copper rings seal and iv never needed any more.

    PTFE tape is only supposed to be used with tapered threads. The tape itself those not make the seal, it reduces the friction significantly which allows the thread to deform and seal when tightened.

    Parallel threads like in the sump plug are designed to be sealed with a gasket, ie the copper ring.

    As an fyi toastedpickles in that pic is looks like the tape is applied in the wrong direction for a right hand tread.


  • Closed Accounts Posts: 9,607 ✭✭✭toastedpickles


    GE90 wrote: »
    PTFE tape is only supposed to be used with tapered threads. The tape itself those not make the seal, it reduces the friction significantly which allows the thread to deform and seal when tightened.

    Parallel threads like in the sump plug are designed to be sealed with a gasket, ie the copper ring.

    As an fyi toastedpickles in that pic is looks like the tape is applied in the wrong direction for a right hand tread.

    Tis a learning curve, so duly noted


  • Registered Users Posts: 265 ✭✭GE90


    Tis a learning curve, so duly noted

    "The day we stop learning is the day we die" ;)

    btw way toastedpickles very nice car. I have always loved sabs. I really appreciate the "over engineering". The cup holder being a prime example.

    I love the flight deck look at night with all the buttons illuminated.
    Perhaps if you got a chance you might post a pic of the dash at night time over in the "post a pic of your dash thread"


  • Registered Users Posts: 3,404 ✭✭✭corkgsxr


    GE90 wrote: »
    PTFE tape is only supposed to be used with tapered threads. The tape itself those not make the seal, it reduces the friction significantly which allows the thread to deform and seal when tightened.

    Parallel threads like in the sump plug are designed to be sealed with a gasket, ie the copper ring.

    As an fyi toastedpickles in that pic is looks like the tape is applied in the wrong direction for a right hand tread.

    Taper threads compress the ptfe to help it make a seal. Threads don't seal no matter how tight you go.

    and once done right there is no issue with ptfe on parallel threads.


  • Closed Accounts Posts: 9,607 ✭✭✭toastedpickles


    GE90 wrote: »
    "The day we stop learning is the day we die" ;)

    btw way toastedpickles very nice car. I have always loved sabs. I really appreciate the "over engineering". The cup holder being a prime example.

    I love the flight deck look at night with all the buttons illuminated.
    Perhaps if you got a chance you might post a pic of the dash at night time over in the "post a pic of your dash thread"

    There you go!

    Thank you, I've a build thread in upgrades and audio, in relation to the dash thread #20 ;) But I'll stick one from night tomorrow


  • Registered Users Posts: 641 ✭✭✭kilianmanning


    Today dgt built me a new diesel pump.. ;)


  • Registered Users Posts: 1,331 ✭✭✭toyotaavensis


    Yesterday, changed the oil oil filter and air filter.


  • Advertisement
  • Registered Users Posts: 73,454 ✭✭✭✭colm_mcm


    the projects and builds forum is now open
    Click me


Advertisement