Advertisement
If you have a new account but are having problems posting or verifying your account, please email us on hello@boards.ie for help. Thanks :)
Hello all! Please ensure that you are posting a new thread or question in the appropriate forum. The Feedback forum is overwhelmed with questions that are having to be moved elsewhere. If you need help to verify your account contact hello@boards.ie
Hi there,
There is an issue with role permissions that is being worked on at the moment.
If you are having trouble with access or permissions on regional forums please post here to get access: https://www.boards.ie/discussion/2058365403/you-do-not-have-permission-for-that#latest

toastedpickles Saab 900 lpt build

  • 08-06-2014 10:54am
    #1
    Closed Accounts Posts: 9,607 ✭✭✭


    So I've went and bought another saab :rolleyes:

    A 1991 saab 900 low pressure turbo, doesn't have much to show off about but it seems to be a very "all business end" kind of car, it gives my 9-5 a run for it's money to say the least, being the same age as myself (23) and having been layed up for the last two years it's gathered a bit of rust in places, the previous owner has tried to repair it, but it still needs work, 90% looks to be surface rust, and the other 10% I'm going to have to get it cut out and replaced, other than that, it needs a good service, new coolant piping, a headlining, electrics sorted out, and a respray/ alloy refurb, the rest is just small little things, near gearknob, dashlights and so on.
    Just by going on a quick inspection this is what I've found, I'm sure the next two years will throw up plenty, the end result is to have it ready for my 25th birthday, so it's a long term birthday present of sorts :pac: So my first mission is to find a manual for this car, after a bit of searching I found this http://www.amazon.com/Saab-900-Valve-Service-Manual/dp/0837603137 from what i seen it looks pretty in depth, so I'm going to invest in it when i have the money, along with a haynes one for it and bodywork, then strip and rust proof the car, after that, who knows

    So pics!

    205zb48.jpg

    15x7djm.jpg

    izx26d.jpg

    Needs headlining

    104rtj8.jpg

    Surprisingly enough this is the only lacquer peel on the whole car

    2wembtk.jpg

    And now for my favourite bit :pac:

    2lt24c3.jpg

    xbhbog.jpg

    2zzhrgw.jpg

    Made me giggle like a kid when i seen this first

    And the bidness end of things

    2yn2y5e.jpg

    8wyvqq.jpg


«13456

Comments

  • Closed Accounts Posts: 9,607 ✭✭✭toastedpickles


    So, day 1, today began with me hunting for rust, and it didn't take long for me to find it, lets see how deep the rabbit hole goes
    I'm going to throw just about everything in on this build as there's feck all in depth guides on how to do things with this car, today i done what i could without the use of books or manuals, so until i get one, I'll just do what i can
    Also drown every nut in wd40/plusgas, or whatever you have

    First order of business was removing the battery, so get a 10 mm spanner or socket and take off the negative and then the positive

    And rust!

    nda239.jpg

    So i'm debating weather to cut it out or leave it in place and douse it in kurust

    Next on the list to take off, the washer tank, they're known to rot at the bottom of the tanks so just to be safe

    Here is said water tank

    2u3y7nd.jpg

    To get the tank out first you need to remove a bracket, there's a 10mm nut inside the engine bay

    2pqkf40.jpg

    And then the bracket comes out

    2i0grh2.jpg

    Then disconnect the horn, again 10mm

    vowu1g.jpg

    And then pull out the tank, and disconnect the pump, this can be a bit of a pain, but if you turn the pump sideways you can get at it easy enough

    turo.jpg

    So i decided to have a looksee inside, I shouldn't have :o

    13z9213.jpg

    So i decided while i was it to check the coolant, again, I shouldn't have

    21c5ncp.jpg

    Rust...in the coolant :o So that's being drained and binning the pipes and replace them with silicone hoses

    More in the next post ;)


  • Closed Accounts Posts: 9,607 ✭✭✭toastedpickles


    After all this i decided to start tackling the rust, which there is quiet a lot, I have a dremel so I used that to grind off the surface rust on where i could get to so I'll carry on with that tomorrow

    After removing the water tank my suspicions were confirmed, it was rather rotted :( so I'll have to cut it out or something

    2n9f60o.jpg

    1z1tzzc.jpg

    Along with this at the back of the engine

    200aadv.jpg

    So I went to have a look at the suspension set up, again, very different to modern set ups, and rather rusty

    2cptbp1.jpg

    2ms3c3t.jpg

    More rust, I'm thinking of just replacing the whole hub/driveshaft assembly

    2lax04.jpg

    2nlwrvt.jpg

    Here's a section I was working on, I've a feeling the car will begin to look more like this over the next few weeks

    331egs1.jpg

    After this, I looked at the doors, and was greeted by, yep, more rust

    sdnqr4.jpg

    So off with the door cards to investigate further


  • Closed Accounts Posts: 9,607 ✭✭✭toastedpickles


    You'l need a T20 hex bit for this

    Start by removing the screw in the door latch cover

    flhxfr.jpg

    Then remove the covering behind it to show the rest of the bolts

    1z353iv.jpg

    And then undo the rest of the screws and take off the door card, but before you get it off, there is one obstacle in the way, the lock, simply unscrew this and take the door card off

    dca4hf.jpg

    And result

    zjxeg9.jpg

    And the verdict? Well a new door might be in order if I can't sort this

    jhx7di.jpg

    Some rust spots are in hard to reach places, like this one

    24zce8y.jpg

    14mt7nr.jpg

    There's still some rust spots here and there but a good dollop of kurust should sort that

    The left door wasn't too bad bar the bottom

    faxahx.jpg

    This was the worst of it

    20qgk6s.jpg

    And a dodgy filler job

    2ushaaa.jpg

    Something fell into the back, put my hand on the floor, wet floor, not looking forward to pulling out the interior :(

    2cgkf40.jpg


    And more rust under the body

    2wq4a5j.jpg
    acs7j5.jpg

    Went to remove the fuse box and some corroded wiring greeted me, so I called it a day

    2s635sn.jpg

    More fun tomorrow!


  • Closed Accounts Posts: 9,607 ✭✭✭toastedpickles


    So today i decided to buy a wire bit for a drill, for a euro, courtesy of the local motor factors

    And got to tackling this

    2ushaaa.jpg

    The drill i have isn't great if I'm honest, but it got through most of it,

    Halfway through

    34g5ag3.jpg

    2u71285.jpg

    And this is as good as i can get it, gona run a layer of kurust over it tomorrow

    2udyujn.jpg

    Ended up going through a few sander bits for my dremel, and a wire bit, so I'm in need of a new "proper" drill

    So I intended on removing the bumper and so on to get access to the radiator to drain the coolant

    qrgg35.jpg

    Blasted these with wd40 and tried to take them off, with a 7mm socket the first one had other ideas :rolleyes:

    fviwx3.jpg

    The rest decided they didn't want to come out due to rust, so I moved onto taking the front off, and the air intake

    Take off the main grille with a t20 bit

    25thqpt.jpg

    Then move onto the lights, this is what you have to disconnect

    11ju0xw.jpg

    Then begin disconnecting the plugs, some can be a bit of a pain to get but its doable
    Lable everything for later on ;) Sadly some connectors are a bit worse for wear

    2yxklz6.jpg

    After this undo two 8mmm bolts on the headlight and pull the whole unit out, put it to one side for safe keeping, next the issue of the wipers, sadly these wipers have seen much better days, perished blades and rusted holders, I'll try do something with them but i don't have much hope

    2d27msz.jpg

    Do the same with the other light, disconnecting any wires or anything in the way the car should look similar to this now!

    vzymg5.jpg


  • Closed Accounts Posts: 9,607 ✭✭✭toastedpickles


    After the headlights were taken out i had a looksee for rust, and I wasn't disappointed, well I was, but you get me

    This part will need replacing, when it comes to it, I might just use solid steel instead of sheet metal or whatever, strength and all

    14tvjg0.jpg

    Same on the other side

    awqkra.jpg

    After this the air intake system was coming out, Also I found this beside it, does anyone have any idea of what it does or what its for? Seems to be some sort of ignition

    2iql9go.jpg

    Anyways the air system, there's a piece on the side that comes out with a t20 hex bit, then undo the jubilee clip and jiggle it off, next the maf and hosework for it, undo more jubilee clips and wiggle that off

    Looks like this

    abo4y0.jpg

    Then onto the air filter, this was a bit of a pig, but then most things are rusted on the car, this is secured in with a bracket, so get a 10mm socket and away you go, loosen it enough till you can pull the whole filter and housing out, there's a good deal of space there so I might look at getting a different airbox made up ;)

    s0vlv8.jpg

    Then take off the bracket and that's your airbox out, the bracket appears to be zinc plated so I might get that redone, or attempt to do it myself, No idea how to plate metal so that's a learning curve in itself

    xpda3a.jpg

    After this it started raining so I called it a day, tomorrow I'll drain the coolant and get stuck into the pipework for it


  • Advertisement
  • Registered Users, Registered Users 2 Posts: 73,517 ✭✭✭✭colm_mcm


    Is that keyhole thing for the alarm?


  • Closed Accounts Posts: 10,817 ✭✭✭✭Dord


    Should be great when it's done... but you've certainly got your work cut out for you. :)

    I didn't find Kurust to be all that great to be honest. Maybe you need to use it in combination with some other treatments. I started a thread a while back on this subject and was suggested to use zinc primer on top of this.


  • Closed Accounts Posts: 9,607 ✭✭✭toastedpickles


    colm_mcm wrote: »
    Is that keyhole thing for the alarm?

    Yeah it's an aftermarket alarm apparently
    Dord wrote: »
    Should be great when it's done... but you've certainly got your work cut out for you. :)

    I didn't find Kurust to be all that great to be honest. Maybe you need to use it in combination with some other treatments. I started a thread a while back on this subject and was suggested to use zinc primer on top of this.

    I was told the same, but I want to get it sandblasted at some stage, so it's more for a temporary fix, I have zinc primer but it's grey, so i don't want the car covered in grey blotches, might end up with it though


  • Closed Accounts Posts: 10,817 ✭✭✭✭Dord


    Sandblasting would be a good idea. Do you have a shed to keep it dry?


  • Closed Accounts Posts: 9,607 ✭✭✭toastedpickles


    Dord wrote: »
    Sandblasting would be a good idea. Do you have a shed to keep it dry?

    Nope :( so I'm kinda fighting a loosing battle, the sooner i get it done the better y'know?


  • Advertisement
  • Registered Users, Registered Users 2 Posts: 9,313 ✭✭✭Mycroft H


    Get some kurust on the minor stuff.

    How's the chassis?


  • Closed Accounts Posts: 9,607 ✭✭✭toastedpickles


    Mycroft H wrote: »
    Get some kurust on the minor stuff.

    How's the chassis?
    Shall do, can't do anything today due to the rain, cars covered though, thanks to granny pickles :) got me a car cover

    From what I can make out the chassis seems to be good, like i said somewhere else, if it's not, then game over sadly :( I don't know of anyone who would repair it, or I might end up doing a jozi on the whole thing


  • Closed Accounts Posts: 10,817 ✭✭✭✭Dord


    Well, you have plenty of time... start building a shed! :D


  • Registered Users, Registered Users 2 Posts: 8,480 ✭✭✭YbFocus


    Can you weld man? Pretty easy to put in a few plates if any rust shows up in the floor!


  • Closed Accounts Posts: 9,607 ✭✭✭toastedpickles


    YbFocus wrote: »
    Can you weld man? Pretty easy to put in a few plates if any rust shows up in the floor!

    sadly no i cant :( gona have to pay someone to do that


  • Registered Users, Registered Users 2 Posts: 8,480 ✭✭✭YbFocus


    sadly no i cant :( gona have to pay someone to do that

    I can and have put many plates into cars, hell we've spaceframed the front of a 180 before :)


  • Closed Accounts Posts: 9,607 ✭✭✭toastedpickles


    YbFocus wrote: »
    I can and have put many plates into cars, hell we've spaceframed the front of a 180 before :)

    I might be calling on you again so :pac:


  • Closed Accounts Posts: 9,607 ✭✭✭toastedpickles


    Jaypers such a day! So today started off with me swearing at the sky for raining, and making my car get new rust on where I had grinded away rust and forgot to coat it, lesson learned there I also started taking out the aftermarket alarm and took out the radiator

    After much giving out thanks to my gran, I got this :D

    2wr0s46.jpg

    So that's as good as my coverage is going to get, got it in halfords and its the best they got so it better work :P

    Anyways during the rain falls I was out doing a bit of tidying up/re derusting on the car, i covered areas in kurust and it seems to have done the job nicely

    2q313ll.jpg

    104f48y.jpg

    Next I drained the "coolant" Take a 24mm deep socket and unscrew the plug

    25r2xw6.jpg

    This is some of came out :o

    kbumaw.jpg

    So i let that drain out and carried on removing the coolant tank, undo the jubilee clips and then a 13mm bolt holds the tank in place

    qp32u8.jpg

    And the tank out

    9ih3wl.jpg

    Treated that area too, wire brush and kurust

    9ih3wl.jpg

    After that I removed the larger pipe and I'll replace it the inside was fake tan colour :P

    t5nkmx.jpg

    After this it was the removal of this "alarm" thing,

    5eheut.jpg

    ju8x0o.jpg

    Then I traced the wiring for it back to under the fuse box, this was a rather happy moment, I previously thought the corroded wires were part of the main loom, but nope, part of the alarm system, so I'm gona trace it right back and gut it out


  • Closed Accounts Posts: 9,607 ✭✭✭toastedpickles


    Pulled the alarm out and traced the wires back

    21mbtec.jpg

    I'm not very good or knowledgeable with wiring, but whoever done this job should be shot

    wwd7ol.jpg

    15q5gs3.jpg

    There's two fuses in that white thing

    Goes in under the fuse box

    35cn4ms.jpg

    There was one blue wire that went somewhere else, so i traced it back to the slam panel to this thing

    u0zd0.jpg

    So i cut the wire and removed it

    258vxn8.jpg

    While I was there I removed this as well

    149vayb.jpg

    Didn't get the whole thing off as it broke my hex bit :(

    Push in the metal clip and pull it out

    After this I started at the radiator, first the fan has to come out, there's a good bit of stuff to get out of the way

    30moihf.jpg

    First i took off the coolant hose and moved that aside, then onto the starter motor, at least I think that's it, it lead to the distributor so it must be

    2mqthj8.jpg

    And disconnect it from the distributor and place it to one side

    2wo8vap.jpg

    Then take off the fan with a t20 bit, there's three bits, two on top and one on the bottom, when i got it out the fan seems to be knackered so I'll invest in a new one

    x3wb3n.jpg

    qn1og7.jpg


  • Closed Accounts Posts: 9,607 ✭✭✭toastedpickles


    Next on the list was this cnut of a thing :(

    2isi0wy.jpg

    it was rusted together and broke two of my bits :mad:

    25u65og.jpg

    So, out with the dremel and I cut it off

    xqkl6w.jpg

    The pipe itself seems to be connected to another pipe so I'll find out what it joins up to

    oid3pl.jpg

    The radiator's held in by two 10mm bolts, but to get the clearance you need to take the turbo pipe out

    2rqy51j.jpg

    Same on the other side, and with it gone, you have miles of room

    1zmjxok.jpg

    And then just pull the rad out, and clean up any spillage from it and call it a day!

    23wtwr5.jpg

    After now I don't really know where to go as I need to get a manual and a few bits, I might invest in some more rust proofing and see what happens form there!


  • Advertisement
  • Registered Users, Registered Users 2 Posts: 2,280 ✭✭✭commited


    Some great work here, good man for getting stuck in :) Seems like you need to get an angle grinder with a knot wheel for some of that stuff though!


  • Closed Accounts Posts: 9,607 ✭✭✭toastedpickles


    commited wrote: »
    Some great work here, good man for getting stuck in :) Seems like you need to get an angle grinder with a knot wheel for some of that stuff though!

    Thanks :) I do need and angle grinder, but I've 0 money at the minute, I'll just buy a cheap yoke and go at it when i can, I want to get the engine out first, which half of it I've no idea what I'm doing :o really need a manual, again when I have money

    2 years to do it all so plenty of time! but sooner the better


  • Registered Users Posts: 105 ✭✭Saabturbonut


    looks like a nice 900 restoring one in worst shape , make sure to check behind the aero kit panels as water always gets traps there unless someones drilled drain holes


  • Closed Accounts Posts: 9,607 ✭✭✭toastedpickles


    So thanks to a very helpful individual on another forum to get the engine out this is the general preocedure

    - take off bonnet ( 2 10mm bolts )
    - Drain coolant/remove rad ( done )
    - disconnect gear linkage
    - disconnect exhaust
    - disconnect oil cooler
    - disconnect power steering
    - disconnect/remove air intake ( done )
    - Remove driveshafts from gearbox

    Today I didn't really do a whole lot, more rust proofing and more "yay!" moments

    I began by finding what wires from the aftermarket alarm went where to the fuse board, turns out they're soldered in with other wires, not sure what they do, but I'll look tomorrow, me thinks an auto electrician will be needed for this :o

    9ied7s.jpg

    70xkd2.jpg

    After deciding to leave this for another day/person, I decided to take a look at the rear wheel arches, by this time it was getting to evening time so i only got a look at one side, a lot of surface rust, and a lot of kurust was used, seemed to do the trick though!

    33l03kj.jpg

    So onto wire brushing and this decided to fall off from up around the suspension mount so i put it aside for later

    205tl06.jpg

    And here is said location, the flat washer piece

    2j41ykj.jpg

    After i checked the rear axle, hoped that it wasn't rusted through, and it wasn't :D

    2zgu3iq.jpg

    Out with the wire brush and cleaned it up as best i could on that side, stuck on some more kurust on it to see if it done anything and it did!

    11t30yc.jpg

    So plans are in place to buy a drum of waxoyl and more of this kurust stuff and use them as a combination treatment

    A few more bits i got with it

    1zbfd6o.jpg

    xdruvl.jpg

    Cleaned up the wheel arch due to a bit of rust i seen and began removing it, it turned out to be a bit bigger than i thought

    ohip9h.jpg

    Two holes in the boot need to be addressed too

    2wnb8k3.jpg

    29zvudz.jpg


  • Registered Users, Registered Users 2 Posts: 2,280 ✭✭✭commited


    Do you have a multimeter dude? I wouldn't tackle anymore wiring stuff without one (oh and make sure battery is disconnected :) ) €10 will get you one from ebay that will fit the bill.

    Regarding surface rust on the axle etc - I wouldn't be too concerned about those bits, generally made from fairly thick stuff that won't rust through, the main areas of concern would be the sheet steel, especially any place that 2 sheets meet, mounting points etc.


  • Closed Accounts Posts: 9,607 ✭✭✭toastedpickles


    commited wrote: »
    Do you have a multimeter dude? I wouldn't tackle anymore wiring stuff without one (oh and make sure battery is disconnected :) ) €10 will get you one from ebay that will fit the bill.

    Regarding surface rust on the axle etc - I wouldn't be too concerned about those bits, generally made from fairly thick stuff that won't rust through, the main areas of concern would be the sheet steel, especially any place that 2 sheets meet, mounting points etc.

    No multimeter sadly, I've literally got a socket set and a few pliers and basic tools, I'm trying to get one thing a week, that's the only way I can actually afford it

    First thin that was taken out was the battery :)


  • Registered Users, Registered Users 2 Posts: 2,280 ✭✭✭commited


    This should get you started - http://www.ebay.ie/itm/SN9F-LCD-Electric-Voltmeter-Ammeter-Ohm-Tester-Meter-Digital-Multimeter-DT-832-/121228223849 <€5
    You won't become a pro sparky but that + 9v battery will do you fine for a couple of years.


  • Registered Users, Registered Users 2 Posts: 8,532 ✭✭✭JohnBoy26


    Jaysus you have some project on your hands there. The rust on the axle and suspension components are nothing to worry about. It's only surface rust from the car being idle and is nothing to worry about.

    The rust on the body would be of far more concern to me. A welder would come in very handy for a lot of that stuff but maybe for the more structurally important areas, a body shop might be the best bet.

    Also IMO, your wasting your time with kurust. In my experience any time I used it the rust would be back out through it in no time. I have found that it only covers the rust and doesn't really convert it.

    The best thing for the surface rust imo is bilt hamber deox gel followed by bilt hamber electrox primer.


  • Closed Accounts Posts: 9,607 ✭✭✭toastedpickles


    JohnBoy26 wrote: »
    Jaysus you have some project on your hands there. The rust on the axle and suspension components are nothing to worry about. It's only surface rust from the car being idle and is nothing to worry about.

    The rust on the body would be of far more concern to me. A welder would come in very handy for a lot of that stuff but maybe for the more structurally important areas, a body shop might be the best bet.

    Also IMO, your wasting your time with kurust. In my experience any time I used it the rust would be back out through it in no time. I have found that it only covers the rust and doesn't really convert it.

    The best thing for the surface rust imo is bilt hamber deox gel followed by bilt hamber electrox primer.
    Yeah i know :pac: i know its only surface rust but i want it gone, looks nasty to me

    Well I'll leave the kurust for a few days, and see what happens, if it doesn't work I'll invest in the bilt hamber, trying to work on a budget here :) I have a few offers with welding and help regards the front end so we'l see how that turns out, taking it one step at a time here


  • Advertisement
  • Registered Users, Registered Users 2 Posts: 8,532 ✭✭✭JohnBoy26


    Yeah i know :pac: i know its only surface rust but i want it gone, looks nasty to me

    Well I'll leave the kurust for a few days, and see what happens, if it doesn't work I'll invest in the bilt hamber, trying to work on a budget here :) I have a few offers with welding and help regards the front end so we'l see how that turns out, taking it one step at a time here

    Scrap off a bit of the kurust in a few day where it's gone black. I bet the rust will still be there underneath ;)


  • Closed Accounts Posts: 9,607 ✭✭✭toastedpickles


    So away from the yays, and into the "ahhhh crap" moments

    Didn't get a whole lot done today as thursdays are generally busy anyways

    Heres what I did get done, tackled the right hand brake setup and general rust hunting

    Start off by loosening the wheel nuts on both front wheels, and then bit by bit lift the car into the air, I never thought I'd see another saab in this position in my yard :rolleyes:

    t5pw9d.jpg

    The predecessor, pretty much in the same spot?

    14kzjnd.jpg

    Anyways, bidness time

    Started tackling a rust patch that grew a bit, so I may cut that out and get some metal welded in there when i feel confident enough

    2d8gtxl.jpg

    After this i cleaned the wheel arch with a wire brush and a pot scrubber, seems to have been layered with something but most of the dirt and so on pulled it away

    Pull this off just to get the whole arch, 2 10mm nuts, drown them in wd40

    30ixheh.jpg

    After this it was onto the caliper and disc, I had intended on getting the hub off but someone else had other ideas, took off the wheel and went to take the locking pin out and this greeted me

    2rggjlj.jpg

    Yokes more rounded than a circle :mad: So I'll attack that tomorrow with all the cutting power i have

    Anyways, onto the rest of things, Took the calliper off, 16mm nuts if i remember correctly, and just keep at them until they come out, halfway though the brother came out and attempted so brother pickles about to be in action :pac:

    op7lmu.jpg

    Calliper nearly off

    n720c8.jpg

    And the calliper off, I rested it on the A bracket behind the disc, next the shoe for the pads, both 19mm

    15gxn53.jpg

    And the disc as it stands now

    2u5xqaq.jpg

    After this I loosened up the remaining nuts around, ball joints and steering and called it at that,

    Then I went under the car to figure out how to start disconnecting the exhaust/gear linkage/box etc, and found this, any idea anyone?

    2mgqu53.jpg

    More questions, when disconnecting the exhaust, should i disconnect it from the turbo or on the joins at the bottom?

    21o0zty.jpg

    Anyways, after this I got sick of getting nowhere, most of the nuts were torqued on to an inch of their life, air tools would've been great but we got there in the end, tomorrow I'll attack that rounded bit and see from there


  • Closed Accounts Posts: 12,985 ✭✭✭✭dgt


    Okays....

    The rust: cut that out and weld in a new piece

    Forget wd40, plusgas or nothin'

    The stud: Get the correct size bit, heat the surrounding area with a blowtorch and use it with an impact driver. It might take it. Failing that, drill and tap time etc

    For the mystery cooler, that looks like an oil cooler to me

    AS for disconnecting the exhaust, remove it from the downpipe don't remove it from the turbo. Cut those 3 bolts off with a grinder, they'll be seized solid


  • Closed Accounts Posts: 9,607 ✭✭✭toastedpickles


    dgt wrote: »
    Okays....

    The rust: cut that out and weld in a new piece

    Forget wd40, plusgas or nothin'

    The stud: Get the correct size bit, heat the surrounding area with a blowtorch and use it with an impact driver. It might take it. Failing that, drill and tap time etc

    For the mystery cooler, that looks like an oil cooler to me

    AS for disconnecting the exhaust, remove it from the downpipe don't remove it from the turbo. Cut those 3 bolts off with a grinder, they'll be seized solid

    The rust I'll attack when i learn how to weld

    Nowhere around here has plusgas so i may travel further afield

    The stud, I'm just going to drill the thing out, I'm getting new discs anyways

    Mystery cooler not mysterious anymore :pac:

    The downpipe it is! the bolts aren't seized though so ill get them

    Thank ya! :D


  • Closed Accounts Posts: 9,607 ✭✭✭toastedpickles


    Small update today

    A special mention goes out to this set up

    2jeaiqf.jpg

    And my dremel tool, best 50 euro I ever spent, it's really starting to prove its worth

    I finally got the pin out

    mhdp1c.jpg

    And away came the disc

    nmg2eq.jpg

    After this i took a 13mm bit and disconnected the exhaust

    s58ihg.jpg

    And after this I checked the driveshaft holes for rot, solid as a brick, happy days :)


  • Closed Accounts Posts: 9,607 ✭✭✭toastedpickles


    So I've began following this guide to removing the engine

    http://www.saabcentral.com/forums/showthread.php?t=64956

    I spent the majority of today trying to get this cursed thing out, it ended up breaking :(

    Here's what I'm dealing with

    cuuiu.jpg

    2gslaub.jpg

    Literally at my wits end with it, what im thinking of doing is disconnecting the rectangular bracket piece to see if that does anything, after that I'm out of ideas
    Someone posted this over on a saab forum so maybe this, or drilling it out will do it "I also typically remove that linkage coupler WITH the transmission. As suggested, I typically put the car in 4th, loosen the clamp, then put it in third rapidly and the shaft pops right out".
    Anyone got any ideas of their own?


  • Advertisement
  • Closed Accounts Posts: 9,607 ✭✭✭toastedpickles


    This seems doable so i might give this a go
    Don't mess with the taper pin, its very hard to remove that thing even with the engine removed from the car. Just loosen the 13mm bolt that clamps on the shift linkage. When you reinstall the transmission you will need to readjust the shift linkage but this is much easier than trying to remove the taper pin with the engine in the car.

    Before you loosen the clamp, clean off the shift linkage, put a splash of paint on the point where the two shafts connect, and paint a line along the shaft. These marks will help get the two shafts close to the right position when you reassemble.

    Dec232008031.jpg


  • Closed Accounts Posts: 9,607 ✭✭✭toastedpickles


    So! After yesterdays nightmare fun and games I ended up just disconnecting the couplings 2 10mm bolts and a bit of gentle persuasion and it comes out

    2aeqihh.jpg

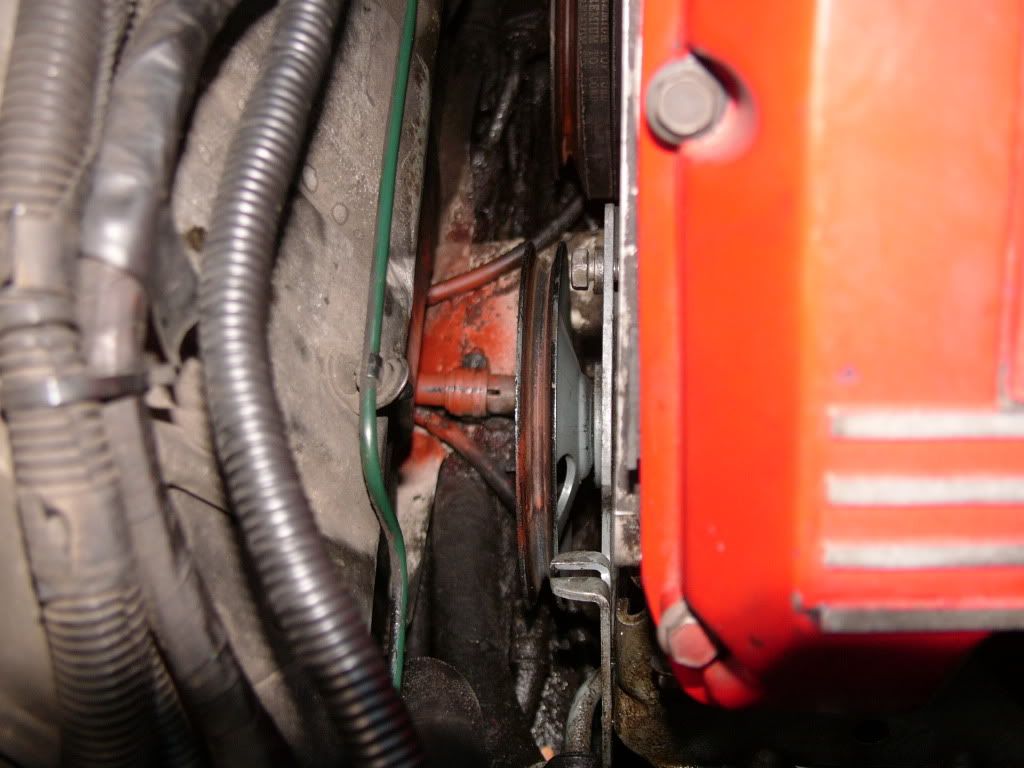
    After this I went after the power steering tensioner, which is located above the gearlinkage you just undone, looking from above it's below the wiring loom, you need to get the belt off instead of draining the power steering fluid apparently, again going by the guide i posted up

    Cut the cable ties away so you have more room to get to the tensioner

    2po9mas.jpg

    pccja.jpg

    And here's what you're after

    5lwgnk.jpg

    Disconnect the lowest nut with a 13mm socket and take the whole thing out, I didn't go near the other nut on the longer thread

    dvrnti.jpg

    So what the lovely man in the guide I'm following didn't mention was that there is another bolt holding the cog in place, therefore you can't remove the belt, its located just above the tensioner you just took out, again with a 13mm take it out, the belt wheel becomes slack and you can remove the belt, hurrah!

    2la80w5.jpg

    Just move the wheel with your hand towards the left of the engine and undo the belt

    2e14s4w.jpg

    Belt looks a bit used so I'm gona replace it

    289ejhd.jpg

    After this it said to bleed the clutch, don't have a kit so i may get one but you do it here

    2rw3kox.jpg

    After this i went to disconnect the main ground wire off the front of the gearbox, but there something in the way, so i may get it out of the way

    2eakqa8.jpg

    96hzq9.jpg

    I need to somehow get that bracket with the pipe out and see from there, it connects up to the turbo and to one of the radiator hoses

    After this I went after the throttle cable, 13mm will do the job for this, undo it at the spring and disconnect the oil filler pipe bracket, 10mm spanner does the job for this one

    The spring

    3zo81.jpg

    And the bracket

    ml2eqw.jpg

    Put the cable to one side and get back under the car to undo the speedo cable bracket, 12mm socket for this

    34io2sj.jpg

    And the bracket out

    2nq8cx4.jpg

    Next post ahoy!


  • Registered Users, Registered Users 2 Posts: 1,331 ✭✭✭toyotaavensis


    Great to see an old 900 beng saved


  • Closed Accounts Posts: 9,607 ✭✭✭toastedpickles


    And I'm not even a quarter of the way done haha :) the 9-5 plans are on hold for the time being, I'm just enjoying that and getting stuck into this


  • Closed Accounts Posts: 9,607 ✭✭✭toastedpickles


    After this yank the speedo cable out, or in my case it needed some persuasion with a vice grips, don't use a load of pressure though, just enough to get it loose

    Located here

    ib9xec.jpg

    This is what you're after

    9k036h.jpg

    After this, going along with the guide I was following it said to disconnect the connectors for the fuel injectors, leave the injectors alone just disconnect the loom form them, number them so you know which goes into which

    2l8xnb7.jpg

    Theres two bits I've yet to disconnect, partly because I don't know what they are, so I can't label them, one's just behind the fuel rail, and the other is buried under a heap of pipes

    The first one

    34jdipw.jpg

    And the buried one

    121quyb.jpg

    So if anyone has any idea what they could be I'd appreciate it

    After this, disconnect the wires from the alternator, again label everything 8mm for the small ones and 13mm for the big one, Where I can I put the nuts back on so I wont loose them :)

    2h53big.jpg

    While you're here disconnect the oil pressure sender, mine looks a bit corroded so I'll get a new one

    2ibi5oy.jpg

    After this go over to the distributor and disconnect the central pin, I'd already done this but its the one from the centre ;)

    2vno1eo.jpg

    I keep intending on making a list of stuff i have to do so i figured I'd keep it handy where i usually am :pac:

    Not much left to do!

    24djuxc.jpg

    After this i went to loosen the nuts on the oil cooler. to get to it properly I took off the side trim, it just slides off i found

    28gutz7.jpg

    It varying sizes, with one head rounded, so i might disconnect it somewhere else if it can be

    Also this vacuum line was hanging loose, I think it goes here but I'm not too sure

    5zgnq8.jpg


  • Advertisement
  • Registered Users, Registered Users 2 Posts: 2,280 ✭✭✭commited


    Looks like you're making good progress. For the connecters you don't know what they do, just label the connector and corresponding plug with the same thing i.e. AAA


  • Closed Accounts Posts: 9,607 ✭✭✭toastedpickles


    commited wrote: »
    Looks like you're making good progress. For the connecters you don't know what they do, just label the connector and corresponding plug with the same thing i.e. AAA

    Slowly but surely! not much left to do Never thought of that :o

    Congrats on the 1600th post in my thread :pac: I'll send out the prize soon :P


  • Registered Users, Registered Users 2 Posts: 2,280 ✭✭✭commited


    Congrats on the 1600th post in my thread :pac: I'll send out the prize soon :P

    Will it be broken Saab parts? :D


  • Closed Accounts Posts: 9,607 ✭✭✭toastedpickles


    commited wrote: »
    Will it be broken Saab parts? :D

    You have your choice of broken 900 or broken 9-5 parts :pac: and a sticker that says SAAB = Something Always Almost Broken :pac:


  • Closed Accounts Posts: 9,607 ✭✭✭toastedpickles


    Small update today

    Removed the right brake disc/ caliper, the disc was fairly lipped so again, new ones are due

    whxt79.jpg

    Got the loom out too, everything labelled accordingly

    1255hk1.jpg

    After this i loosened the jubilee clips on the cv boots, one however had been cable tied, so that was cut off

    2hi2qo8.jpg

    Here's what's behind the boot the cv cup

    2q0odxi.jpg

    After this i called it a day, you're supposed to knock out the tow lower nuts on the balljoints so I'll get to that next time, as for yanking the hub out, well that's another story i'm sure we'l find out


  • Closed Accounts Posts: 9,607 ✭✭✭toastedpickles


    Another small update today

    Relabelled everything/ connections etc in pen
    Removed the battery tray and de rusted it, to remove the tray you remove the 3 nuts from under the car

    Stuck two coats of waxoyl on it

    Then onto the driveshafts, this is the last bit i need to get out and it has me stumped, in the guide I'm following it says;

    Undo the jubilee clips away from the cv boots - Done

    And pull the hub away from the car, this is where I've gotten stuck, I'm guessing theres more to it than that, by the looks of it I still need to disconect the steering and suspension mounts, but I don't want to go mad and end up doing something i didn't need to

    The steering

    6ihfcz.jpg

    And the suspension

    2rxir15.jpg

    I'm fairly sure these have to come off too, but if anyone else knows for certain i'd really appreciate it


  • Registered Users Posts: 105 ✭✭Saabturbonut


    nice bit of progress , your lucky the drive tunnels are solid all mine are gone as the story with most 900's


  • Closed Accounts Posts: 9,607 ✭✭✭toastedpickles


    nice bit of progress , your lucky the drive tunnels are solid all mine are gone as the story with most 900's

    Yeah i seen what can happen, scary looking stuff! :eek:


  • Closed Accounts Posts: 9,607 ✭✭✭toastedpickles


    Carrying on from today, I managed to get the right hand balljoint out, with a bit of persuasion and some help from mr hammer :pac:

    Lower balljoint nuts removed, to do this, get the nut to the edge of the screw, hit it with a hammer so the screw comes out, remove the nut and use a punch to get the nut out

    21m9pc7.jpg

    Then pull the hub out, this might take a bit of effort as it did with mine, but one the ball joint is near out, hit it with a hammer and out it comes, then pull it out a bit more

    The joint out

    10pauzk.jpg

    Then i repositioned the hub to be straight and pulled outwards, again referring to the guide, the cv boot/cv cup are should start moving and it has

    Before

    2rfymj9.jpg

    After

    2jbv8th.jpg

    As you can see the boot has moved a good bit so after this I'm stumped :confused:

    But with a bit of patience I'll get there :)


  • Closed Accounts Posts: 9,607 ✭✭✭toastedpickles


    So again a little update, and the last for the next while, on hollerdays next week :D

    Got the last connector out from the loom, so the loom is completely out of the way

    Rustproofed the battery tray, and done a little refurb on the gearknob piece, the acrylic bit the gear numbers on it was a bit scuffed, seems to have been black at some stage, does anyone know where I can get a glass or acrylic bit made like this?

    6r1oqr.jpg

    Then you have the housing for it which was a bit rusty on the edges

    24eyg4y.jpg

    Out with the dremel and sanded it all off, then i figured I'd use my old astra rattle can, it's a black with some "glitter" though it, so sprayed up the housing, looks black but shines well in the sun :)

    ycklw.jpg

    The next problem was that the inside of the gear knob had separated from the handle, so out with sump glue and sealed it all back together :pac:


    The next and last thing I've to disconnect before the engine gets lifted, is this

    nedhra.jpg

    That bracket is not budging from the pipe its attached to, the pipe is attached to the turbo and lower rad hose so I'm guessing it's safe to take off?

    Anyways, two or three steps away from my first ever engine removal, never thought I'd see this happen

    After this if i have the money, I'm going to get a bently manual, which is essentially the workshop manuals from saab themselves

    So in no order

    Bently manual
    Bilit hamber rust proofing (proper stuff)
    Le mans blue spray paint
    Cutting discs for the angle grinder
    New metal plates for the rotted parts
    A welder


  • Advertisement
Advertisement