Advertisement
If you have a new account but are having problems posting or verifying your account, please email us on hello@boards.ie for help. Thanks :)
Hello all! Please ensure that you are posting a new thread or question in the appropriate forum. The Feedback forum is overwhelmed with questions that are having to be moved elsewhere. If you need help to verify your account contact hello@boards.ie
Hi all! We have been experiencing an issue on site where threads have been missing the latest postings. The platform host Vanilla are working on this issue. A workaround that has been used by some is to navigate back from 1 to 10+ pages to re-sync the thread and this will then show the latest posts. Thanks, Mike.
Hi there,
There is an issue with role permissions that is being worked on at the moment.
If you are having trouble with access or permissions on regional forums please post here to get access: https://www.boards.ie/discussion/2058365403/you-do-not-have-permission-for-that#latest

Shed build - help

12346

Comments

  • Registered Users, Registered Users 2 Posts: 31,141 ✭✭✭✭Lumen


    whizbang wrote: »
    That routing is class..

    I would like to see the gravel edging built up level with the base of shed..

    Not really possible, there's over a foot difference in height between the high side and low side! Whatever I do, something is going to look wonky.

    It might look better once I've raised the soil to the top of the edging, grown some grass and painted the ground screws black.


  • Registered Users, Registered Users 2 Posts: 34,111 ✭✭✭✭listermint


    What, no porch deck! i expected a porch deck with handmade seat swing :D


  • Registered Users, Registered Users 2 Posts: 31,141 ✭✭✭✭Lumen


    listermint wrote: »
    What, no porch deck! i expected a porch deck with handmade seat swing :D

    :D

    Yeah, I'm currently torturing myself about whether to attempt a door opening on to the deck, cos otherwise I'll have to go out, down, and up another set of steps to use the deck. I really hate hinged things.

    I sought the advice of my local decorating shop about the steps, he suggested decking stain with embedded grit, but it's only available in very dark colours, and I'm not quite ready for black steps yet.

    So if it ever stops raining I'm going to see what I can do with Danish oil, a random orbital sander and some kind of buffing drill attachment (Halfords?).


  • Registered Users, Registered Users 2 Posts: 31,141 ✭✭✭✭Lumen


    Been quite busy late. Couple of posts incoming....

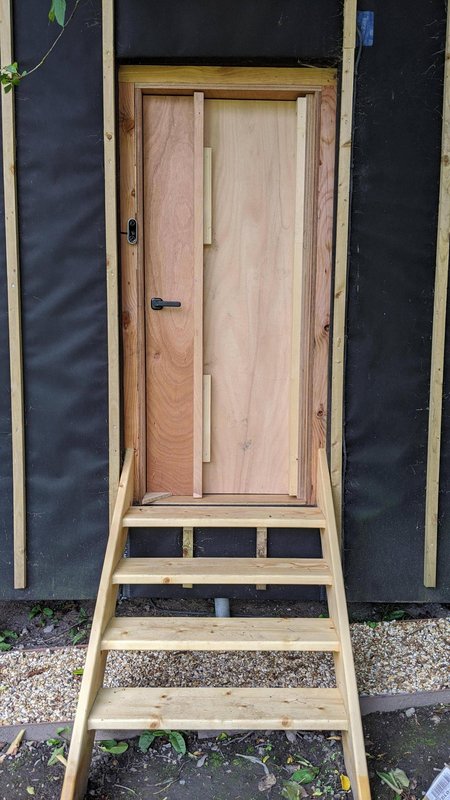
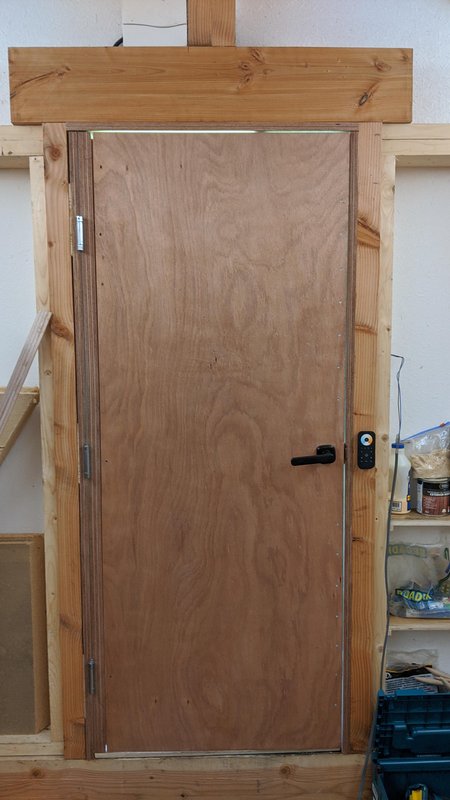
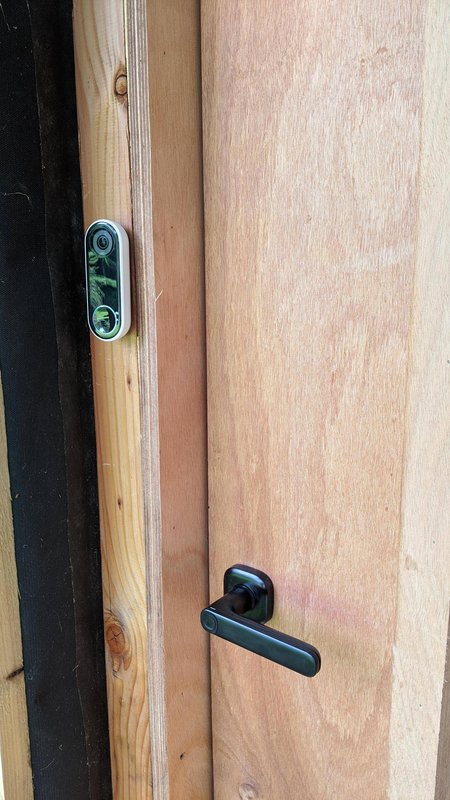
    First, the door. I previously made a frame from construction framing timber, which was a terrible idea, and hung a cheap B&Q door. It looked bad and didn't close properly.

    Whilst taking a break from Shed things I made a chicken coop, partly using plywood joined with glue and brad nails. It was a nice experience, so I decided to continue the experiment and make a door frame and door out of plywood.

    Now, plywood comes in various grades. The "WBP" and "Marine" grading actually applies to the glue layers, not the wood plies. Marine is the same as WBP except that it is guaranteed to be free of voids in the glue layers.

    The marine ply you can get from builders merchants is usually not proper boatbuilding quality, and that's mostly down to the wood used in the plies. Some of it is "hardwood faced", but as soon as you cut it you're through to the softwood plies and that can cause issues. For that reason it is often marked "not suitable for cutting" or some such.

    So I decided to go for Joubert Marine ply from paneldespot (http://www.paneldepot.ie/sheet_ply_marine.html), which is Okoume hardwood throughout, and I've laminated it myself with Titebond II, which is worse than the glue used in the plies themselves but ought to be OK.

    I haven't decided what to finish it with. I have some outdoor satin varnish, but for now I've put on a couple of coats of Danish oil.

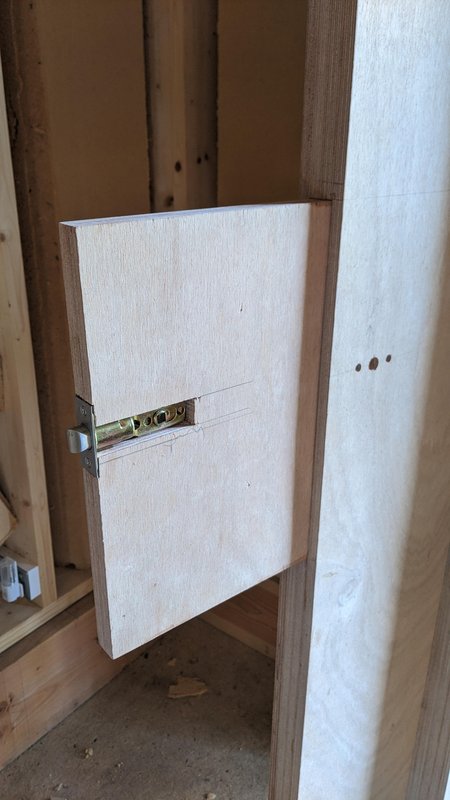
    Anyway, the plywood allows me to create interesting features, like the removable "locking module" which I can slide out if I want to change the arrangement of locking things.

    Making a door and frame with acceptable tolerances in a opening which is out of true in every conceivable way is hard. There are various wood shims which will eventually be covered by some combination of tape, filler, glue and cladding.

    I ended up with 2-3mm clearance on all sides, with consistency within 1mm on each given side. It's fine.

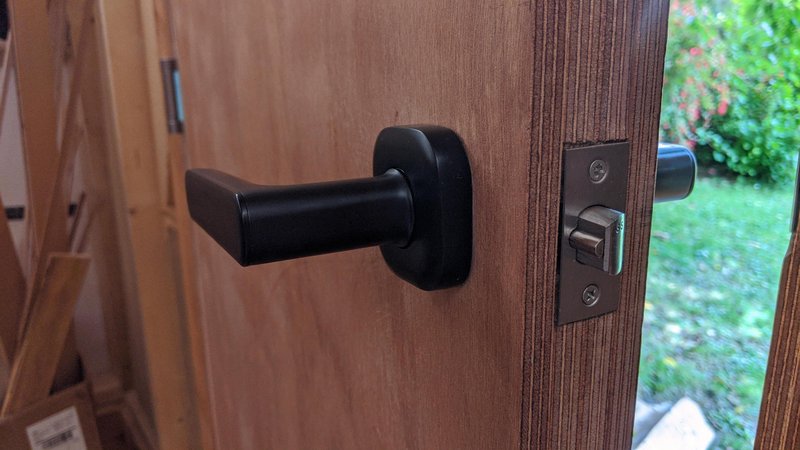
    The requirement for the locking mechanism was "convenient security". I want to be able to get in and out without keys, and know that if the door is closed then casual robbery is impossible.

    So in July 2019 I punted some money at an Indiegogo crowd funded smart lock called "Fido", which arrived in November 2019.

    It's controlled with a smartphone app called "YEEUU", and a company of that name seems to be trading sort-of through Facebook and indiegogo, but I don't know whether it's actually for sale at this point.

    There are fobs as backup, but the usual way is thumbprint recognition. Yay, the Chinese government has my thumb prints! But it works.

    Here's a video.


    The door obviously isn't finished yet, the proper stops still have to go on and I need to fill the void on the right with insulation and add the last sheet of ply, fill the tops and bottoms, and add draught stripping.

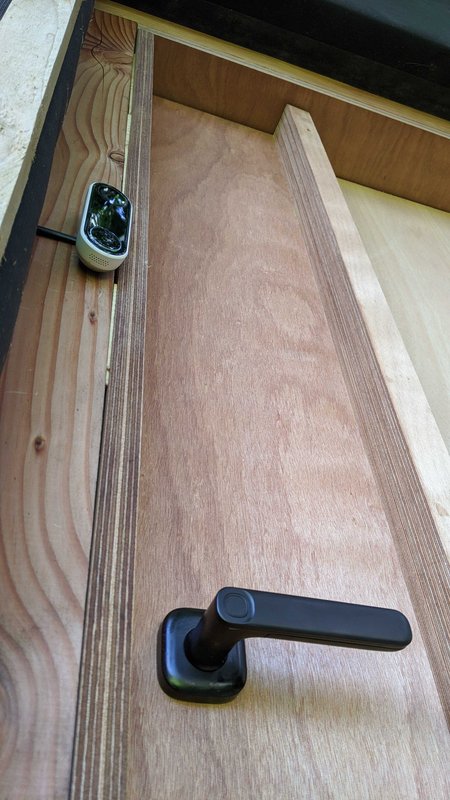
    The odd split/recessed design on the front serves several purposes: it shelters the electronic lock from drips, and it allows 100mm woodfibre insulation over about 2/3 of the door area whilst keeping the lock-side to about 50mm which means it doesn't catch against the frame when opening, and allows "normal" locks to be fitted.

    Oh, and I added a Nest doorbell which does remote two-way video/audio, face recognition, intruder detection and stuff. That's wired through a bell transformer.

    Full size pics on imgur https://imgur.com/a/stAnpqi

    VcgbRDu.jpgjbZzWJ0.jpgkTjhpLT.jpgOCyzBaH.jpgPjOkpYQ.jpgyDfk6pE.jpg


  • Registered Users, Registered Users 2 Posts: 31,141 ✭✭✭✭Lumen


    On to lighting.

    It would have been more sensible to focus on windows as a source of light, but after the pain of making a door I needed a bit of a break from things with hinges. Plus, my boards username justifies a bit of effort.

    I suffer a lot from lack of energy in the winter. I wouldn't necessarily call it full blown S.A.D., but I get nothing done except work and sleep when we're not on daylight savings time.

    Now that LEDs are so powerful, I wondered whether I could create daylight levels in the Shed, to delay the onset of whatever hormone crap has me sleepy at 7pm in winter.

    So, what are the most powerful LEDs on sale? I found some 24v "tunable white" strips which are rated at 19.2W/m power consumption and claim to put out 2760 lumens/m. (*)

    https://www.hiline-lighting.co.uk/gb/tunable-white-led-tape/562-tunable-white-led-strip-120-2in1-ip00-5060440713859.html

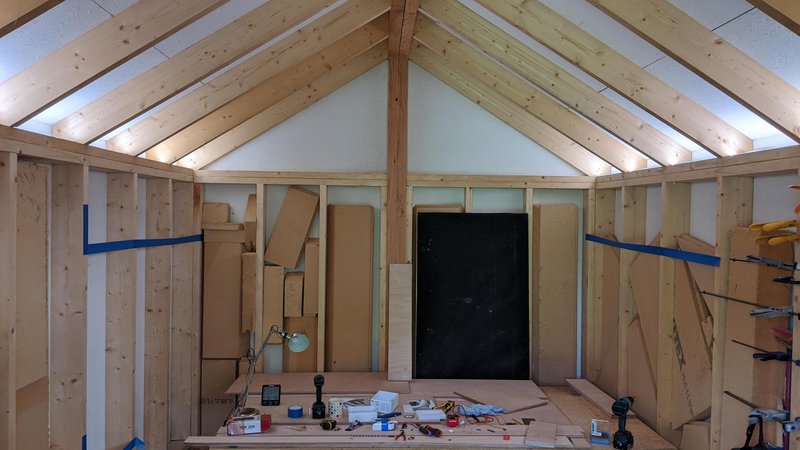
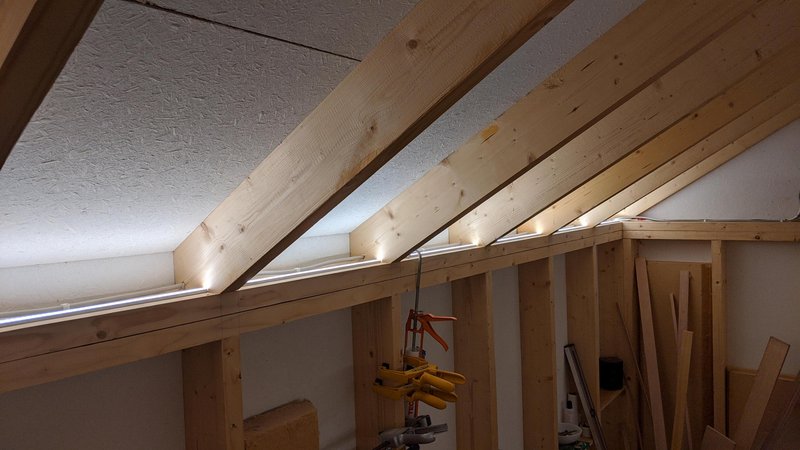
    If I ran these LED strips along the upper wall plate, I could get maybe 24,000 lumens of output, which is equivalent to about 1.5kW of incandescent lighting, and if I bounced the light off the ceiling it wouldn't look like an operating theatre. Right?

    I wired each strip differently. One strip runs continuously through 10mm holes in the rafters. That will probably cause overheating and premature LED burnout, so the second strip was cut into 500mm sections and soldered with triple-core connecting wire running through the same type of 10mm hole. I'll see which lives longer. The strips sit in alu profiles which do a nice job of diffusing the light when looking directly at the strips, which will be important when the mezzanine floor goes in.

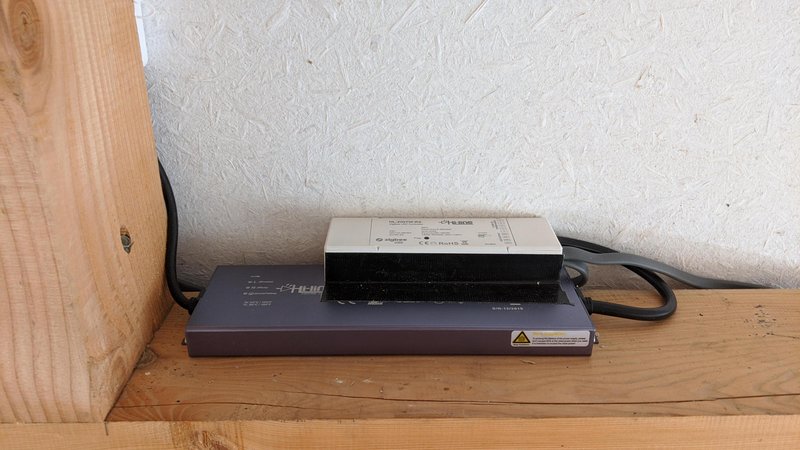
    The LEDs are powered by a 300W transformer and controlled by a wired Zigbee controller and a handy little remote with various colour temperature controls and stored presets.

    The effect is decently bright but not quite as daylighty as I was hoping. A free Android app tells me that I'm getting about 100lux with the door closed, and although I'm not sure it's accurate, it's about the same lux level as my one of the corridors in my house in summer daytime.

    I might add some more task lighting later on down the line. At that stage my winter heat requirements will probably be met by simply turning on the lights.

    (*) I've since discovered that there are LED strips twice as powerful as this, but I'm not changing them now.


    The following pics were taken with the door closed and as mentioned, there are no windows yet.

    Full size pics: https://imgur.com/a/IMWZFOS

    K6FVoyO.jpguFwQDs3.jpgD1t4kW7.jpg


  • Registered Users, Registered Users 2 Posts: 34,111 ✭✭✭✭listermint


  • Registered Users, Registered Users 2 Posts: 31,141 ✭✭✭✭Lumen


    listermint wrote: »

    I bought 12mm EDPM rubber strips (3mm and 6mm) and was planning to stick them to the 12mm door stops. That sorts out top and sides.

    So this is for the bottom? I have some kind of strip I bought from B&Q.

    https://www.diy.com/departments/diall-brown-self-adhesive-draught-seal-l-6m/1802901_BQ.prd

    Are those router bits for that sort of stripping?


  • Registered Users, Registered Users 2 Posts: 34,111 ✭✭✭✭listermint


    Lumen wrote: »
    I bought 12mm EDPM rubber strips (3mm and 6mm) and was planning to stick them to the 12mm door stops. That sorts out top and sides.

    So this is for the bottom? I have some kind of strip I bought from B&Q.

    https://www.diy.com/departments/diall-brown-self-adhesive-draught-seal-l-6m/1802901_BQ.prd

    Are those router bits for that sort of stripping?

    tbh, the effort you've gone into the door and the insulation, id just a rebate a weather strip for a nice flush finish inside the frame. Strips stuck to the front of door or frame will not look as well with the finish youve done on the door (expensive ply) and they wont be as good for sealing either.


  • Registered Users, Registered Users 2 Posts: 31,141 ✭✭✭✭Lumen


    listermint wrote: »
    tbh, the effort you've gone into the door and the insulation, id just a rebate a weather strip for a nice flush finish inside the frame. Strips stuck to the front of door or frame will not look as well with the finish youve done on the door (expensive ply) and they wont be as good for sealing either.

    Can you recommend a specific type of weatherstrip? I'm looking at pages of them and can't figure it out.


  • Registered Users, Registered Users 2 Posts: 34,111 ✭✭✭✭listermint


    Lumen wrote: »
    Can you recommend a specific type of weatherstrip? I'm looking at pages of them and can't figure it out.

    On that im at an array wall of ones the same as you. Seen many variants used on builds on youtube and the likes, push strips, double strips, single strips.

    I think if i recall the restoration couple he used a nice clean one on his Oak door that he built himself, looked really professional and clean.


  • Advertisement
  • Registered Users, Registered Users 2 Posts: 31,141 ✭✭✭✭Lumen


    Maybe this?

    https://ie.rs-online.com/web/p/door-seals/1752561/

    image.png

    ...and then rout an 8mm slot, maybe 2mm deep?


  • Registered Users, Registered Users 2 Posts: 31,141 ✭✭✭✭Lumen


    listermint wrote: »
    On that im at an array wall of ones the same as you. Seen many variants used on builds on youtube and the likes, push strips, double strips, single strips.

    I think if i recall the restoration couple he used a nice clean one on his Oak door that he built himself, looked really professional and clean.

    Ah, at about 5:50

    edit: no, this attempt looks like a failure, must be another vid


  • Registered Users, Registered Users 2 Posts: 31,141 ✭✭✭✭Lumen


    OK, so they push into what look like square-edged slots in the door stops.

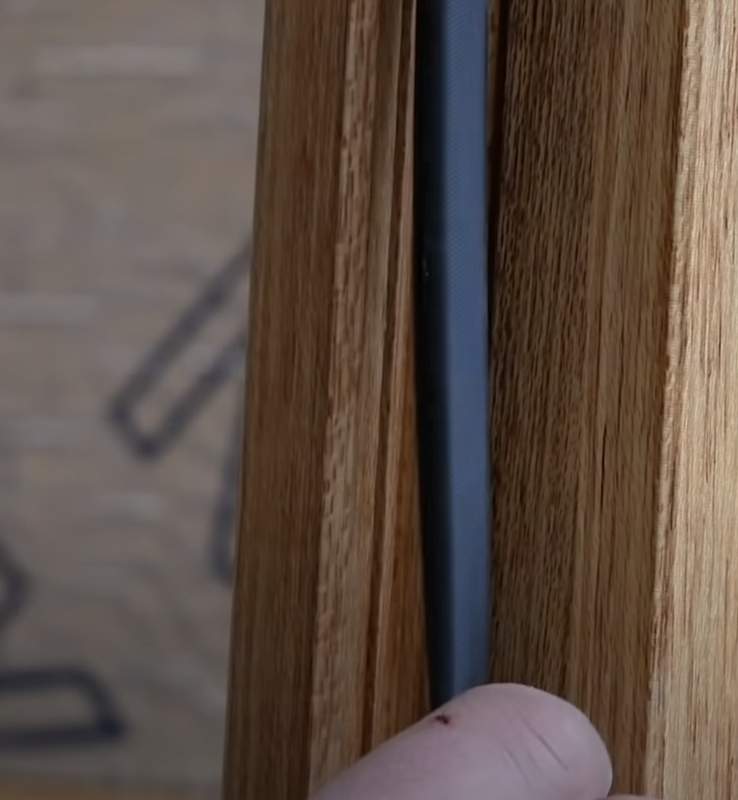
    Only the bottom one didn't work, but having an exposed seal on the threshold is madness when you can just recess it into the bottom of the door.

    Screenshot-from-2020-07-28-16-12-30.png


  • Registered Users, Registered Users 2 Posts: 31,141 ✭✭✭✭Lumen


    So I finished the door this weekend and tidied up some electrics, in between pulling ceilings down in my house. Too dark for pics when I finished today. WINTER IS COMING.

    It turns out that the expensive and beautiful D-section EDPM rubber "brush strips" are unsuitable for use on door stops because they're so elastic that the door bounces off them unless you slam it.

    So I ended up using the cheaper EDPM foam strips. LOL.

    Still have the threshold and top stop to make.

    It all works beautifully, like some kind of plywood fortress, but this is the first and last door I'm ever making. :pac:


  • Registered Users, Registered Users 2 Posts: 31,141 ✭✭✭✭Lumen


    I haven't given up. :D

    15989848181921168839772465526655.jpg


  • Registered Users, Registered Users 2 Posts: 31,141 ✭✭✭✭Lumen


    It's a big week in Shed world and I thought I'd write a post to get my head straight.

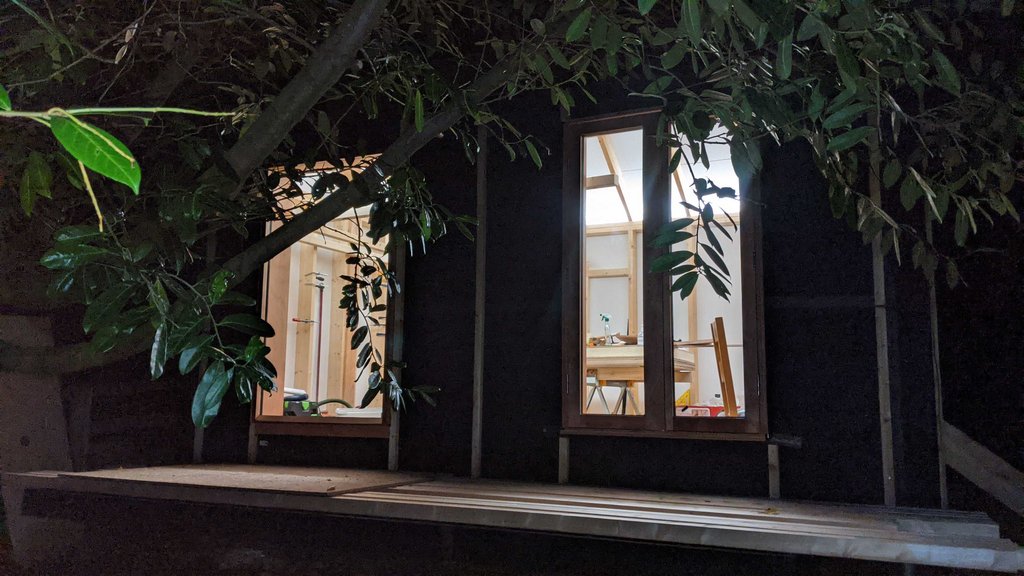
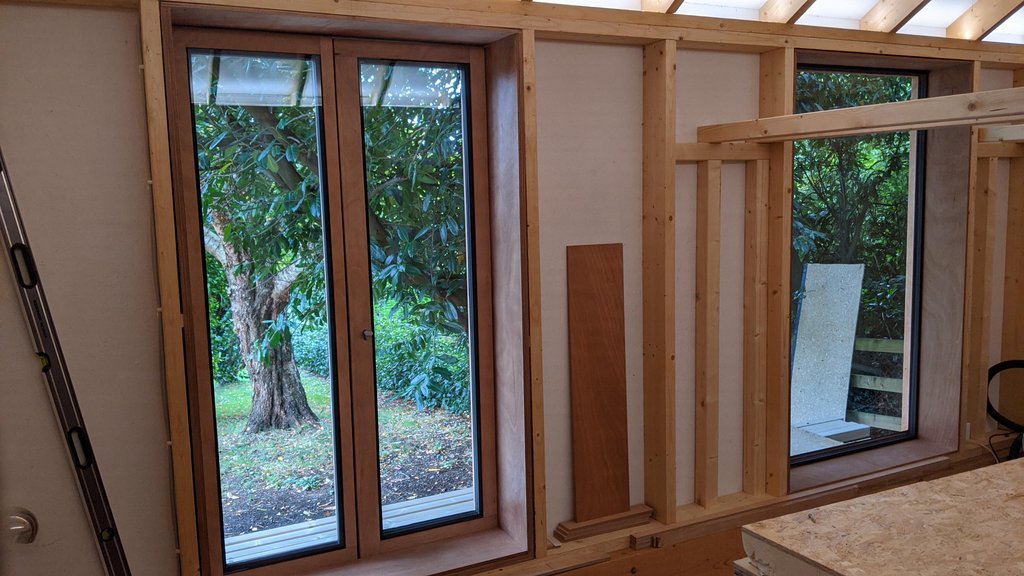
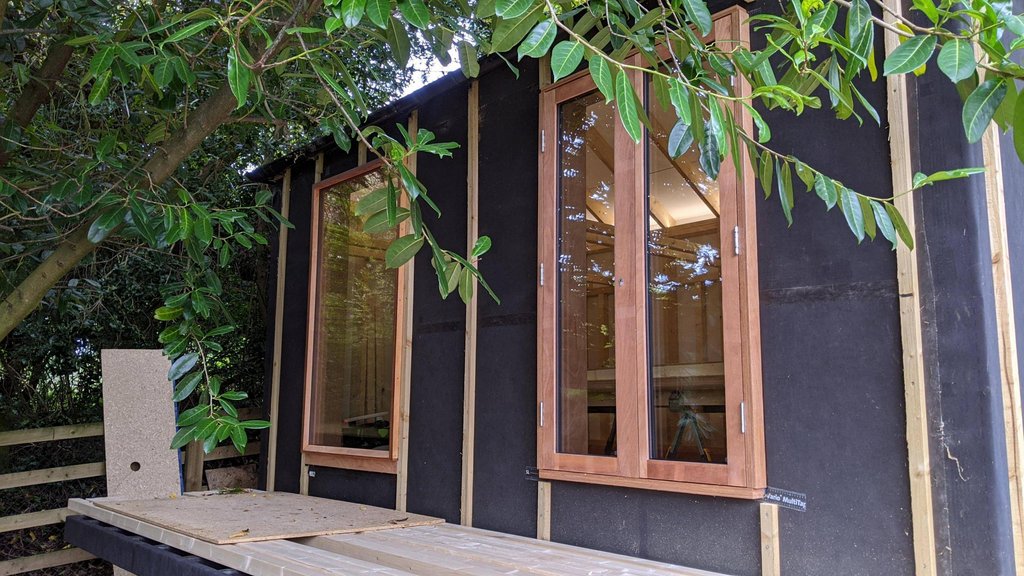
    The triple glazed IGUs (insulated glass units) for the French doors and picture window are being manufactured as I type this, and I've materials arriving to make a floating mezzanine floor.

    Figuring out how to make windows has been one of the more demanding aspects of this project.

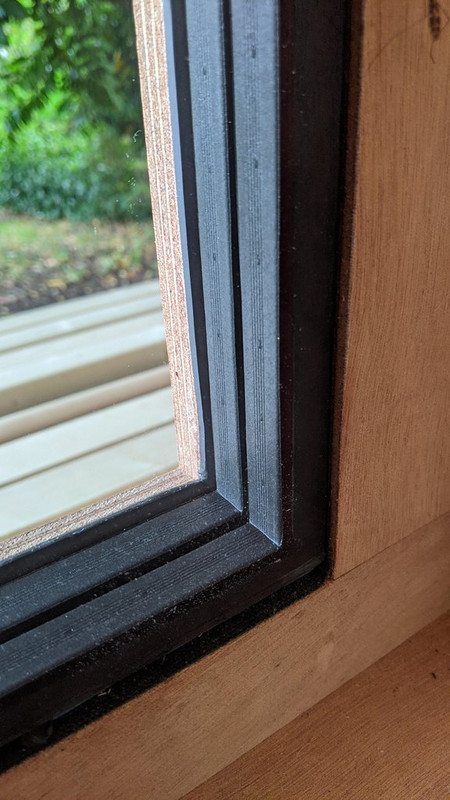
    Putty is a thing of the past except for heritage projects, there are various "glazing systems" used now, which use different permutations of hybrid sealants and adhesive glazing tape.

    I am going for something close to the Hodgson "D3 Drained Security Glazing System", which uses adhesive tapes under compression to provide a watertight (and hopefully airtight) seal, and sealant only for the frame joints.

    image.png

    It's critical to ensure that water doesn't collect around the base of the IGU even if the seals fail, as that will cause the unit to fail, so I'll be drilling holes through the bottom of the frames, draining to the outside behind the cladding. This is made possible because I made the frames such that the glass is located "outboard" of the walls, with the battened cladding ultimately coming out flush with the frames.

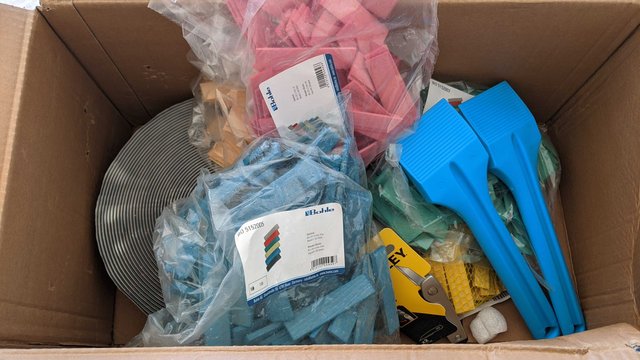
    The glass will be located and supported by hardwood blocks which come in various thicknesses. I have them all, they're cheap and should be handy for general shimming jobs.

    image.png

    I think professionally made windows use glazing pins to locate the glass, but I'm not planning on using those. This may prove a mistake.

    I have a set of of vacuum lifters from Screwfix plus some super tough glazing shovels to help manouvre the IGUs, which are absurdly heavy. Both the French doors and picture window have a a 6/14/6/14/6 specification (6mm glass panes with 14mm warm edge spacers), so 18mm of glass in total, and the picture window unit should weigh close to 100kg.

    The tape is interesting. It's quite high density and to achieve a watertight seal it requires 20% compression, which requires 1.1kg of force per cm2 of tape, which works out at about almost 800kg of force. Yeah, so that seems like a bit of a challenge.

    But interestingly, triple glazing is relatively cheap. I'm getting about 3.5sqm and it's only costing about 700 quid.

    PXL-20201012-103651481.jpg

    As for the mezzanine floor, that's going to be made of 3x3 PAO sandwiched between 9mm birch ply with plenty of blocking to spread the load. I have no idea whether it will be stiff enough, but I'm planning to incorporate a floating structural ladder anchored to the ridge beam to help out.

    It should all be over by the end of the month, bar the cladding. Hopefully I will still have all my fingers.

    I am deep down the rabbit hole here. If anyone has any tips, I'm all ears. :D


  • Registered Users, Registered Users 2 Posts: 31,141 ✭✭✭✭Lumen


    Triple glazing is in.

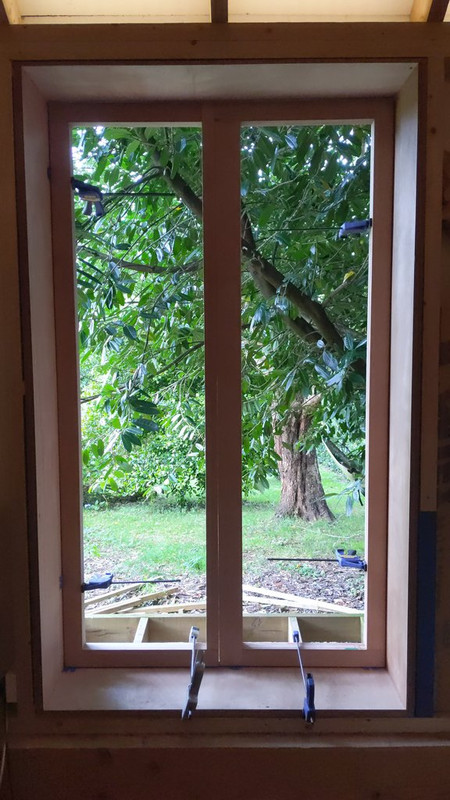
    The French doors were easy enough. The picture window was a two person job so I called in a favour before the household visit lockdown came in at midnight. :)

    As expected, generating sufficient compression for the glazing tape on the big pane was tricky, required the use of reversed clamps and large bits of wood spanning the inside of the shed, applying maybe 100kg of pressure to each of about ten areas on the perimeter in turn. Once it stuck though, it stuck.

    I'm not sure I like the glazing tape that much. It's certainly clean, but I can't help thinking that the skilled application of some black Tek 7 might have achieved the same or better results. Or an incredible mess.

    I still have to add the inside stops and seals, but it's now a balmy 20C in there with a small convection heater on lowest setting. It'll take some time to warm up the structure (a couple of tonnes of wood inside the external insulation) and then I'll gather some data from the Govee monitors to work out how well it's performing.

    One useful thing for anyone doing this for the first time like me: account for the fact that the rubber sealant on the glazed units protrudes unevenly from the edges of the glass for 1-2mm. This means that whereas I'd planned on using 5mm (bottom) and 3mm (top and side) setting blocks I ended up with 5mm and 1mm or nothing. It's fine, it works, but it was bloody close.

    Anyway, I'm delighted with the results. Probably cost me about €1200 all in for the plywood, glazing, tape and tooling. Dunno what that would cost new, but it would be more.

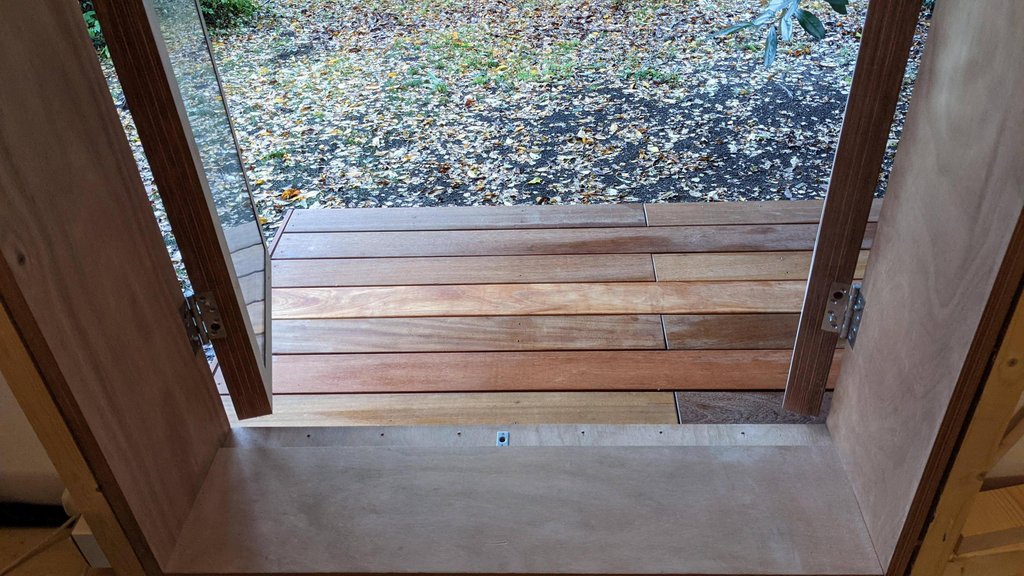
    Nearly there...

    3CV42O9.jpg

    pPKY7d0.jpg

    ZnWX3RR.jpg

    wG8Xmdu.jpg

    More and bigger pics here: https://imgur.com/a/TOeLJFx


  • Registered Users, Registered Users 2 Posts: 34,111 ✭✭✭✭listermint


    how are you finishing the external plywood edges. I notice exposed ply edging outside in your bottom image shot.


  • Registered Users, Registered Users 2 Posts: 31,141 ✭✭✭✭Lumen


    listermint wrote: »
    how are you finishing the external plywood edges. I notice exposed ply edging outside in your bottom image shot.

    The edges are sealed with a couple of coats of yacht varnish. I tried it also on the flat sections but didn't like the satin finish so I took it off and switched to danish oil for those. I'll do some experiments with Textrol soon.

    The windows are fairly well sheltered anyway, with tree shelter blocking wind and the gutter blocking rain from above.

    Time will tell whether it will hold up.


  • Advertisement
  • Registered Users, Registered Users 2 Posts: 2,593 ✭✭✭karlitob


    Lumen wrote: »
    The edges are sealed with a couple of coats of yacht varnish. I tried it also on the flat sections but didn't like the satin finish so I took it off and switched to danish oil for those. I'll do some experiments with Textrol soon.

    The windows are fairly well sheltered anyway, with tree shelter blocking wind and the gutter blocking rain from above.

    Time will tell whether it will hold up.

    I used textrol on an outdoor workbench recently with a wide brush. I have to say - I found it very hard to work with. It needs to go on wet on wet and you apply as many coats as it can absorb. I put two coats on but it started to dry fairly quickly so I was only a quarter way through the job before it dried It looks quite streaky now (it’s in grey). It’s fine - it needs another coat Or two and I’m sure it’ll look better. Just thought I’d give my experience. And I’m fairly handy at the painting - quite enjoy it.

    Have you used it before.


  • Registered Users, Registered Users 2 Posts: 34,111 ✭✭✭✭listermint


    Lumen wrote: »
    The edges are sealed with a couple of coats of yacht varnish. I tried it also on the flat sections but didn't like the satin finish so I took it off and switched to danish oil for those. I'll do some experiments with Textrol soon.

    The windows are fairly well sheltered anyway, with tree shelter blocking wind and the gutter blocking rain from above.

    Time will tell whether it will hold up.

    You mentioned tape is that the tape on the external section ? Just considering it may not have the run off you want. That silicone would give. In terms of shape and angle.

    You don't want any water sitting there for any time.


  • Registered Users, Registered Users 2 Posts: 31,141 ✭✭✭✭Lumen


    listermint wrote: »
    You mentioned tape is that the tape on the external section ? Just considering it may not have the run off you want. That silicone would give. In terms of shape and angle.

    You don't want any water sitting there for any time.

    The correct procedure is to position the tape so that it comes out past the upstand, and then cut it back with a sharp blade. On the bottom upstand the cut should be angled upwards to create a run off.

    I tried!

    The tape isn't like EDPM foam tape, it's more like a gum or playdoh consistency, so is a bit malleable. I can see through the glazing to check for leaks and then sort it out if necessary. The joy of DIY is that there's nothing done that can't be re-done. If the worst comes to the worst the drainage/ventilation holes in the bottom of the frame will weep out any seepage.


  • Registered Users, Registered Users 2 Posts: 31,141 ✭✭✭✭Lumen


    karlitob wrote: »
    I used textrol on an outdoor workbench recently with a wide brush. I have to say - I found it very hard to work with. It needs to go on wet on wet and you apply as many coats as it can absorb. I put two coats on but it started to dry fairly quickly so I was only a quarter way through the job before it dried It looks quite streaky now (it’s in grey). It’s fine - it needs another coat Or two and I’m sure it’ll look better. Just thought I’d give my experience. And I’m fairly handy at the painting - quite enjoy it.

    What kind of timber did you use? New pressure-treated softwood? Rough or planed? As I understand it, Textrol should not require "as many coats as it can absorb", it should require exactly two, according to the directions. Mill glaze from planing and pressure treatment will both stop it penetrating.

    Last night I read the data sheets and third party advice on Textrol application. It is not supposed to be used on freshly milled or pre-treated timber, otherwise it won't penetrate.

    The Balau decking arrived yesterday and the procedure I'll use for that is:

    - Prepdeck to remove mill glaze (strip)
    - Net-trol to stop the effect of the stripper (neutralize)
    - Dry for 48 hours (dry)
    - Deks Olje D1 (but could be Textrol) (treat)

    This is the recommended approach, see here for example:

    https://www.owatrolusa.com/how-to-guides/remove-mill-glaze/

    ...and the PDF attached which I found from a Balau decking supplier.

    Lots of washing used in the first couple of steps so I'll do that outdoors and then treat the decking lengths in the shed where it's dry.

    The same strip/neutralize/dry/treat approach is recommended also for Textrol, on new wood and previously treated wood (unless the treatment is a re-application of the same thing).

    The alternative is to let the wood weather for at least 6 months, which has the same effect as the stripping and so replaces the first two steps.

    If this all goes to plan with the decking I'll might try it out on the non-varnished parts of the window frames.

    FWIW I decided to use Deks Olje D1 rather than Textrol on the decking because...the boaty people use it, and I like oil on wood. But they do the same job.

    I am inexperienced so trying to learn from wherever I can. Hopefully I have this right, please correct if not!


  • Registered Users, Registered Users 2 Posts: 2,593 ✭✭✭karlitob


    Lumen wrote: »
    What kind of timber did you use? New pressure-treated softwood? Rough or planed? As I understand it, Textrol should not require "as many coats as it can absorb", it should require exactly two, according to the directions. Mill glaze from planing and pressure treatment will both stop it penetrating.

    Last night I read the data sheets and third party advice on Textrol application. It is not supposed to be used on freshly milled or pre-treated timber, otherwise it won't penetrate.

    The Balau decking arrived yesterday and the procedure I'll use for that is:

    - Prepdeck to remove mill glaze (strip)
    - Net-trol to stop the effect of the stripper (neutralize)
    - Dry for 48 hours (dry)
    - Deks Olje D1 (but could be Textrol) (treat)

    This is the recommended approach, see here for example:

    https://www.owatrolusa.com/how-to-guides/remove-mill-glaze/

    ...and the PDF attached which I found from a Balau decking supplier.

    Lots of washing used in the first couple of steps so I'll do that outdoors and then treat the decking lengths in the shed where it's dry.

    The same strip/neutralize/dry/treat approach is recommended also for Textrol, on new wood and previously treated wood (unless the treatment is a re-application of the same thing).

    The alternative is to let the wood weather for at least 6 months, which has the same effect as the stripping and so replaces the first two steps.

    If this all goes to plan with the decking I'll might try it out on the non-varnished parts of the window frames.

    FWIW I decided to use Deks Olje D1 rather than Textrol on the decking because...the boaty people use it, and I like oil on wood. But they do the same job.

    I am inexperienced so trying to learn from wherever I can. Hopefully I have this right, please correct if not!

    Well you’re asking the wrong man for an expert opinion - an optimistic enthusiast would be about my limit.


    It’s was made of old and well seasoned wood by a carpenter neighbour. Freshly sanded etx.

    You’re correct on the two coats - and I copied that approach. But I *though* the YouTube clip on textrol suggested that you could keep going til absorbed.

    My workbench is staying outdoors so I wanted to give it a lash of something good, as well as seeing how it would look/hold up for other planned work.

    I think the fact I had to brush hard to reach areas made it hard to use. Roller onto to flat surfaces like cladding or decking would be easier.

    Like you - I think I might stick to natural colour oil like the Deks.

    Looks like you’ve done your research. Best of luck with it. Photos when your finished would be great.


  • Registered Users, Registered Users 2 Posts: 14,210 ✭✭✭✭Goldengirl


    Lumen wrote: »
    What kind of timber did you use? New pressure-treated softwood? Rough or planed? As I understand it, Textrol should not require "as many coats as it can absorb", it should require exactly two, according to the directions. Mill glaze from planing and pressure treatment will both stop it penetrating.

    Last night I read the data sheets and third party advice on Textrol application. It is not supposed to be used on freshly milled or pre-treated timber, otherwise it won't penetrate.

    The Balau decking arrived yesterday and the procedure I'll use for that is:

    - Prepdeck to remove mill glaze (strip)
    - Net-trol to stop the effect of the stripper (neutralize)
    - Dry for 48 hours (dry)
    - Deks Olje D1 (but could be Textrol) (treat)

    This is the recommended approach, see here for example:

    https://www.owatrolusa.com/how-to-guides/remove-mill-glaze/

    ...and the PDF attached which I found from a Balau decking supplier.

    Lots of washing used in the first couple of steps so I'll do that outdoors and then treat the decking lengths in the shed where it's dry.

    The same strip/neutralize/dry/treat approach is recommended also for Textrol, on new wood and previously treated wood (unless the treatment is a re-application of the same thing).

    The alternative is to let the wood weather for at least 6 months, which has the same effect as the stripping and so replaces the first two steps.

    If this all goes to plan with the decking I'll might try it out on the non-varnished parts of the window frames.

    FWIW I decided to use Deks Olje D1 rather than Textrol on the decking because...the boaty people use it, and I like oil on wood. But they do the same job.

    I am inexperienced so trying to learn from wherever I can. Hopefully I have this right, please correct if not!

    Hi Lumen .
    Lovely job you are doing here , have been following with interest although am no good at the hardwork but like picking up tips, lol.
    I have used both Netrol and Textrol on a deck .
    Left the deck which was pressure treated for a while before cleaning with Netrol. Came up a treat . Picked a dry week forecast wise in Summer .Used the Textrol a few days later , 2 coats , it just disappeared into the wood and I thought it wasn't enough .
    But it was .
    Apart from a top up a few years later the deck was perfect for 10 years .
    When it started to get dry and grey I redid it ..but ...
    I made the mistake after that of changing to deck oil, Cuprinol , which sat on top like thick butter and the wood didn't absorb it .
    It went black in parts and rotted after that . Got rid this year and paved instead .
    I don't know if this would have happened anyway ie. it's time was up , or I did something wrong , or the wood with the Textrol just wasn't absorbing the oil .
    Anyway , my tuppence worth is if going with Textrol, stick with Textrol, or if oil used continue oiling .
    You probably know this already .
    Reason I didn't continue with the Textrol is I have asthma and found it a bit overwhelming when I did it even though outdoors .
    The oil is less pungent .
    Best of luck with your lovely " shed" !


  • Advertisement
  • Registered Users, Registered Users 2 Posts: 31,141 ✭✭✭✭Lumen


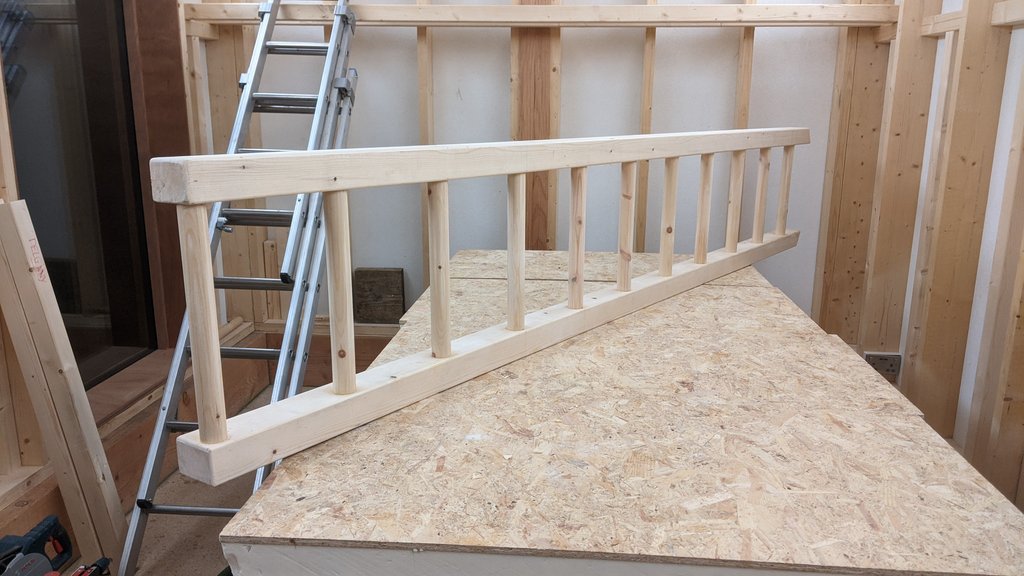
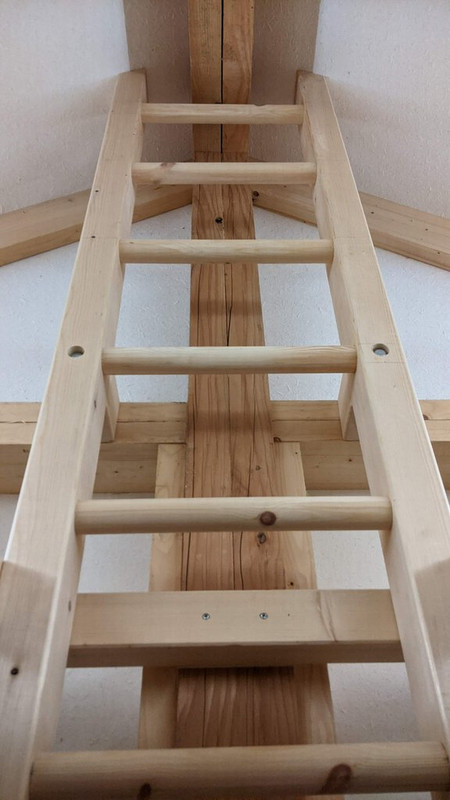
    The 38mm dowels I ordered turned out to be 44mm.

    Still, there's no such thing as too strong a ladder right?

    I couldn't be bothered to route out 22 perfect circles so I just used two 140mm Spax screws and glue for each 380mm rung.

    Uprights are 4x3 PAO with 6mm roundover.

    PXL-20201020-202639859.jpg


  • Registered Users, Registered Users 2 Posts: 31,141 ✭✭✭✭Lumen


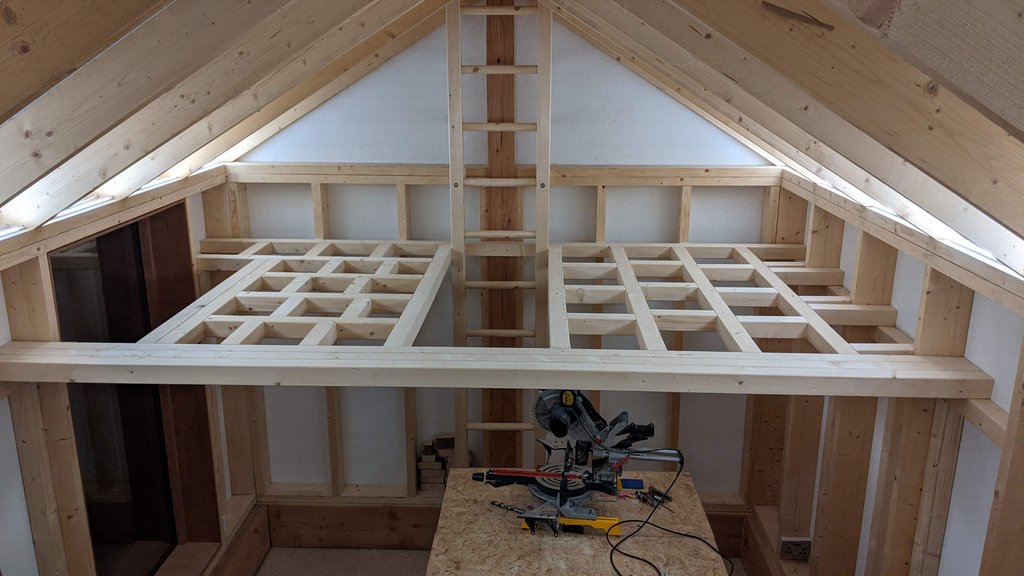
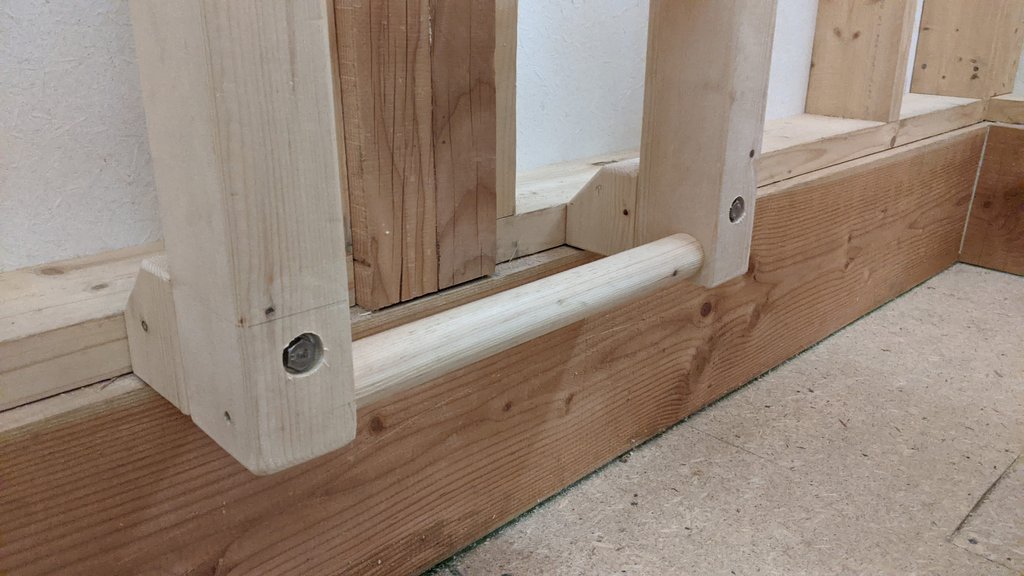
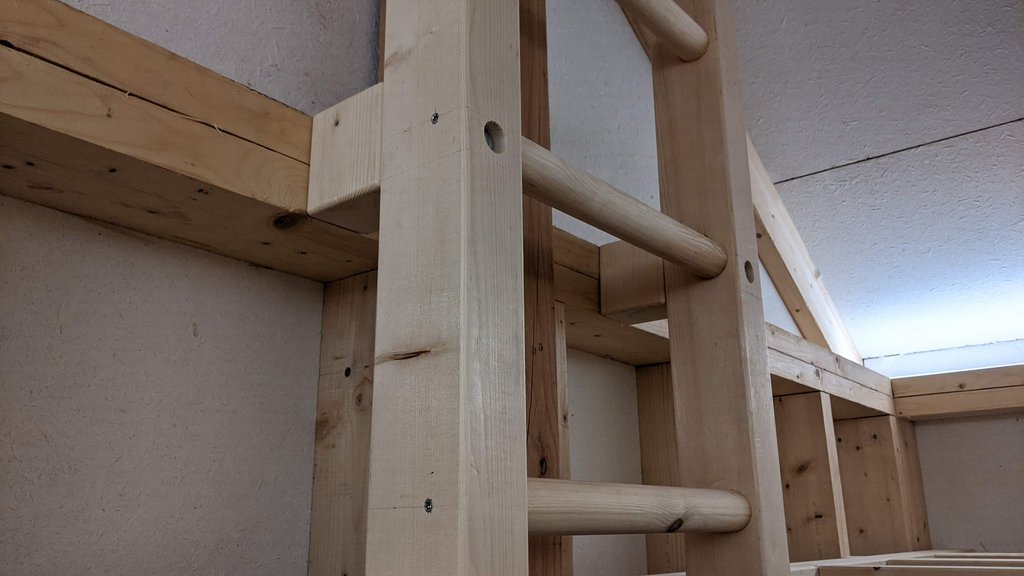
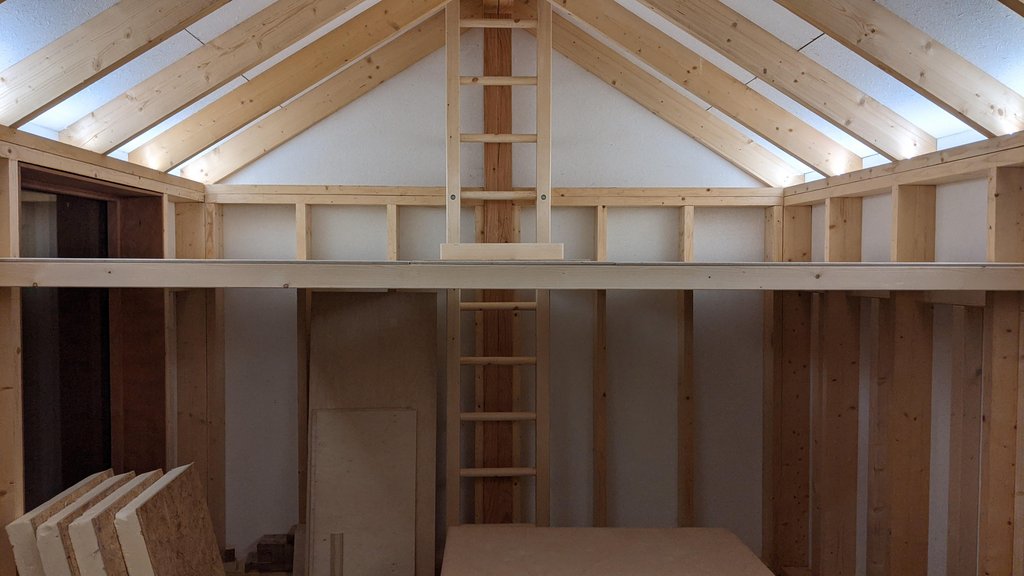
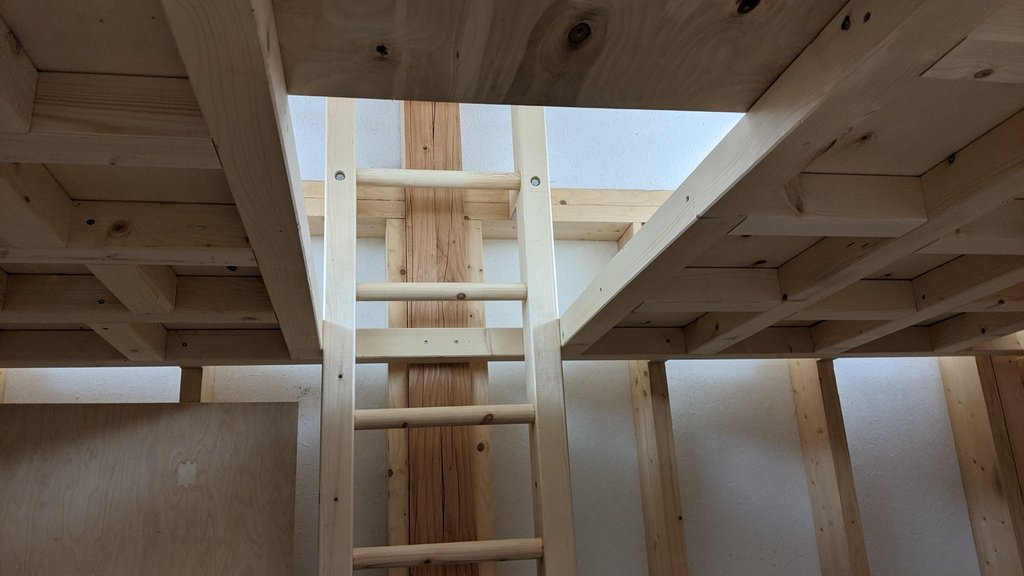
    Put up the ladder and framed the mezzanine floor.

    Most of it is held together with 140mm Spax screws, apart from the ladder which is bolted to the wall with stainless lag screws, and the outer triple beam bit which is glued for stiffness and to avoid visible screws.

    The floor frame is reasonably stiff although obviously gets springier to towards the centre of the unsupported leading edge, hopefully the birch ply will help a bit more. If necessary I can add a wire rope to the beam.

    None of it touches the floor - all the load is transferred to the ring beam. This is important as the lower floor joists are only 150mm - it's all been about conserving internal headroom.

    To get the long screws into the close framing I used one of these:

    9929V_P&$prodImageMedium$

    Anyway, all straightforward enough.

    Onwards and upwards, literally.

    PXL-20201025-201038164.jpg

    PXL-20201025-201829981.jpg

    PXL-20201025-201845713.jpg

    PXL-20201025-201941459.jpg


  • Registered Users, Registered Users 2 Posts: 34,111 ✭✭✭✭listermint


    Lovely level of work. Are you playing the top and underneath surface? If yes I'd imagine that would add a huge amount of ridigity to it. Just top side alone might not.

    Very nice detail. Like the central ladder idea.


  • Registered Users, Registered Users 2 Posts: 31,141 ✭✭✭✭Lumen


    It's a straight play off between aesthetics and engineering.

    I'm really loathed to lose the view of the framing from below.


  • Registered Users, Registered Users 2 Posts: 34,111 ✭✭✭✭listermint


    Lumen wrote: »
    It's a straight play off between aesthetics and engineering.

    I'm really loathed to lose the view of the framing from below.

    I kinda knew you'd say that. I'd be the same.


  • Advertisement
  • Registered Users, Registered Users 2 Posts: 31,141 ✭✭✭✭Lumen


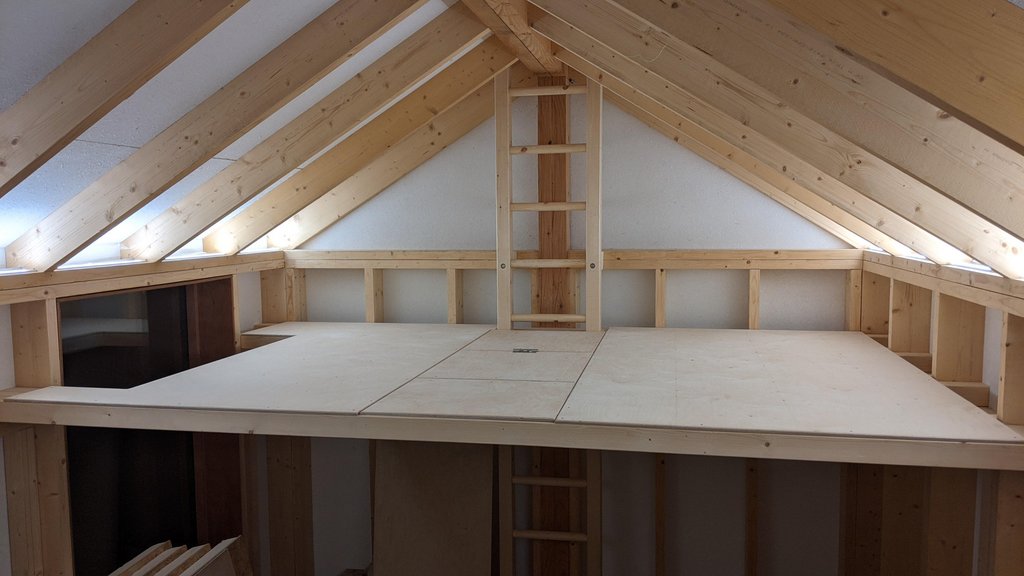
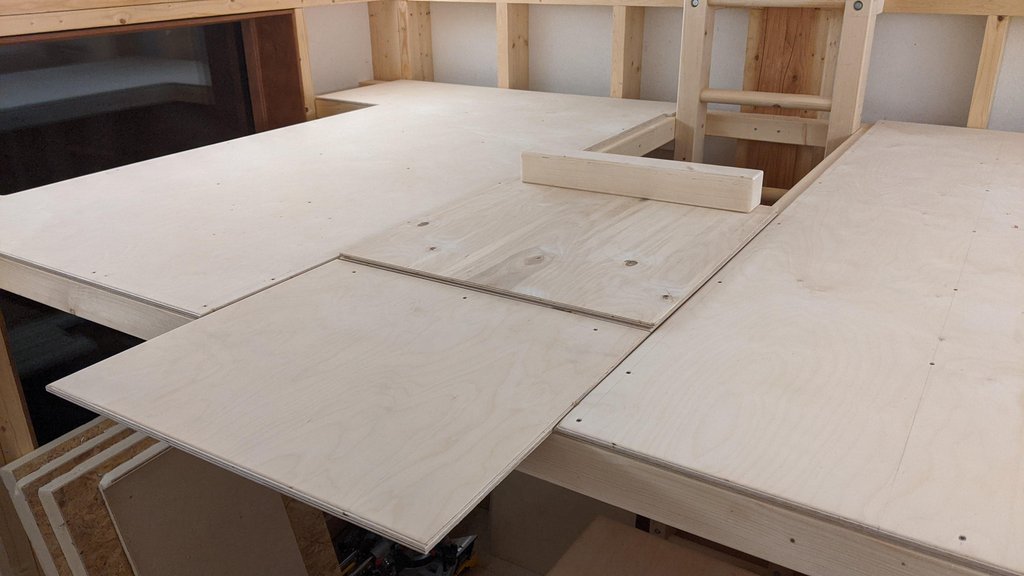
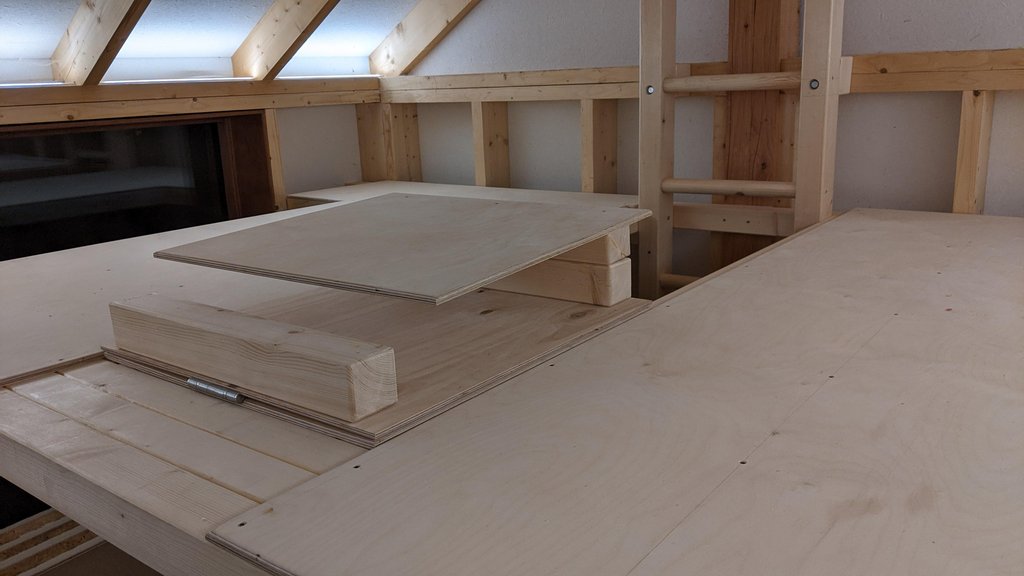
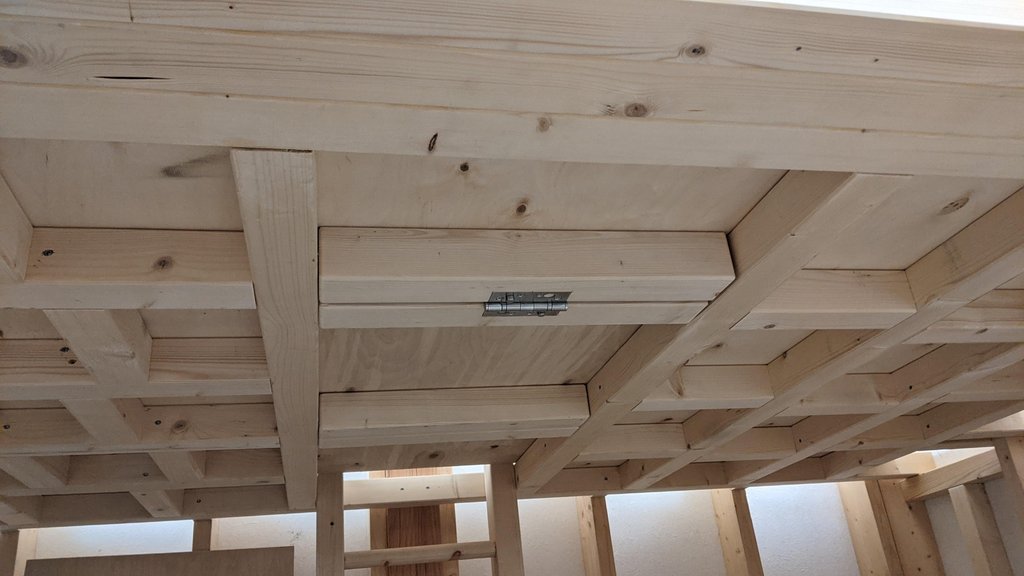
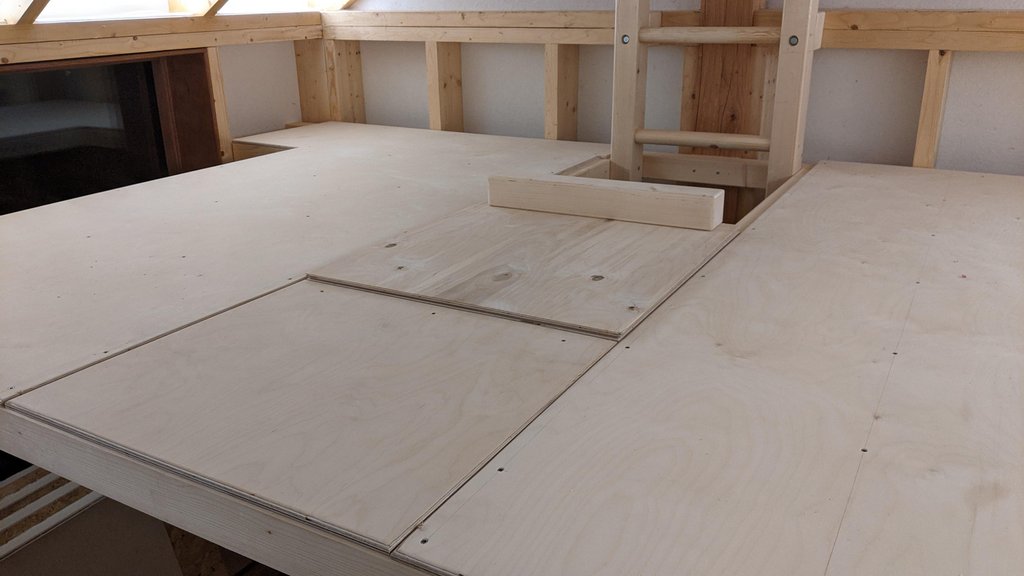
    Right, so the ply didn't help the deflection, 6mm with me sitting on the unsupported leading edge, with or without ply, which amounts to 1/500 deflection. 1/300 is generally considered OK, so it'll do for the intended purpose and I won't bother doing the underneath, might add some more recessed lighting instead.

    I made a sliding, double hinged access hatch. It offers various permutations of finger-trapping goodness.

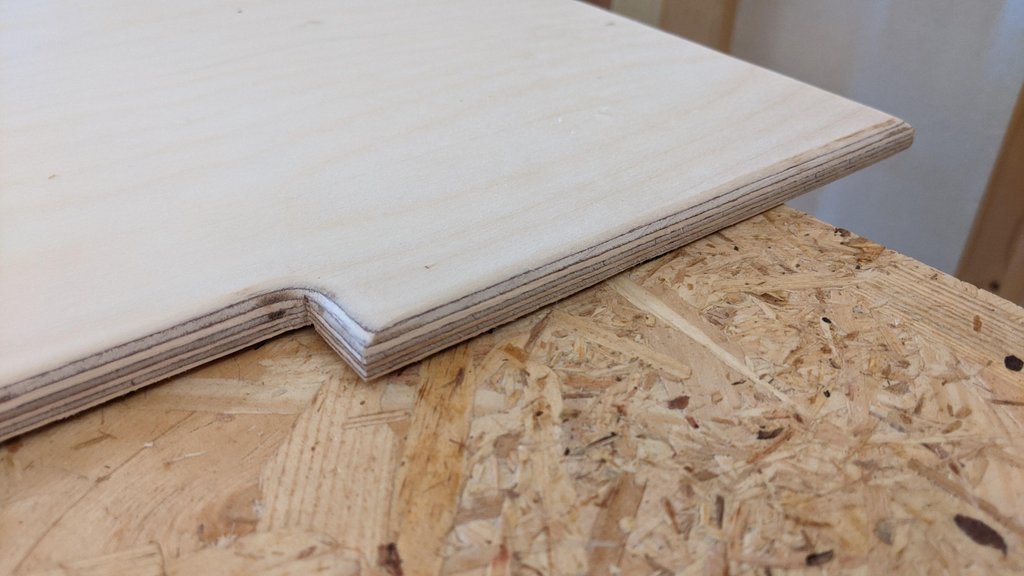
    Birch ply is not the prettiest but it's super strong and looks OK with a roundover applied to the edges with a trimmer router. Anyone got ideas of what to treat it with? I have some Owatrol D1 oil which I might slap on to stop it picking up dirt.

    Decking and flooring next. I'll do the full 3-stage Owatrol treatment on the Bangkirai decking and then decide whether to use it inside too. I definitely don't want proper engineered flooring as it'll look too housey, but I reckon plywood is too fragile for foot traffic.

    https://imgur.com/a/x1xVgns

    1A0n9Lw.jpg

    FBGEXYM.jpg

    04TGPk8.jpg

    iddVevV.jpg

    mftk6Y9.jpg

    unWI72O.jpg

    VsTSwaO.jpg

    fcoqprJ.jpg


  • Registered Users, Registered Users 2 Posts: 9,454 ✭✭✭mloc123


    Lumen wrote: »

    Birch ply is not the prettiest

    How dare you...


  • Registered Users, Registered Users 2 Posts: 7,372 ✭✭✭bladespin


    This has become a work of art, much more than just a 'shed thread' lol. Loving it.

    MasteryDarts Ireland - Master your game!


  • Registered Users, Registered Users 2 Posts: 31,141 ✭✭✭✭Lumen


    bladespin wrote: »
    This has become a work of art, much more than just a 'shed thread' lol. Loving it.

    I think I'm slightly scared of finishing it before there's a vaccine. :D


  • Registered Users, Registered Users 2 Posts: 31,141 ✭✭✭✭Lumen


    Posh decking prep!

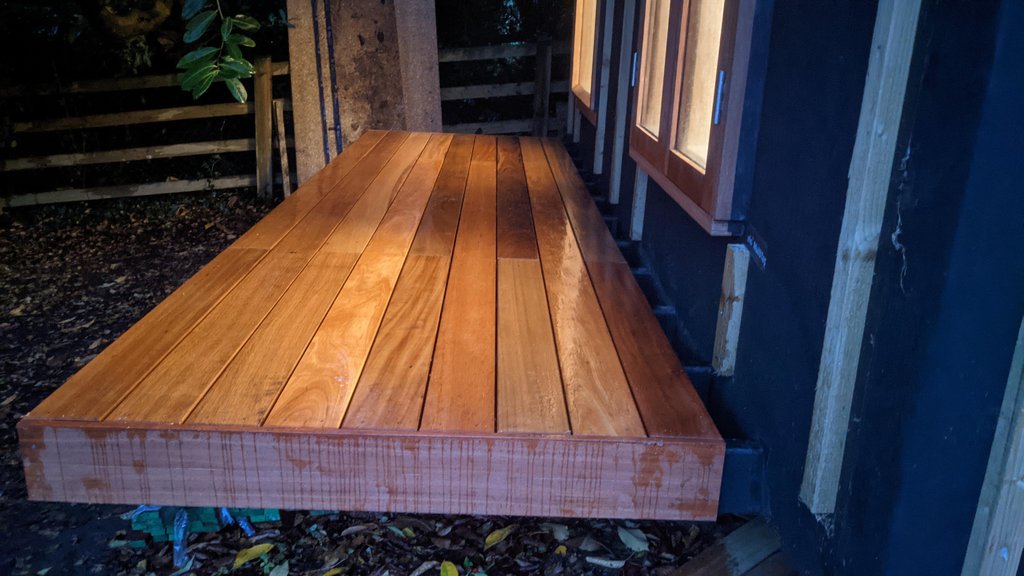
    So I went down the full 3-stage Owatrol route (Prepdeck, Net-trol, D-1 oil) with the Bangkiri decking.

    This is an alternative to just letting it weather for a year and then oiling it. The reason I didn't want to do that is because there are reports of this type of decking cupping and splitting if not properly installed and treated. That risk is made worse if each face performs differently e.g. through moisture absorption, so to make both faces the same I had to treat before installation. Also, it means that when I'm done, I'm done. At least for a couple of years.

    There's only about 7sqm of decking to do but as usual, it took ages.

    Here are the instructions for the 2-stage stripping process. That took about a day spread over the working week.

    https://www.owatrolusa.com/how-to-guides/remove-mill-glaze/

    Then the oiling, which took another half day. It's done wet-on-wet over a couple of hours, with a wipe down after a 30 minutes break at the end to remove excess. So two batches took half a day.

    Below pics are of the decking before and after the oiling.

    I'm happy enough with the results but no-f'ing way I'm doing twice that effort for the flooring, so I ordered some jumbo sheets of 12mm birch ply which I intend to treat with water-based matt poly varnish.

    image.jpg

    image.jpg


  • Registered Users, Registered Users 2 Posts: 34,111 ✭✭✭✭listermint


    jesus thats alot of effort = Personally i would have just gone with oiling both sides properly and well. Cupping has nothing to do with glaze on the wood. Its as you know wood drying out quickly. Oil applied correctly slows that right down or stops it fully for a long period of time.

    The prep stuff for me is unnecessary , i've been guilty on plenty of projects of over egging the research and not doing enough of the 'doing'.


  • Registered Users, Registered Users 2 Posts: 31,141 ✭✭✭✭Lumen


    listermint wrote: »
    jesus thats alot of effort = Personally i would have just gone with oiling both sides properly and well. Cupping has nothing to do with glaze on the wood. Its as you know wood drying out quickly. Oil applied correctly slows that right down or stops it fully for a long period of time.

    The prep stuff for me is unnecessary , i've been guilty on plenty of projects of over egging the research and not doing enough of the 'doing'.

    Yeah, well someone has to follow the instructions, right? :D

    I really should have done one of them the lazy way to compare.


  • Registered Users, Registered Users 2 Posts: 31,141 ✭✭✭✭Lumen


    Fitted the decking. Need to put more screws in but first I have a question.

    When two boards meet on a 2 inch joist, there is not enough "meat" to screw down the boards directly down into that joist without splitting the ends. So should the joist be "loose" at those ends and just screwed everywhere else? Or screwed down at an angle (but then the heads won't be straight!)?

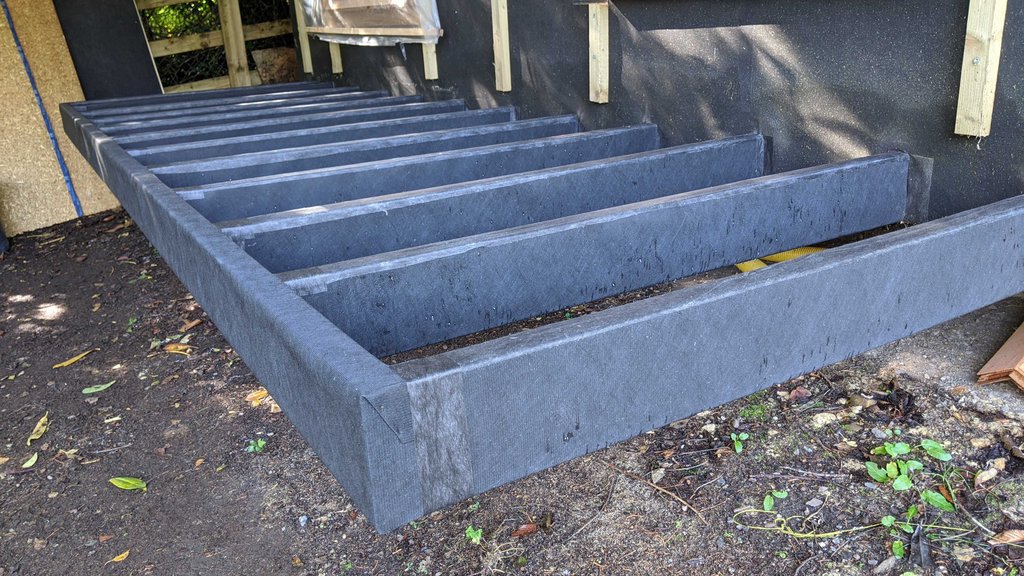
    Anyway, I first did a fresh soaking of ProTim on the joists, then upholstered with leftover membrane. This is no doubt going to send listermint over the edge, but remember that I can't really ever replace these joists - they are the ends of the 4.8m joists which are slung under the ring beam of the shed. So they need to be protected to the maximum.

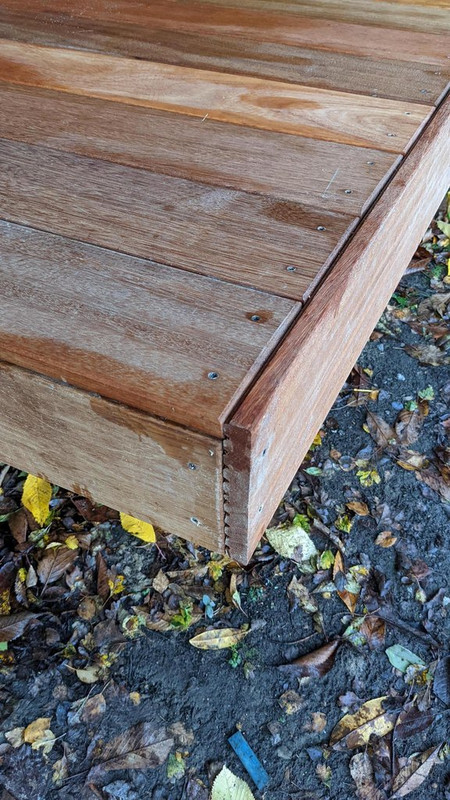
    I used 5mm spacing between boards and 1-2mm at the ends. This is on the basis that wood expands very much perpendicular to the grain, and hardly at all along the grain.

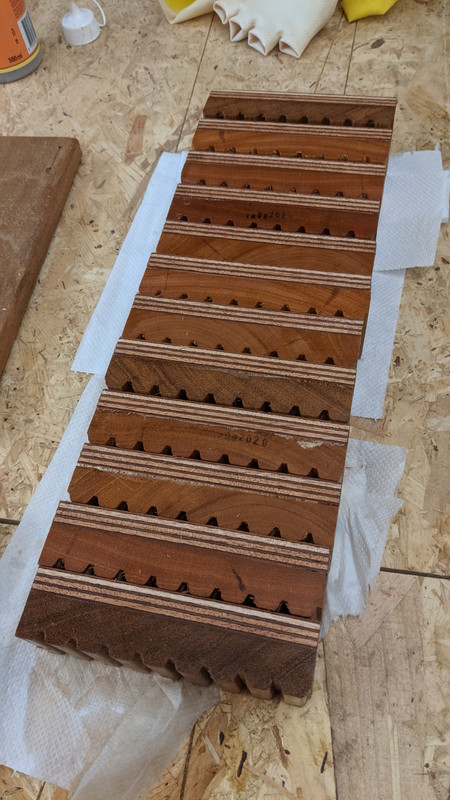
    I tried to eliminate all showing of the ribbed underside (*) and almost achieved it, except for at the corners. To get the ends hidden I made wider end boards by cutting and glueing two boards to get an additional 21mm of width.

    Also, I found that pre-drilling hardwood is absolutely essential even with these self-drilling stainless Spax flooring screws.

    (*) there is a 10-page argument on the Screwfix forums about which way up decking boards are supposed to go. I choose ribs down. It's an ecumenical matter. :D

    dIWPP8v.jpg

    Yk6KKt3.jpg

    ARzkrjK.jpg

    V2y9Wq2.jpg


  • Registered Users, Registered Users 2 Posts: 34,111 ✭✭✭✭listermint


    If I get your question. You need to but in extra joist either side of that joist to screws the board down on to. If a joist is not thick enough then you add thickness with more joist one or either side. This is common on all floorings definitely where boards meet above and there's little or no joist below.

    It can be just a small section of timber to the joist you don't have to put a full length in.


  • Registered Users, Registered Users 2 Posts: 31,141 ✭✭✭✭Lumen


    listermint wrote: »
    If I get your question. You need to but in extra joist either side of that joist to screws the board down on to. If a joist is not thick enough then you add thickness with more joist one or either side. This is common on all floorings definitely where boards meet above and there's little or no joist below.

    It can be just a small section of timber to the joist you don't have to put a full length in.

    Ok cool. Like these I made to space out the side trim so I could use complete board widths.

    PXL-20201101-141911575.jpg


  • Advertisement
  • Registered Users, Registered Users 2 Posts: 34,111 ✭✭✭✭listermint


    No I think you'd be best using a will width joist top to bottom. Not full length left to right. You'd only need about 200-300mm length. But full width because the screws could split the spacers you have there.

    Quick sketch of what I mean. Not sure if it matches your issue though.


  • Registered Users, Registered Users 2 Posts: 31,141 ✭✭✭✭Lumen


    Thanks, I have a load of 3x3 offcuts left over from the mezzanine framing that would probably work fine.


  • Registered Users, Registered Users 2 Posts: 31,141 ✭✭✭✭Lumen


    Oh, one more fun thing. I noticed last night that my "home made" windows have condensation on the outside!

    I was half concerned that I'd buggered up the seals when fitting them, but obviously not.

    Triple glazing FTW.

    image.png


  • Registered Users, Registered Users 2 Posts: 31,141 ✭✭✭✭Lumen


    Currently working on the cladding, was going to post when finished but there's been discussion in the Garden Room thread about cladding so thought people might be interested.

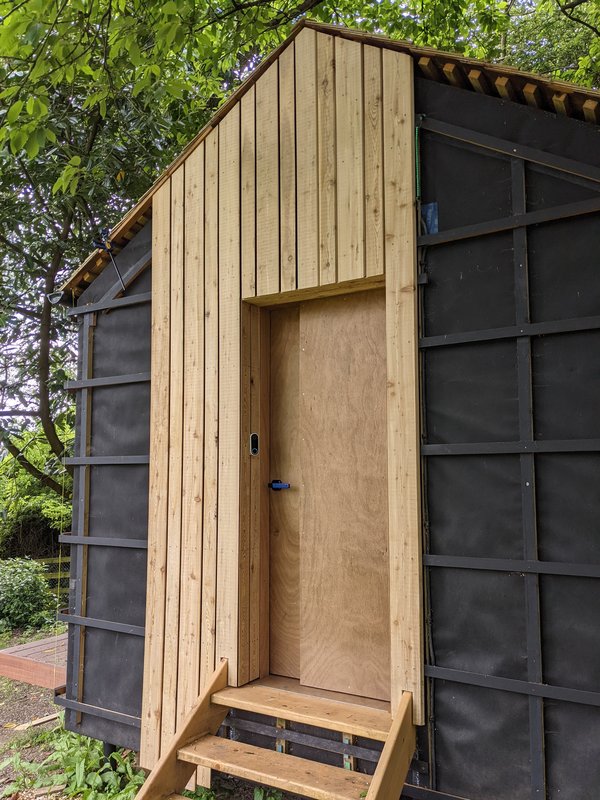
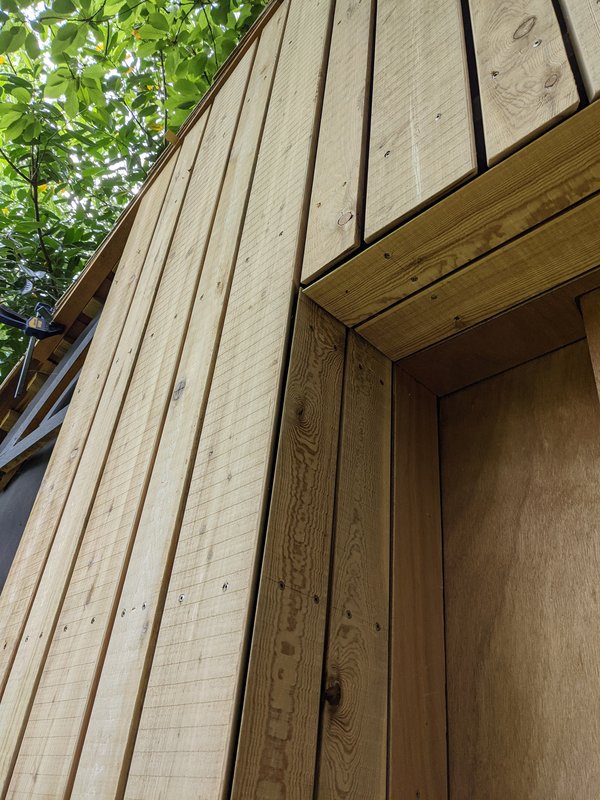
    This is bandsawn larch with a double bevelled profile in mixed widths, with Sioo:X factory applied. It's been a bit neglected over the winter but still seems in reasonable condition.

    The top and bottom cuts are rough, will be tracksawed when finished.

    External corners are mitred at 45 degrees.

    Fixings are stainless steel Spax facade screws on bevelled hardwood counterbattens.

    Click for big versions.

    PXL-20210611-094425146.jpg

    PXL-20210611-094442642.jpg


  • Registered Users, Registered Users 2 Posts: 556 ✭✭✭Fine Cheers


    Class job. Love the grain and colour of the Siberian Larch. Dare I ask, any final treatment proposed, oil etc ?


  • Registered Users, Registered Users 2 Posts: 31,141 ✭✭✭✭Lumen


    Class job. Love the grain and colour of the Siberian Larch. Dare I ask, any final treatment proposed, oil etc ?

    Nope. It should grey naturally and hopefully not clash with the cedar roof shingles.

    The hardwood decking and spruce steps...well they'll just have to, eh... contrast for now.

    The steps were experimental so I didn't want to use expensive timber, and I thought larch decking would make .. too much larch!

    I'm not far off being able to form a view on what worked and what didn't.


  • Registered Users, Registered Users 2 Posts: 31,141 ✭✭✭✭Lumen


    Oh, I might also eventually clad the door too.


  • Registered Users, Registered Users 2 Posts: 1,517 ✭✭✭hesker


    Great job on the cladding. My larch cladding is about 5 years old now and has silvered quite a bit which I like.

    Did you machine the boards yourself?


  • Registered Users, Registered Users 2 Posts: 31,141 ✭✭✭✭Lumen


    hesker wrote: »
    Great job on the cladding. My larch cladding is about 5 years old now and has silvered quite a bit which I like.

    Did you machine the boards yourself?

    Got any pics?

    No, they came like that. They've also got two cuts running down the back, I think to help prevent cupping.


  • Advertisement
  • Registered Users, Registered Users 2 Posts: 1,517 ✭✭✭hesker


    Lumen wrote: »
    Got any pics?

    No, they came like that. They've also got two cuts running down the back, I think to help prevent cupping.

    ....

    555666.jpg


Advertisement